
C 3500 HD Truck 2WD V8-6.5L DSL Turbo VIN F (2001)
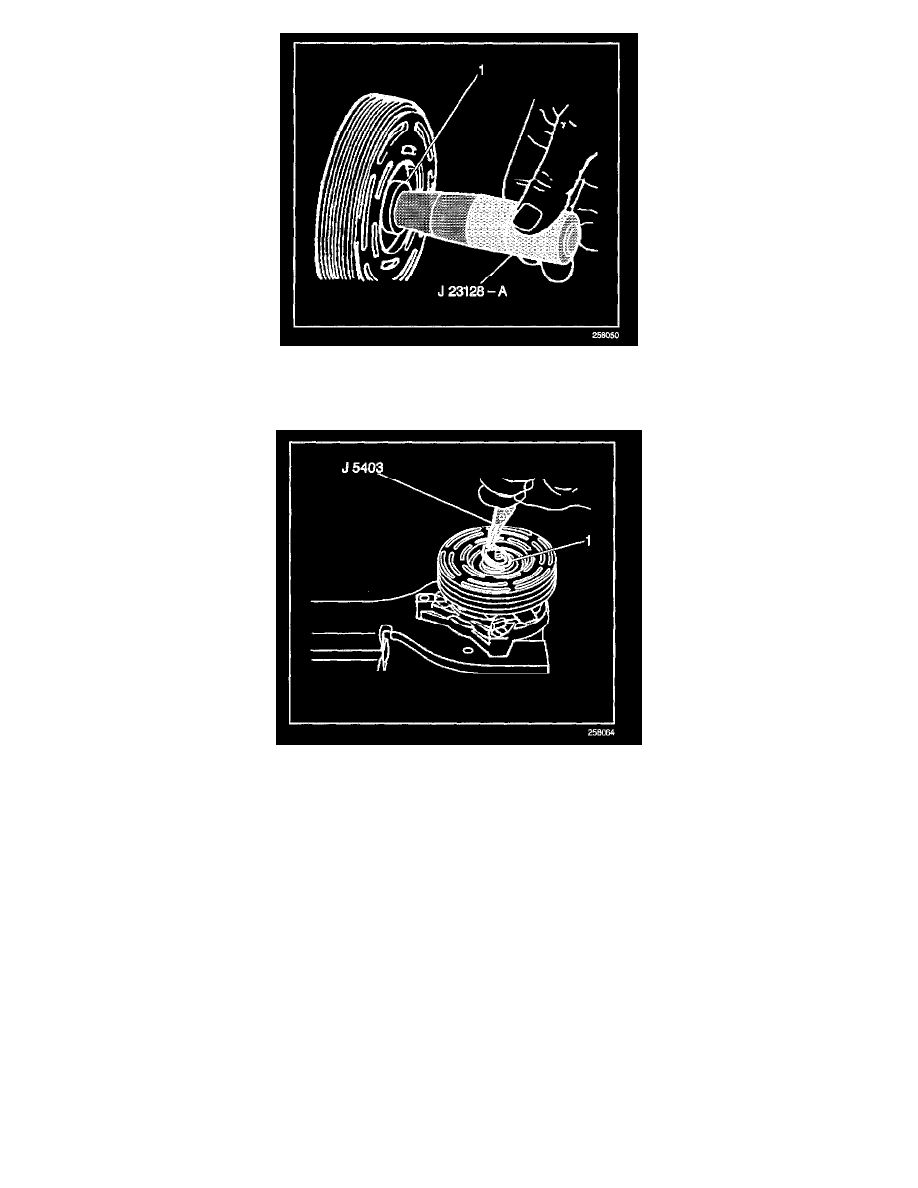
13. Slide the new seal (1) onto the shaft using a rotary motion until the seal stops.
13.1. Ensure that the seal contacts the O-ring. Do not dislodge the O-ring. Disengage the installer from the seal.
13.2. Remove the J 23128-A and the J 34614.
14. Using the J 5403, install the new seal retainer ring (1) with the flat side against the seal. Use the sleeve from J 33011 in order to press in the seal
retainer in order to ensure that the seal snaps into the groove.
15. Perform a leak test using the following procedure:
15.1. Install the J 39893 on the rear head of the compressor.
15.2. Connect the gage charging lines and the J 43600.
15.3. Pressurize the suction and the high-side of the compressor using R-134a Refrigerant.
15.4. Temporarily install a M9 x 1.25 threaded nut on the shaft.
15.5. With the compressor in a horizontal position, rotate the compressor shaft in the normal direction of rotation several turns by hand.
15.6. Leak test the seal area. Correct any leaks found.
15.7. Recover the refrigerant. Refer to Refrigerant Recovery and Recharging.
15.8. Remove the shaft nut.
16. Remove any excess oil from the shaft and from the inside of the compressor neck.
17. Install the clutch plate and hub assembly.
18. Install the compressor belt. Tighten the bracket.
19. Evacuate and charge the refrigerant system.
For a description of the RPO Code(s) shown in this article/images refer to the RPO Code List found at Vehicle/Application ID See: Application and
ID/RPO Codes