
C 3500 Truck 2WD V8-6.0L VIN U (2001)
4. Assemble the 4th clutch accumulator piston pin (2) with the 4th clutch accumulator piston (4).
5. Install the 4th clutch accumulator piston assembly into the accumulator housing (1).
6. Install the 4th clutch accumulator piston pin retainer ring (5) onto the 4th clutch accumulator piston pin (2).
Installation Procedure
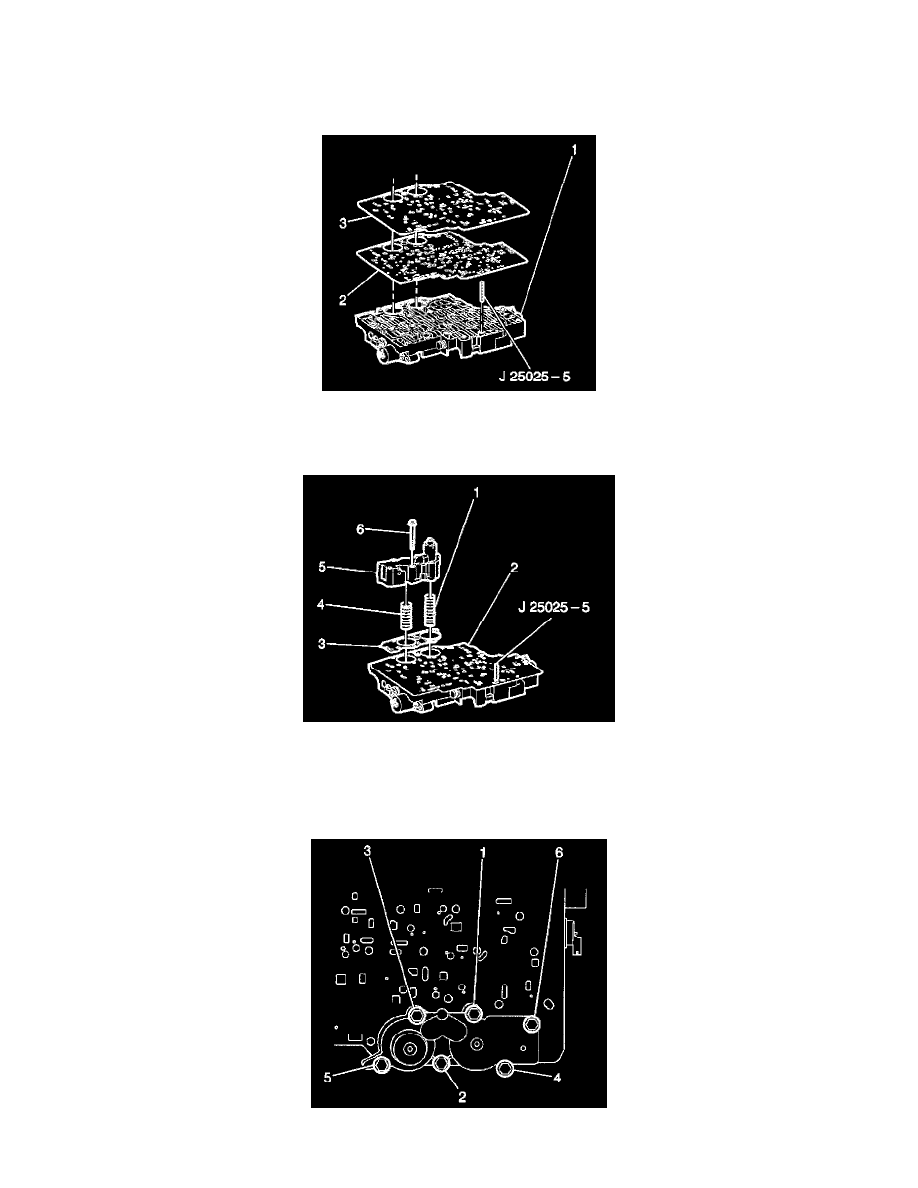
1. Install the J25025 into the control valve body bolt hole where the manual shaft detent roller and spring assembly is mounted.
2. Install the control valve body gasket (2) onto the accumulator housing (1).
3. Install the control valve body spacer plate (3) onto the valve body gasket (2).
4. Install the third and fourth clutch accumulator housing gasket (3).
5. Install the third clutch accumulator piston spring (1). This spring is the longer of the two springs.
6. Install the fourth clutch accumulator piston spring (4).
7. Install the third and fourth clutch accumulator housing assembly (5) onto the control valve body assembly (2).
8. Install the six accumulator housing bolts (6). Start the bolts finger tight and work towards the opposite end.
Notice: Refer to Fastener Notice in Service Precautions.