
Camaro V8-6.2L (2010)
12. Apply the butyl patch (8) to the contact area of the motor mount (6).
13. Install the battery positive starter cable to the starter terminal.
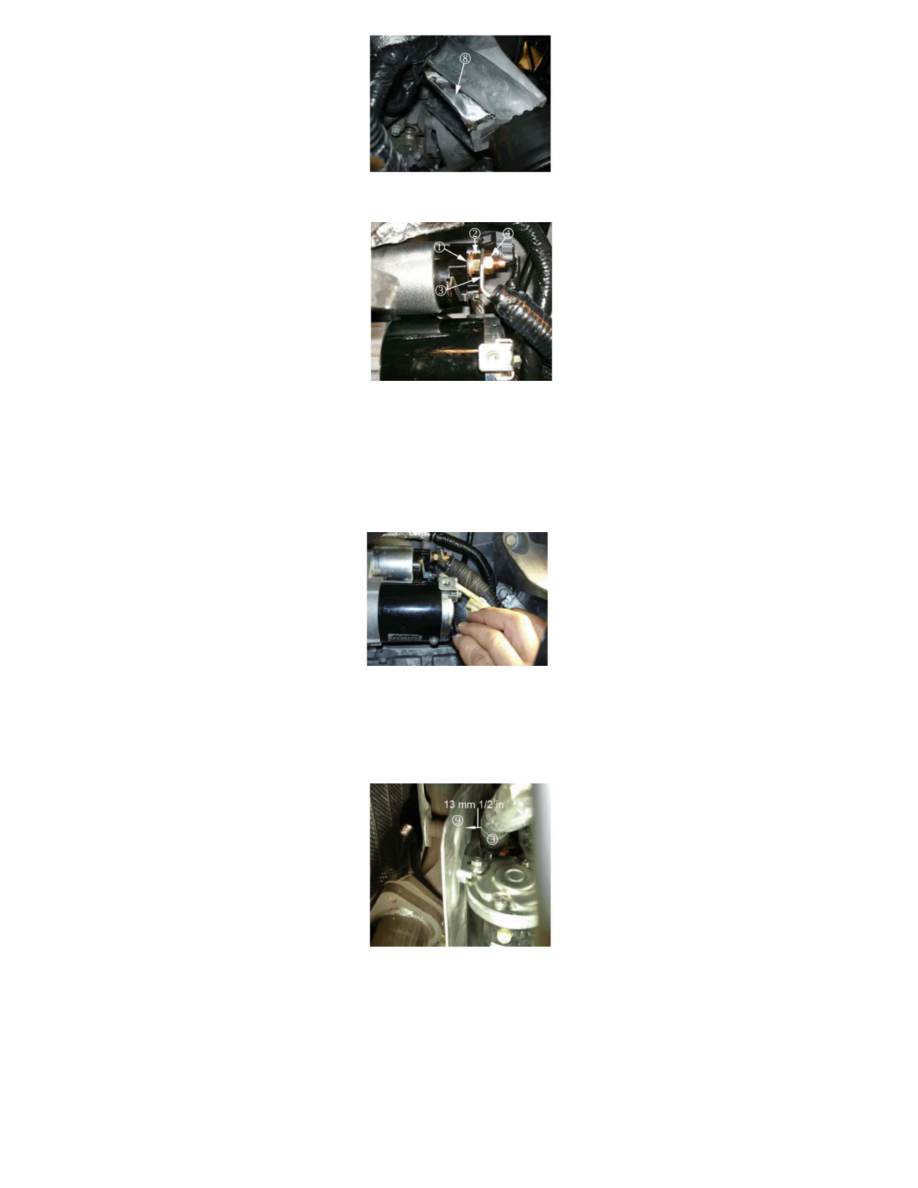
1. Install two copper washers (1), P/N 21012386, and brass nut (2), P/N 21021808, to terminal.
2. Tighten brass nut (2) to 11 Nm (8 lb ft).
3. Install the battery positive starter cable (3) to starter terminal.
4. Ensure that there is a 4 mm (0.16 in) clearance between the starter and the battery positive starter cable.
5. Install and tighten production terminal nut (4) to 11 Nm (8 lb ft).
14. Install the starter shield. Refer to Starter Shield Replacement in SI.
15. Ensure there is 13 mm (1/2 in) clearance between the battery positive starter cable (3) and the heat shield (9).
16. Lower the vehicle. Refer to Lifting and Jacking the Vehicle in SI.
17. Connect the negative battery cable. Refer to Battery Negative Battery Cable Disconnection and Connection in SI.
18. Perform the Window Learn procedure.
1. Turn the ignition to the ON/RUN position.
2. Close all doors.