
Camaro V8-6.2L (2010)
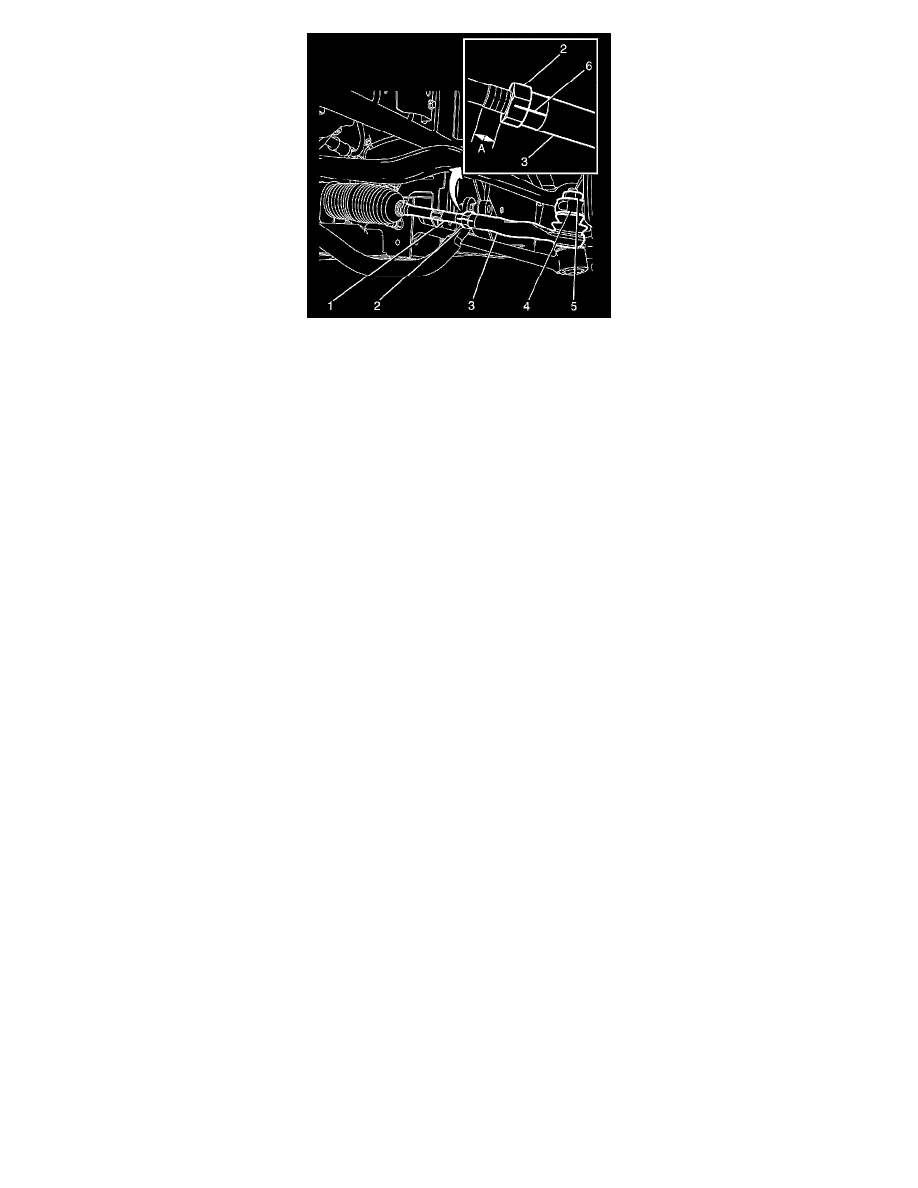
1. Install the outer tie rod (3) to the inner tie rod (1). Use the same number of turns as recorded during the removal procedure.
Note: Do not tighten the inner tie rod nut (2) yet.
2. Ensure the distance (A) is the same as recorded during the removal procedure.
3. Connect the outer tie rod to the steering knuckle (4).
Caution: Refer to Fastener Caution (See: Service Precautions/Vehicle Damage Warnings/Fastener Caution).
4. Install the NEW outer tie rod nut (5) and tighten to 30 Nm (22 lb ft).
5. Tighten the outer tie rod nut an additional 120 degrees.
6. Align the match marks (6).
7. Install the front tire and wheel assembly. Refer to Tire and Wheel Removal and Installation (See: Wheels and Tires/Service and Repair).
8. Measure and adjust the front toe. refer to Wheel Alignment - Steering Wheel Angle and/or Front Toe Adjustment (See: Alignment/Service and
Repair/Wheel Alignment - Steering Wheel Angle and/or Front Toe Adjustment).
9. Tighten the inner tie rod nut to 75 Nm (55 lb ft).