
Camaro Z28 V8-305 5.0L VIN F FI (1991)
Intake Manifold: Service and Repair
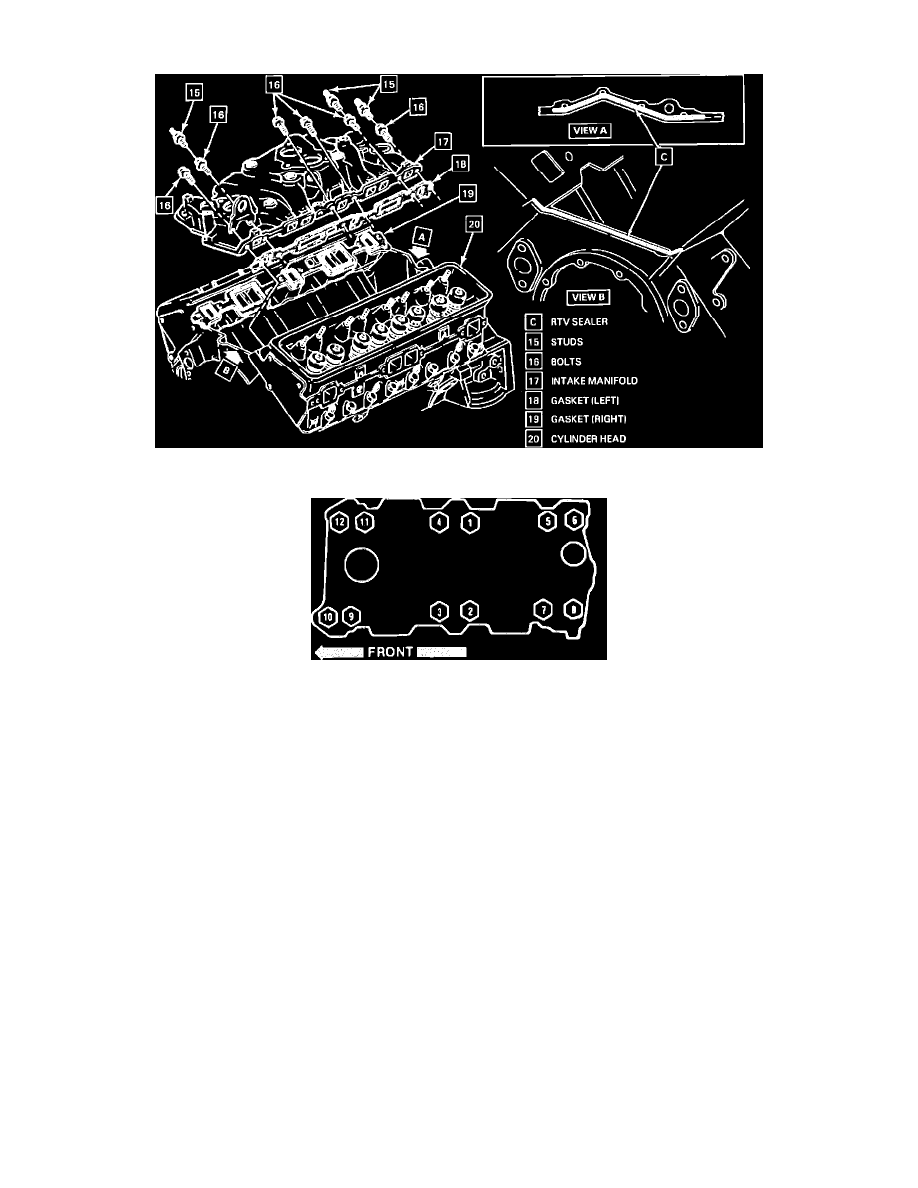
Fig. 2 Intake Manifold Replace
Intake Manifold Bolt Tightening Sequence
REMOVE OR DISCONNECT
1. Negative battery cable and drain cooling system.
2. Accelerator, TV and cruise control cables (as equipped).
3. Air intake duct and heater hoses at throttle body.
4. Electrical connections at throttle body and intake manifold.
5. Vacuum hoses and fuel lines.
6. Vent valve assembly and hoses.
7. Vapor pipe assembly and plenum extension.
8. Spark plug wires at distributor cap and distributor.
9. Port injection assembly.
10. Ignition coil and EGR solenoid.
11. Upper radiator hose and thermostat housing.
12. EGR valve and pipe and electrical wires as necessary.
13. Intake manifold bolts and studs.
14. Intake manifold and gaskets.
15. Clean gasket and seal surfaces on manifold, block and cylinder heads with degreaser.
INSTALL OR CONNECT
1. Gaskets to cylinder heads. Apply a 5 mm (3/16-inch) bead of RTV sealer, GM P/N 1052914 or equivalent, on the front and rear ridges of the
cylinder case. Extend the RTV bead 13 mm (1/2-inch) up each cylinder head to seal and retain the intake manifold side gaskets.
2. Intake manifold.
3. Intake manifold attaching bolts and studs. Tighten to 47 Nm (35 lb ft).
4. Electrical wires.
5. EGR valve and pipe.
6. Thermostat housing w/gasket and the upper radiator hose.
7. Ignition coil and EGR solenoid.