
Cavalier L4-144 2.4L DOHC VIN T SFI (1997)
Expansion Block/Orifice Tube: Service and Repair
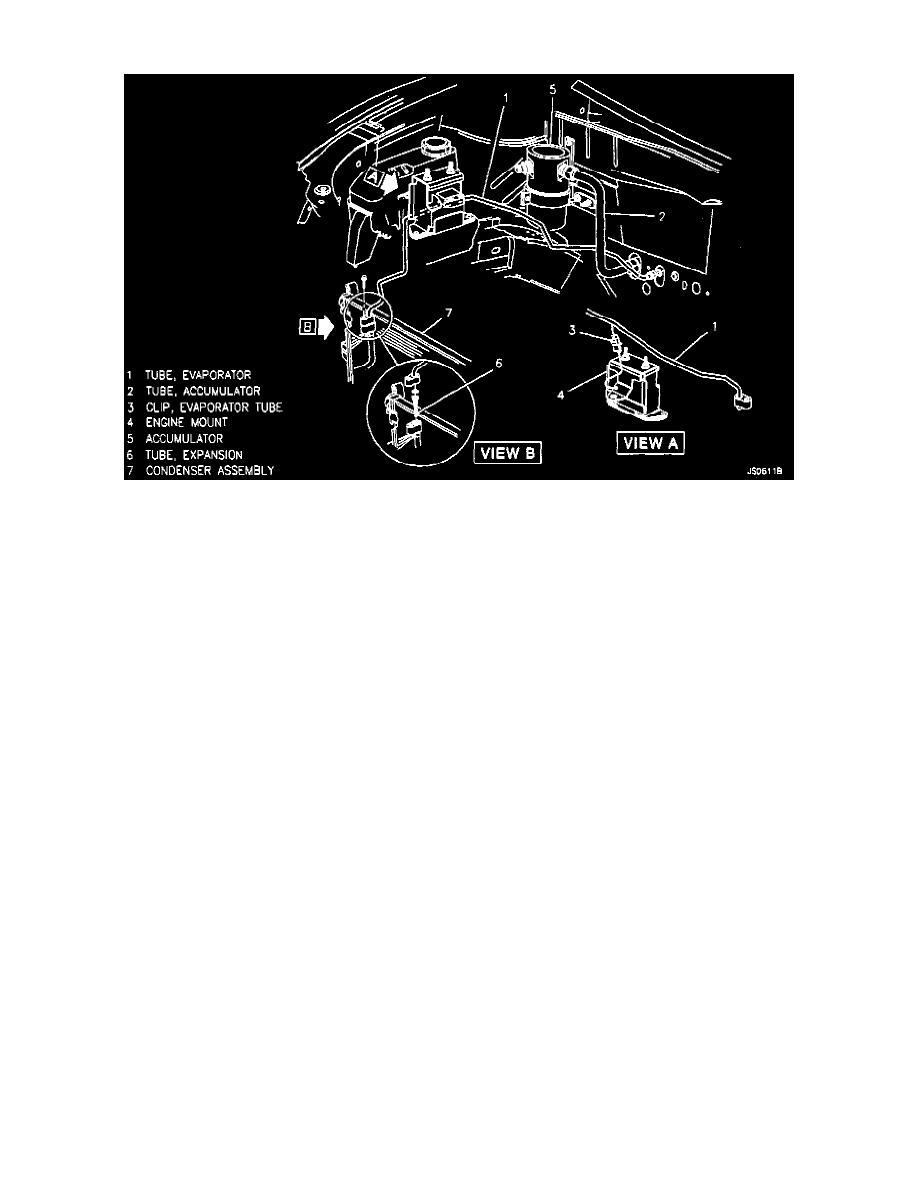
Evaporator Tube And Accumulator Tube
The expansion tube is located at the condenser to evaporator line connection in the condenser.
Important
^
Different designs and colors of orifice tubes may have been used in past production vehicles. When replacing an orifice tube, compare its
design to the replacement part for correct orifice tube selection. The different styles of orifice tubes are not interchangeable.
Tools Required:
J 26549-E Expansion Tube Remover
J 39500 R-134a Refrigerant Recovery, Recycling, and Recharging Station
Remove or Disconnect
1. Recover refrigerant.
2. Upper closeout panel.
3. Connection at condenser. Discard O-ring seals.
4. Evaporator line from clip on body side rail.
5. Carefully remove the expansion tube with needle-nose pliers, or tool J 26549-E.
In the event that difficulty is encountered during the removal of a restricted or plugged expansion tube (orifice tube), the following procedure
is recommended:
1. Remove as much of any impacted residue as possible.
2. Carefully apply heat with heat gun (hair drier, epoxy drier or equivalent) approximately 7 mm (1/4 inch) from dimples on inlet pipe. Do not
overheat pipe.
3. While applying heat, use expansion tube removal tools or J 26549-E to grip the expansion tube. Use a turning motion along with a push-pull
motion to loosen and remove to the impacted expansion tube.
Install or Connect
1. New expansion tube.
2. Evaporator line to clip.
3. Using new O-ring seals, assemble evaporator tube/condenser connection hand tight
4. Upper closeout panel.
5. Evacuate and charge the system.