
Cavalier L4-2.2L VIN 4 (1998)
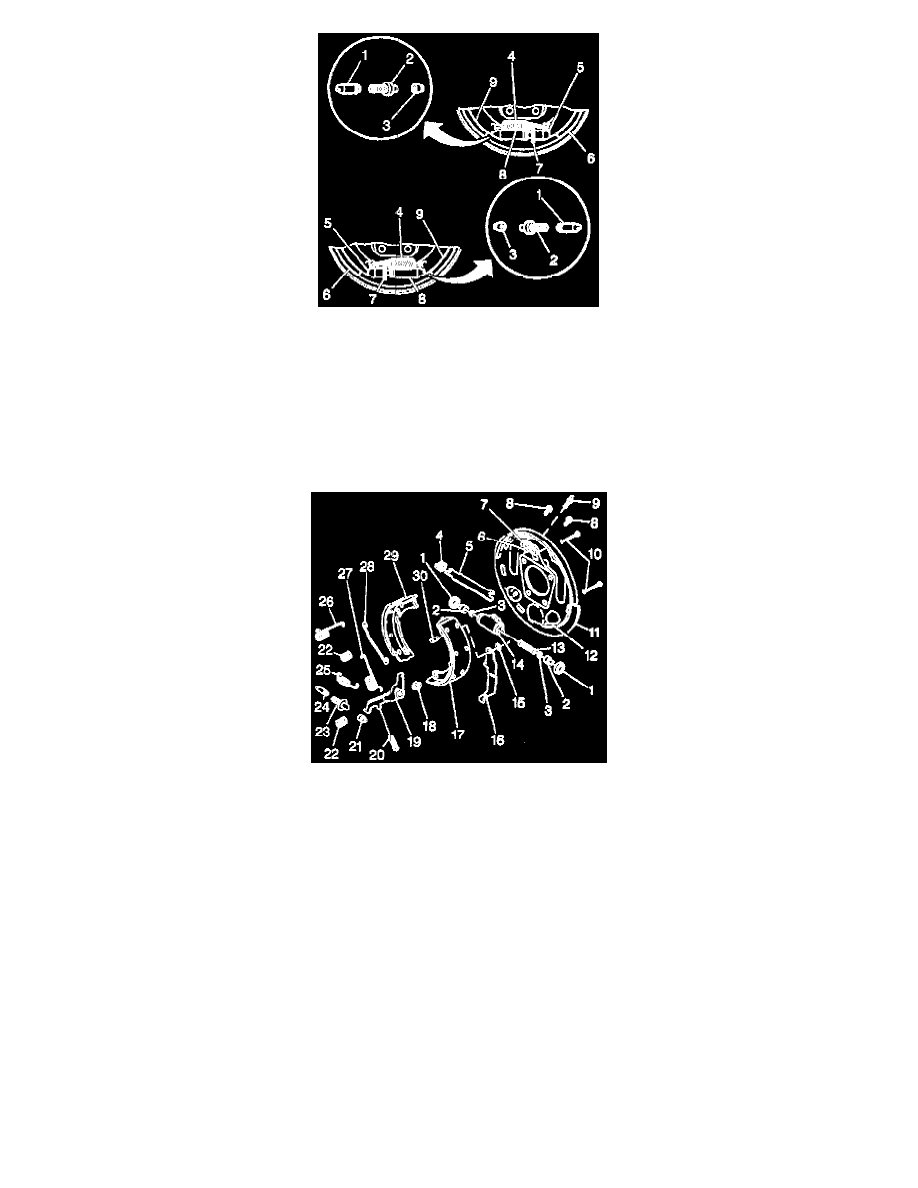
2. Install the adjusting screw assembly and the adjusting screw spring. Before reinstalling the adjusting screw assembly, it must be disassembled,
thoroughly cleaned and lubricated, as follows:
^
Clean the adjusting screw threads with a wire brush.
^
Wash all the components in clean, denatured alcohol.
^
Apply brake lubricant or equivalent to the adjusting screw threads, inside diameter of the socket and socket face.
Adequate lubrication is achieved when a continuous bead of lubricant is at the open end of the pivot nut and socket, when the threads are fully
engaged.
^
Lubricate the six pads on the backing plate where the backing plate makes contact with the brake shoes.
^
Inspect the threads of the adjusting screw for smooth rotation over full length.
3. Install the shoe and lining assemblies, after attaching the parking brake cable.
4. Install the parking brake strut and strut spring by spreading the shoes apart. To be properly positioned:
^
The end without the strut spring should engage the parking brake lever and the secondary shoe and lining.
^
The end with the strut spring should engage the primary shoe and lining.
Important: The bearing sleeve must be installed between the secondary shoe and lining and the actuator lever.
5. Install the bearing sleeve, the actuator lever and the lever return spring.
6. Install the hold-down pins and the hold-down springs.
7. Install the actuator link on the anchor pin.
8. Install the actuator link into the actuator lever while holding up on the lever.
9. Install the shoe return springs, using the J 8057 Brake Spring Pliers.