
Cavalier L4-2.2L VIN F (2004)
Brake Master Cylinder: Service and Repair
Master Cylinder Replacement
Master Cylinder Replacement
Removal Procedure
Caution: Refer to Brake Fluid Irritant Caution in Service Precautions.
Notice: Refer to Brake Fluid Effects on Paint and Electrical Components Notice in Service Precautions.
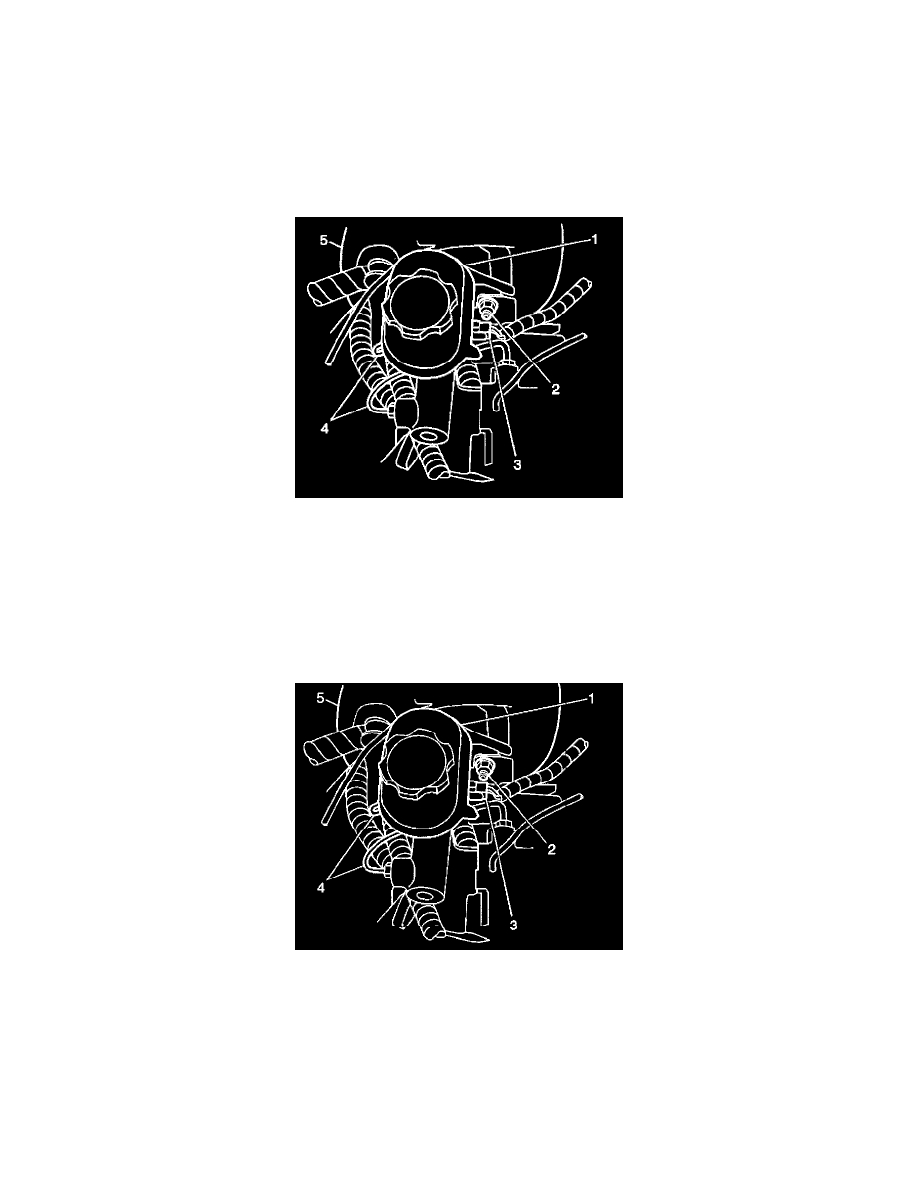
1. Disconnect the electrical connector (3) from the brake fluid level sensor.
2. Disconnect the brake pipes (4) from the master cylinder (1).
3. Cap the open brake pipes (4) to prevent brake fluid loss and contamination.
4. Remove the master cylinder mounting nuts (2).
5. Move the proportioning valve assembly bracket or the antilock brake modulator bracket forward, just enough to clear the studs on the brake
booster.
6. Remove the master cylinder (1) from the booster (5).
Installation Procedure
1. Bench bleed the master cylinder.
2. Install the master cylinder (1) to the vacuum brake booster (5).
3. Position the proportioning valve assembly bracket or the antilock brake modulator bracket, onto the brake booster studs.
Notice: Refer to Fastener Notice in Service Precautions.
4. Install the master cylinder mounting nuts (2).
^
Tighten the nuts to 27 Nm (20 ft. lbs.).
5. Remove the caps from brake pipes (4).
6. Connect the brake pipe fittings (4) at the master cylinder (1).