
Cavalier/Z24 L4-138 2.3L DOHC VIN D MFI (1995)
Radiator Support: Service and Repair
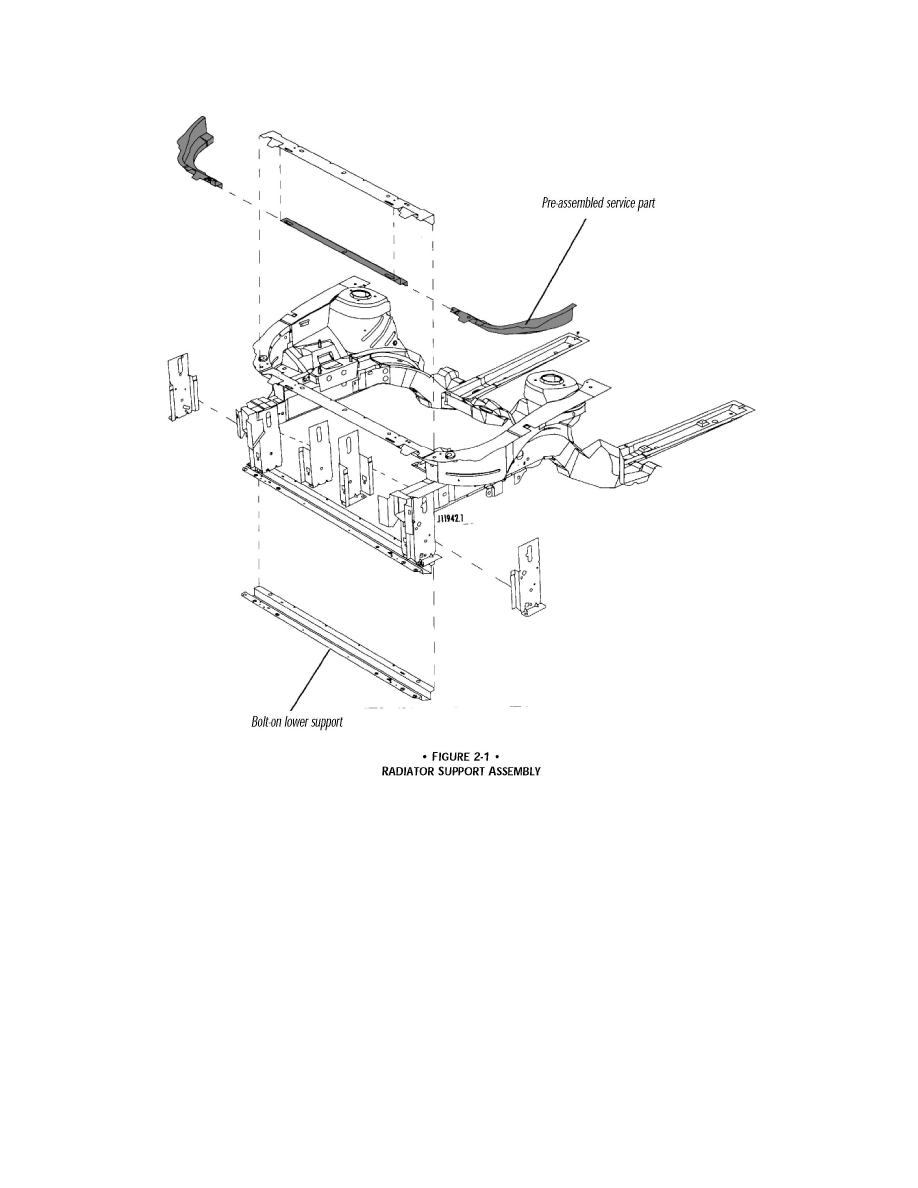
RADIATOR SUPPORT ASSEMBLY
The radiator support assembly (Figure 2-1) consists of nine major components: four upper and five lower. The center reinforcement and left and right
extensions are preassembled. This helps the technician to properly align the front structure. The upper support is serviced separately for efficient
installation. The lower support is held in place with six bolts. It attaches to four brackets that are welded to the lower rails. These brackets are available
as part of the lower rail service assembly or they can be ordered separately.
Remove or Disconnect
1. Remove all related panels and components.
2. Visually inspect and restore as much of the damage as possible to factory specifications.
3. Remove sealers, sound deadeners and corrosion materials as necessary.
4. Locate, mark and drill out all factory welds. Note the number of welds for installation of the service panels.
5. Remove the damaged panels in the radiator support assembly
Install or Connect
1. Prepare mating surfaces and check for proper fit of the service panels.
2. On the service panels, drill 8mm (5/16") plug weld holes as necessary in the locations noted from the original assembly.
3. Position the service panels, check fit using body dimensions, and plug weld accordingly with frequent measurements to ensure proper fit.
4. Clean and prepare welded surfaces. Prime with two-part catalyzed primer. Apply sealers and corrosion protection materials, as necessary. Do not
combine paint systems. Refer to paint manufacturer's recommendations. Reinstall all related panels and components.