
Cavalier/Z24 L4-138 2.3L DOHC VIN D MFI (1995)
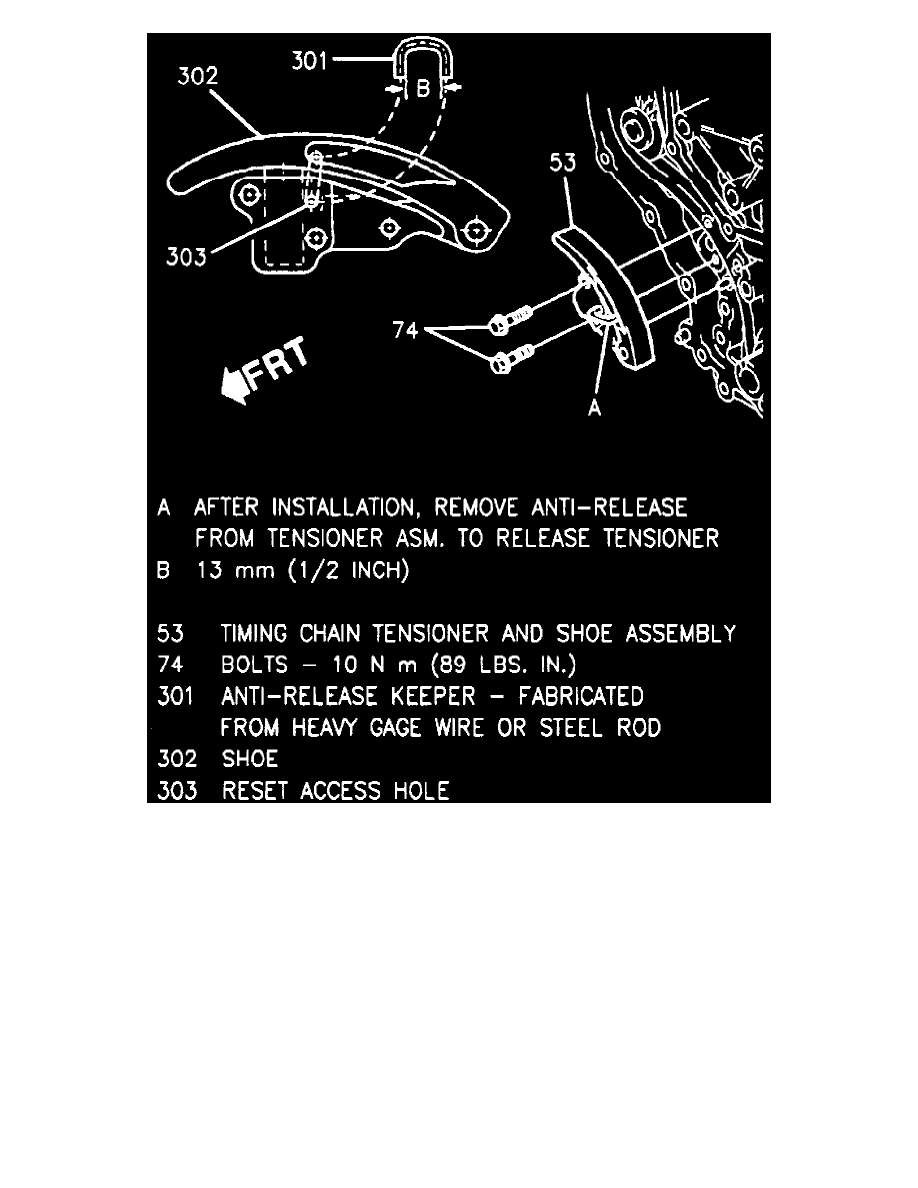
Fig. 16 Timing Chain Tensioner Spring & Retainer
REMOVAL
1. Remove front cover as described under Timing Cover, Replace.
2. Remove crankshaft oil slinger.
3. Rotate crankshaft in clockwise direction until camshaft and crankshaft timing marks are aligned, Fig. 13 and 14 .
4. Remove three timing chain guides.
5. Raise and support vehicle.
6. On early production engines, gently pry off timing chain tensioner spring retainer and remove spring, Fig. 15 and 16.
7. On all models, remove timing chain tensioner shoe retainer.
8. Ensure slack in timing chain is above tensioner shoe, then remove chain tensioner shoe. The timing chain must be disengaged from grooves in
tensioner shoe to permit removal of shoe. Position a suitable screwdriver under timing chain while pulling shoe outward to disengage. If difficulty
is encountered in removing tensioner shoe, proceed as follows:
a. Lower vehicle, then while holding intake camshaft sprocket in position with camshaft sprocket wrench No. J-36013, or equivalent, remove
sprocket bolt and washer.
b. Remove washer, then install bolt into camshaft by hand.
c. Position a suitable three jaw puller into intake camshaft sprocket relief holes and remove sprocket. Do not pry on camshaft sprocket as damage
to sprocket or timing chain housing may result.
9. Remove tensioner assembly attaching bolts and tensioner assembly. Use care when removing, as tensioner is spring loaded.