
Cavalier/Z24 L4-144 2.4L DOHC VIN T SFI (1996)
Intake Manifold: Service and Repair
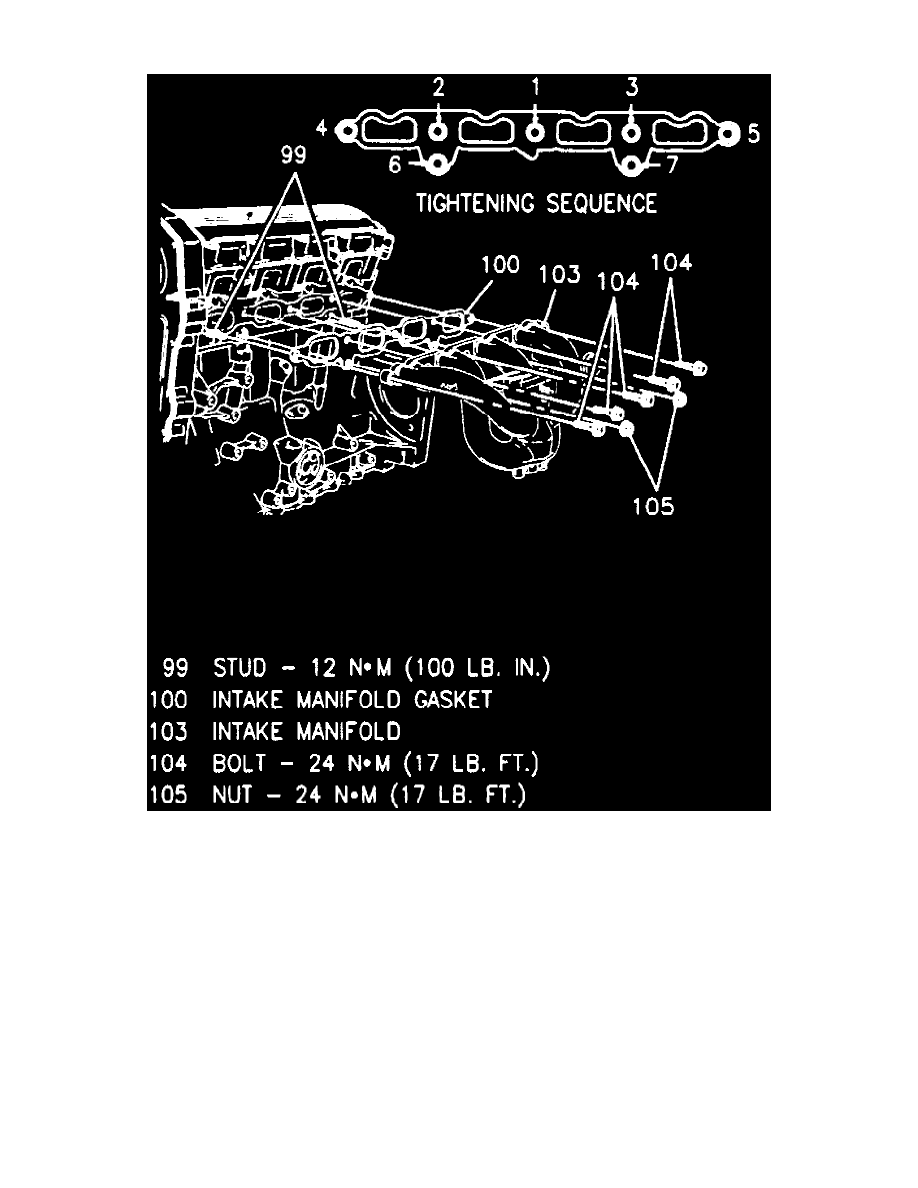
Fig. 8 Intake Manifold Installation & Bolt Tightening Sequence
1. Disconnect battery ground cable.
2. Disconnect the following electrical connectors:
a. MAP sensor.
b. IAT sensor.
c. EVAP sensor.
d. Fuel injector harness.
3. Disconnect vacuum hoses from fuel regulator and EVAP Canister Purge solenoid to canister.
4. Disconnect air cleaner to throttle body duct.
5. Remove throttle cable bracket.
6. Disconnect coolant lines from throttle body.
7. Remove stud-ended generator mount bolt.
8. Remove EGR Pipe from EGR adapter.
9. Raise and support vehicle.
10. Remove intake manifold support brace and lower vehicle.
11. Remove manifold retaining nuts, bolts, manifold and gasket, Fig. 8.
12. Reverse procedure to install, noting to tighten intake manifold bolts in sequence shown in Fig. 8.