
Celebrity L4-151 2.5L (1982)
8.
Remove the converter oil seal.
9.
Remove the drive sprocket support.
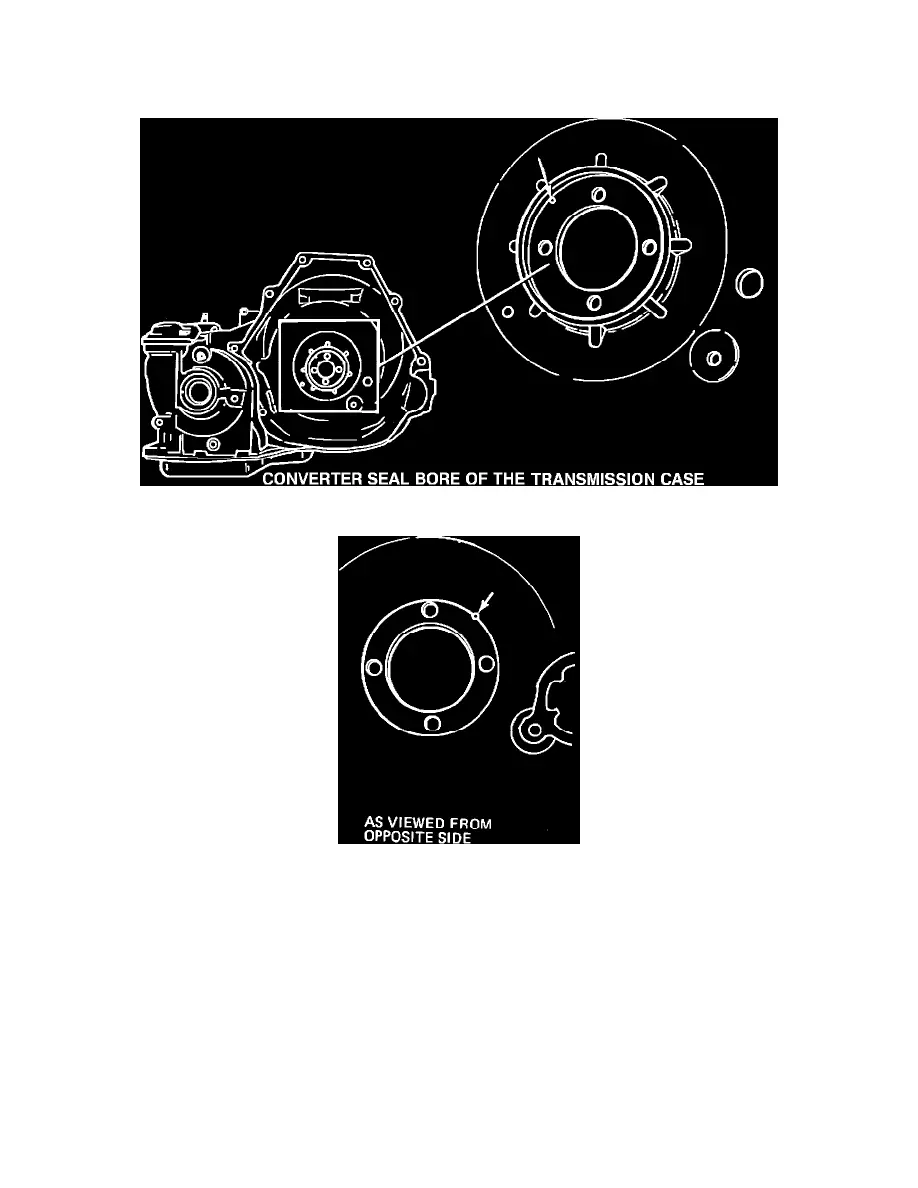
FIGURE 1
FIGURE 2 - SEAL BORE SIDE
10.
Drill, from the seal bore side, a 4.76 mm (3/16 in.) minimum diameter hole 2.03 mm (.080 in.) inside the radius of the converter seal bore (Figure
1). The hole must be drilled thru so that it exists the other side of the sprocket support mating face, partially outward from the machined surface as
shown (Figure 2).
USE CARE NOT TO TOUCH THE SEAL BORE DIAMETER WITH THE DRILL BIT.
11.
Clean all aluminum chips from the case. The transmission must be thoroughly cleaned and all burrs removed from the drilled hole before
reassembly.
12.
Install the drive sprocket support and torque the four torx (R) head bolts to 24 N-m (18 ft.lbs.).
13.
Install a new converter oil seal (P/N 8637906 for a 245 mm converter or P/N 8631950 for a 254 mm converter) into the case. Use tool #J-28540.
14.
Install the drive link assembly.
15.
Install the transmission case cover. Torque all bolts to 24 N-m (18 ft.lbs.).