
Celebrity V6-173 2.8L (1989)
NOTE: Lubricate new proportioner valve cap "0" rings (3) and proportioner valve seals (6) with silicone grease supplied in repair kit. Also
lubricate stem of proportioner valve pistons (5).
1. Install new proportioner valve seals (6) on proportioner valve pistons (5) with seal lips facing upward toward proportioner valve cap (2).
2. Install proportioner valve pistons (5) and seals (6) in master cylinder body (11).
3. Install proportioner valve piston springs (4) in master cylinder body (11).
4. Install new proportioner valve cap "0" rings (3) in grooves in proportioner valve caps (2).
5. Install proportioner valve caps (2) in master cylinder body (11).
TIGHTEN
^
Proportioner valve caps (2) to 27 Nm (20 Ibs. ft.).
INSTALLATION OF MASTER CYLINDER RESOVOIR
^
Clean reservoir with clean denatured alcohol and dry with unlubricated compressed air.
INSPECT
^
Master cylinder reservoir (10) for cracks or deformation and replace reservoir (10) if damage is found.
ASSEMBLE
1. Lubricate new reservoir to body "0" rings (7), and reservoir flanges with clean brake fluid.
2. Install reservoir to body "0" rings (7) into grooves in master cylinder reservoir (10). Be sure "0" rings are properly seated.
3. Install master cylinder reservoir (10) to master cylinder body (11) by pressing straight down by hand into master cylinder body (11).
4. Spring pins (19) by driving in with a one eighth inch punch using care not to damage resovoir or master cylinder body (11).
5. Install brake master onto vehicle. Refer to Installation. See:
Installation
For additional information see Notes, Warnings, and Hints. See: Fundamentals and Basics
CAUTION: Brake fluid will damage painted surfaces. Shop cloths and clean containers should be used to prevent spillage of brake fluid.
Removing Master Cylinder Assembly
1. Bench bleed master cylinder.
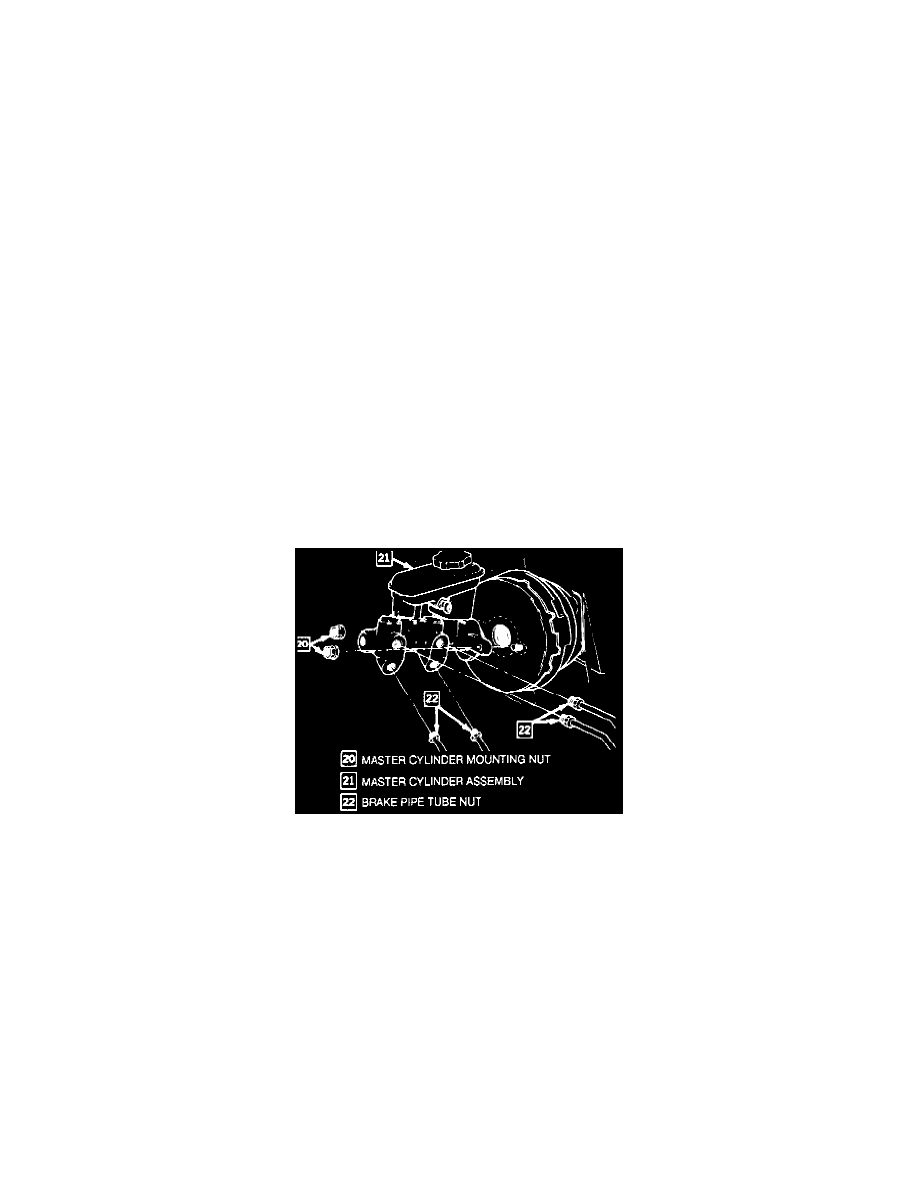
2. Install master cylinder assembly (21) to power booster assembly.
3. Tighten master cylinder assembly mounting nuts (20) to 27 Nm (20 lbs. ft.).
4. Tighten brake pipes tube nuts (22) to master cylinder assembly (21) to 20 Nm (11 lbs. ft.).