
Celebrity V6-173 2.8L (1989)
Exhaust Manifold: Service and Repair
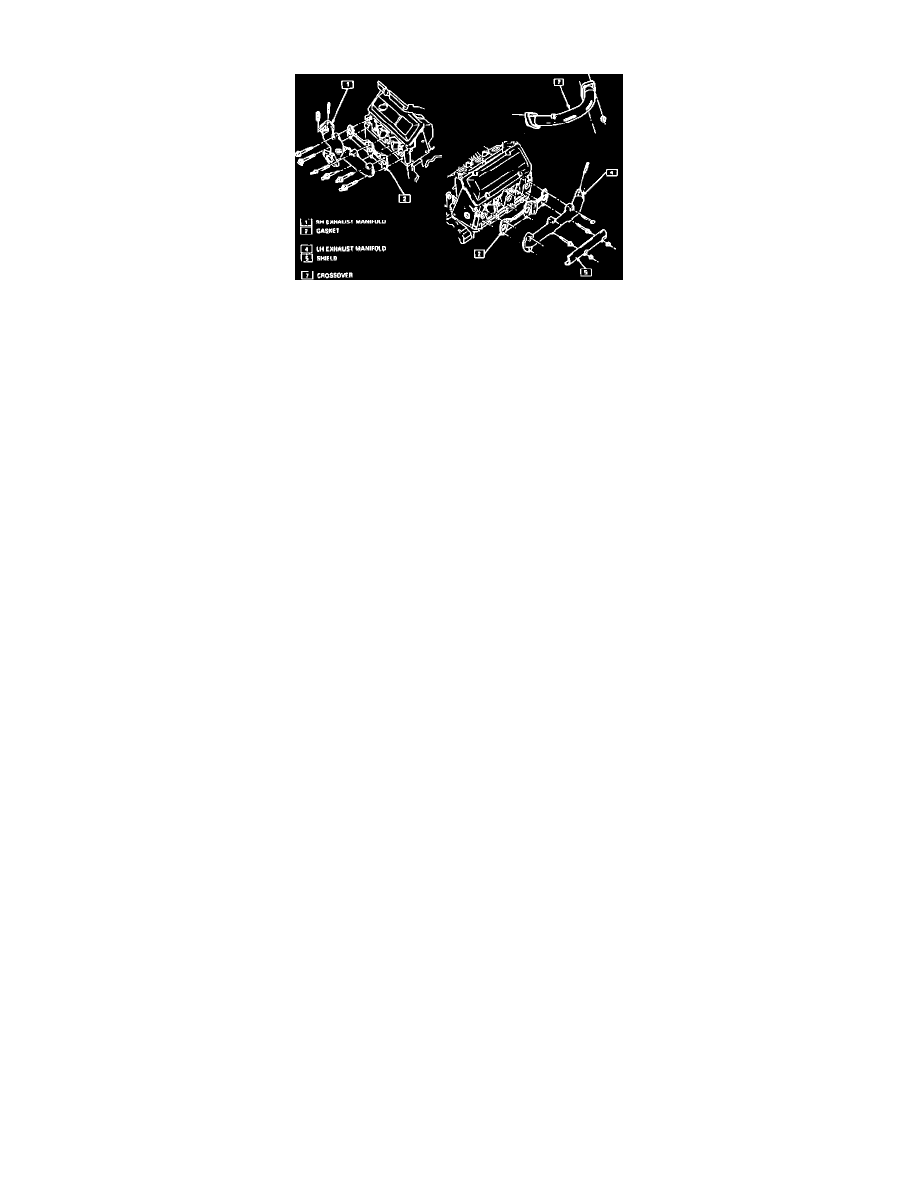
Fig. 4 Removing Exhaust Manifolds
LEFT
1.
Remove battery ground cable, then air cleaner assembly.
2.
Remove coolant recovery bottle, then serpentine drive belt.
3.
Remove A/C compressor. Position compressor aside.
4.
Remove right side torque strut, then strut mounting bracket.
5.
Remove heat shield, then crossover pipe at manifolds.
6.
Remove exhaust manifold attaching bolts, then manifold, Fig. 4.
7.
Reverse procedure to install, torquing all bolts/nuts to specifications.
RIGHT
1.
Remove battery ground cable, then air cleaner assembly.
2.
Raise and support vehicle, then remove exhaust pipe from manifold.
3.
Lower vehicle, then remove breather and mass air flow sensor.
4.
Remove heat shield, then crossover at manifold.
5.
Remove throttle and T.V. cables from throttle body, then throttle and T.V. cable bracket at plenum.
6.
Remove oxygen sensor, then exhaust manifold attaching bolts.
7.
Remove exhaust manifold, Fig. 4.
8.
Reverse procedure to install, torquing all bolts/nuts to specifications.