
Celebrity V6-191 3.1L (1990)
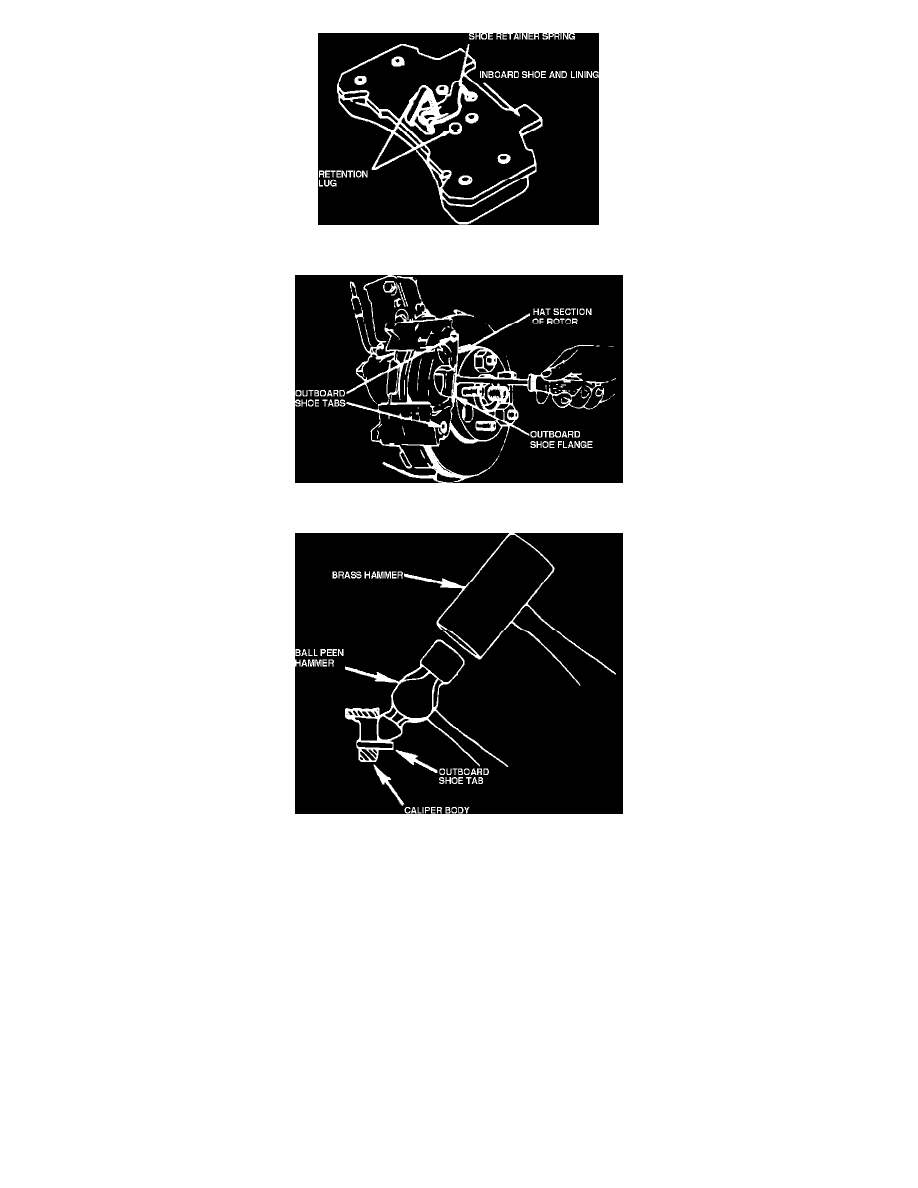
Fig. 9 Installing Retainer Spring On Inboard Shoe
Fig. 10 Positioning Screwdriver Between Outboard Shoe Flange & Hat Section Of Rotor
Fig. 11 Positioning Hammer To Clinch Brake Pad Tabs
1. Lubricate new bushings with suitable grease, install bushings in caliper grooves, then insert sleeves through bushings.
2. Install retaining spring onto inboard shoe and lining assembly if equipped, then install inboard shoe into caliper housing. Shoe must lay flat against
piston.
3. Install outboard shoe and lining assembly into caliper housing ensuring wear sensor is properly positioned. Back of shoe must lay flat against
caliper.
4. Install caliper assembly. Refer to Caliper Removal. See: Brake Caliper/Service and Repair/Front/Caliper Removal
5. Apply brakes several times to ensure caliper piston is extended and shoes are fully seated.
CINCHING PROCEDURE
1. Wedge a large flat blade screwdriver between outboard shoe flange and hat section of rotor.
2. Hold outer pad against caliper with suitable clamp or by applying moderate pressure on brake pedal.
3. Position a ball peen hammer on outboard shoe tab, then using a larger brass hammer, lightly tap the ball peen hammer to bend the outboard shoe
tab. Tabs must be bent around casting to approximately 45°.
4. After both tabs have been bent pressure should be released and outboard shoe should be locked into position.
CAUTION: If an outboard shoe is removed from the caliper, or the tabs unclinched for any reason, then it will be necessary to replace the shoe