
Celebrity V6-191 3.1L (1990)
2. Wiring harness from case electrical connector and leads from 3rd clutch pressure switch (governor pressure switch if applicable).
3. Torque converter clutch bolt to auxiliary valve body.
4. 3rd clutch pressure switch.
5. Second clutch switch, if applicable.
INSTALL OR CONNECT
1. Second clutch switch, if applicable.
2. 3rd clutch pressure switch.
3. Torque converter clutch bolt to auxiliary valve body. Install new O-ring.
4. Wire harness to case and switches.
5. Valve body cover with a new gasket.
ADJUST
^
T.V. cable.
^
Fluid level.
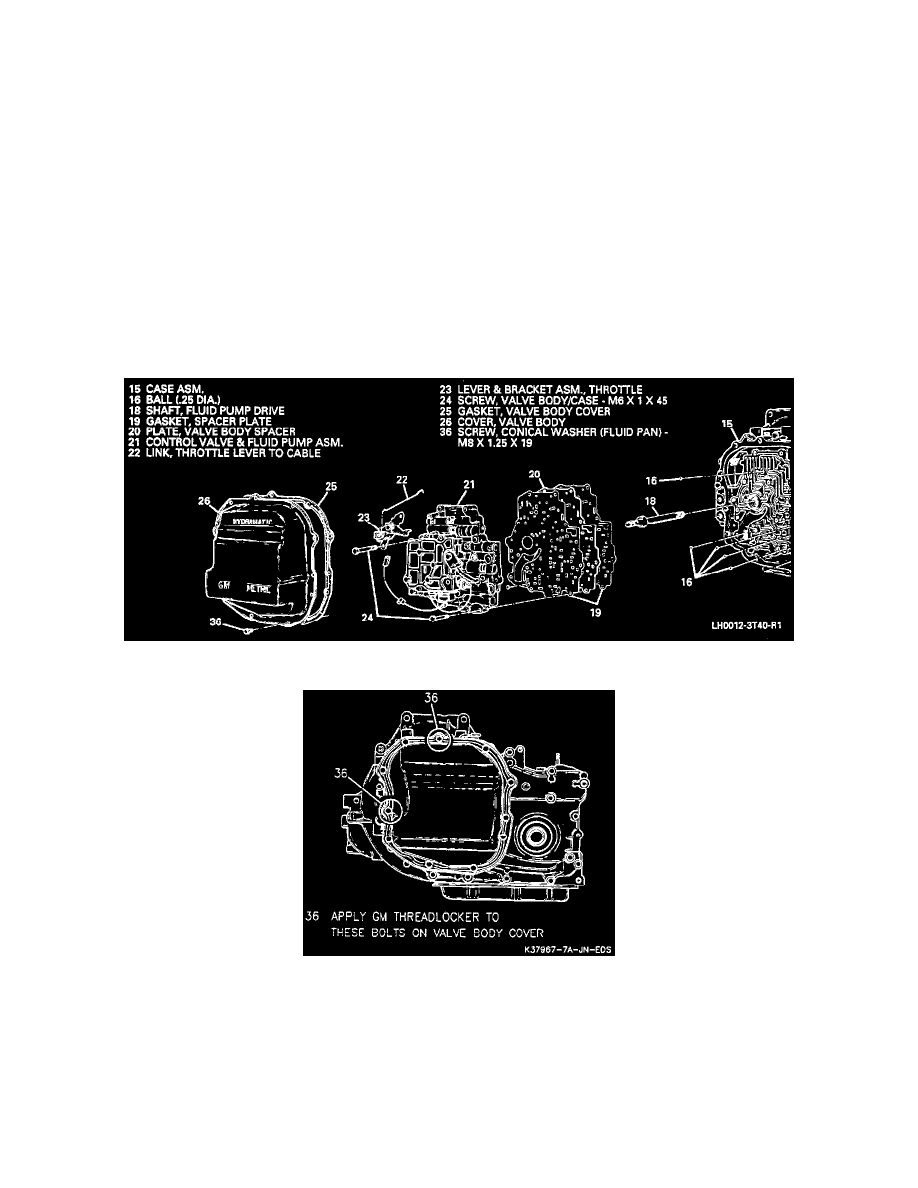
Valve Body Cover
VALVE BODY COVER 3T40 (125C)
Side Cover And Control Valve View
Valve Body Cover
REMOVE OR DISCONNECT
1. Raise vehicle and suitably support.
2. Left tire and wheel assembly.
3. Inner splash shield.
4. Valve body cover to transaxle bolts.
INSTALL OR CONNECT
1. Valve body cover with a new gasket and bolts.