
Chevette L4-98 1.6L (1982)
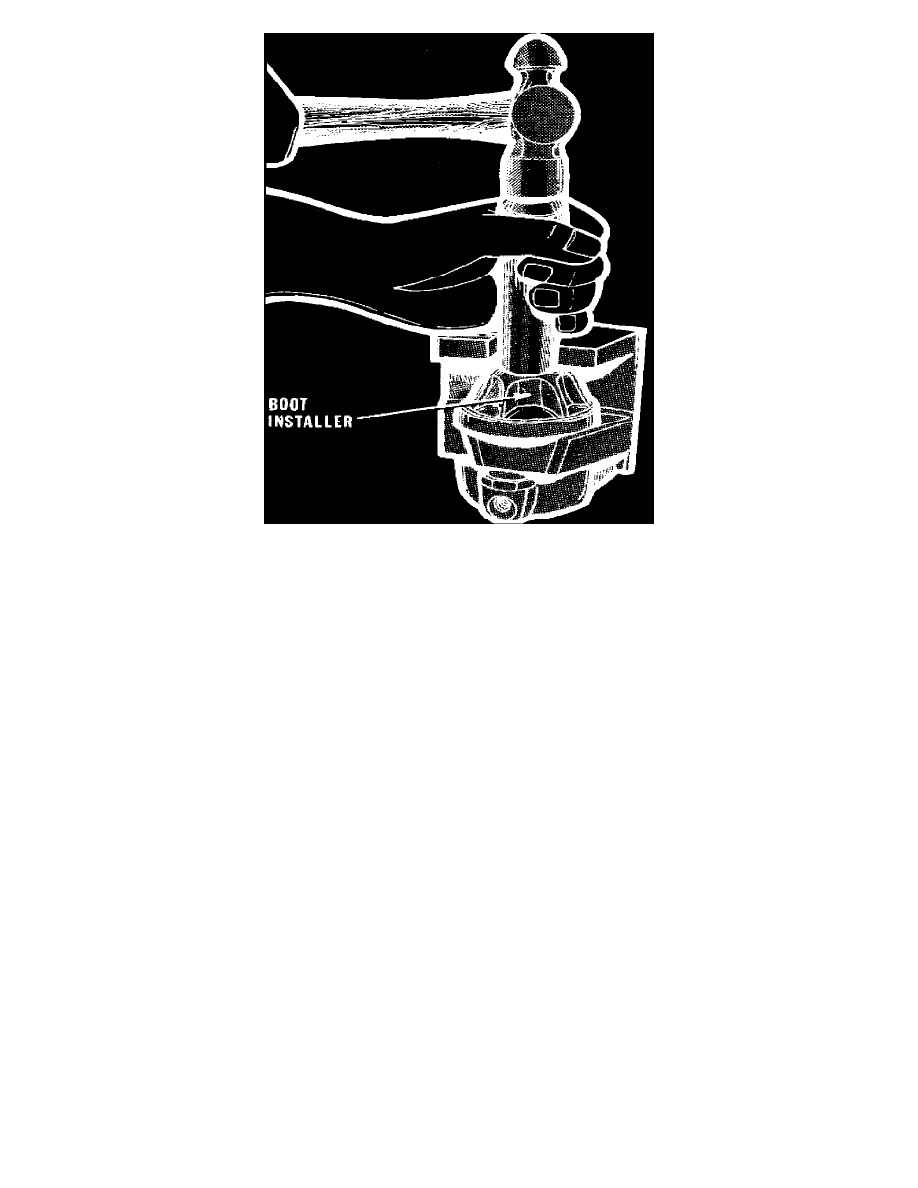
Fig. 7 Installing boot on caliper
1.
Lubricate caliper bore and piston seal with clean brake fluid, then position seal in caliper bore groove.
2.
Lubricate piston with clean brake fluid and install boot into piston groove with fold facing the open end of piston, Fig. 2.
3.
Insert piston into caliper, then using care to avoid unseating seal, force piston into caliper. To force piston into caliper a force of 50-100 pounds
will be required.
4.
Position outside diameter of boot into caliper counterbore and seat with suitable boot installer. Fig. 7. Ensure that retaining ring molded into
boot is not bent and that boot is installed fully and evenly below and around the caliper, as dirt and moisture may enter caliper and cause
damage and corrosion.
5.
Install bleeder screw.
6.
Position and stretch cushions over caliper lugs, fitting the heavy section in the lug recess and saw-tooth edges of cushions facing out, Fig. 5.
7.
Using silicone lubricant, liberally lubricate sleeve and bushings and the non-threaded portion of the retainer bolt. Install the larger bushing in the
caliper hole groove and install the sleeve. Install the smaller bushing in the retainer bolt groove.
8.
With caliper clamped in a vise, position clips over cushions and squeeze mounting bracket over clips, aligning the bolt hole. Move bracket against
retainer boss on caliper and install retainer bolt. Torque bolt to 28 ft. lbs., (38 Nm). Considerable force may be required to squeeze bracket over
cushions and clips on caliper. Start open end of bracket over ends of clips near the boot and move the bracket toward the closed end of caliper.