
Chevette L4-98 1.6L (1982)
Ball Joint: Service and Repair
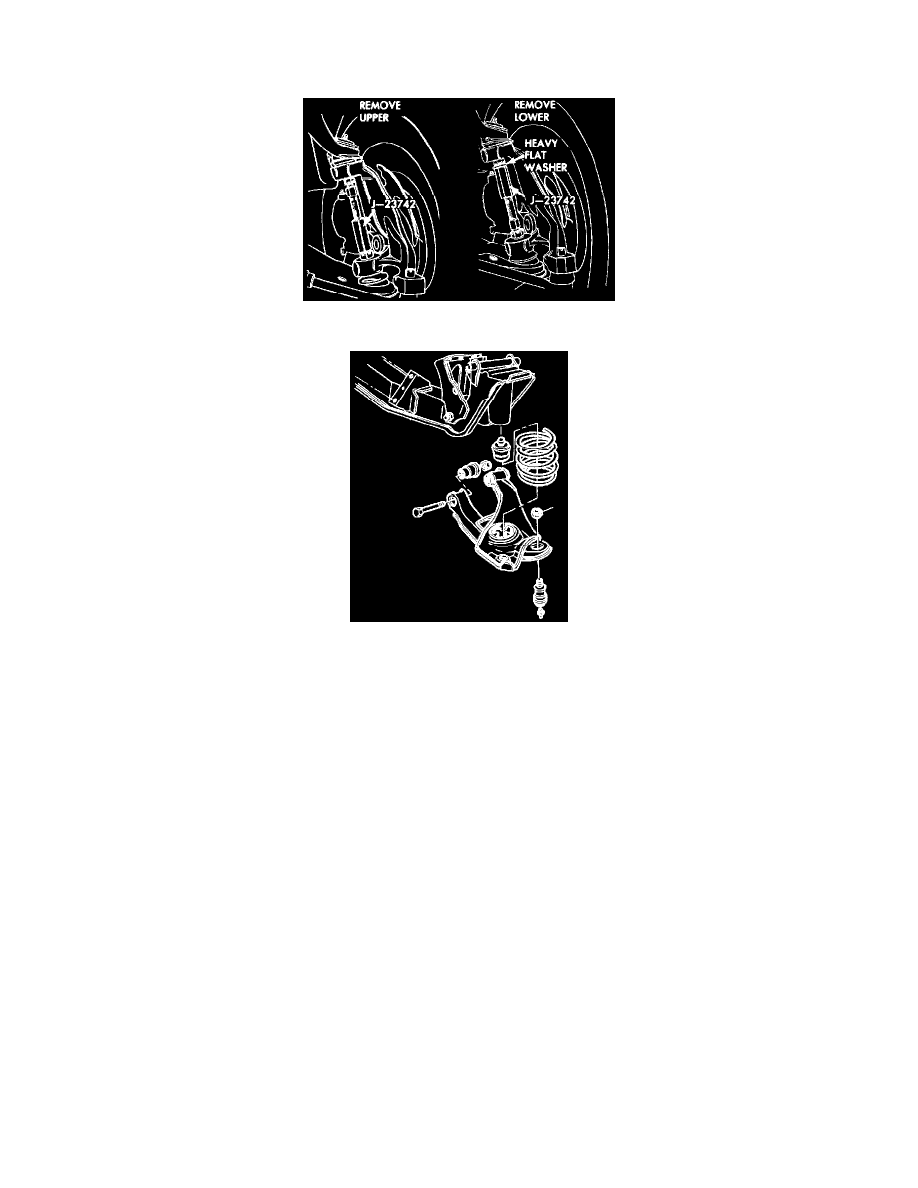
Upper
Ball Joint Separation
Spring and Control Arm
SPECIAL TOOL REQUIRED (or equivalent)
^
J-23742, Ball joint separator
REMOVE OR DISCONNECT
1. Raise vehicle and remove wheel and tire assembly.
2. Support lower control arm using a suitable jack.
3. Loosen the upper ball joint stud nut, however, do not remove nut.
4. Position tool J-23742 with cupped end of tool over upper ball joint stud and turn threaded end of tool until upper ball joint stud is free of steering
knuckle.
5. Remove tool, then the lower ball stud nut.
NOTE: Discard the stud nut. The stud nut is of special design and must be replaced whenever removed or loosened.
6. Two nuts and bolts attaching ball joint to the upper control arm, then remove ball joint.
NOTE: Inspect tapered hole in steering knuckle, if out of round or damaged, the knuckle must be replaced.
INSTALL OR CONNECT
1. Bolts and nuts attaching ball joint to upper control arm, then mate the upper control arm ball stud to the steering knuckle.
2. Install a standard nut to draw ball joint into position on knuckle. Torque standard nut to 50 Nm (35 ft lbs), then remove standard nut. Install a new
special nut for final assembly and torque to 39-49 Nm (29-36 ft lbs).
3. Install wheel and tire assembly and lower vehicle.