
Citation V6-173 2.8L VIN X 2-bbl (1982)
9.
If the valve continues to leak, it will be necessary to replace the case.
10.
If the valve doesn't leak, remove the check valve and install the new conical valve spring onto the valve (small end first). Refer to Figure 8. Install
the valve into the case bore.
11.
Install the servo gasket and cover. (DO NOT USE OLD GASKET.)
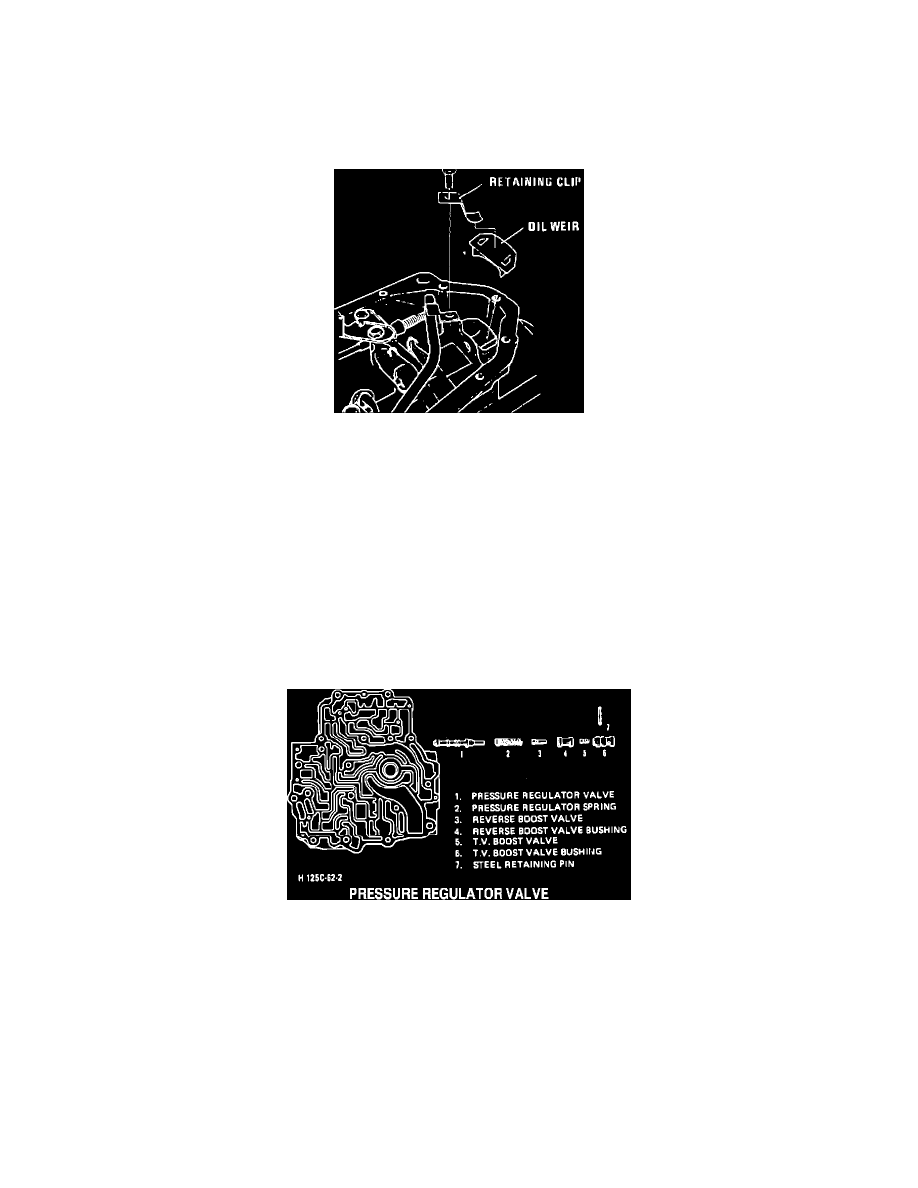
FIGURE 9 - DIFFERENTIAL OIL WEIR LOCATION
OIL WEIR
The oil weir which first went into production in September, 1981, should be installed in all THM 125 and 125C transmissions if not present.
The oil weir is located in the rear case - oil pan area and will revise the lubrication flow around the differential assembly (see Figure 9).
The oil weir, P/N 8637836, is held in place by a retaining clip, P/N 8637837, and both parts are provided in update kit.
Solid Pressure Regulator Valve Retaining Pin
If the pressure regulator valve retaining pin is worn or missing, or is not the new solid pin, the new one, P/N 112496 provided in the update kit, should be
installed using the following directions:
FIGURE 11
1.
Position the control valve and oil pump assembly with the machined portion face down. Be certain the machined face is protected to prevent nicks,
burrs, scratches, etc. Completely disassemble pressure regulator valve train as shown in Figure 11.