
Corsica V6-3100 3.1L VIN M SFI (1996)
Timing Chain: Service and Repair
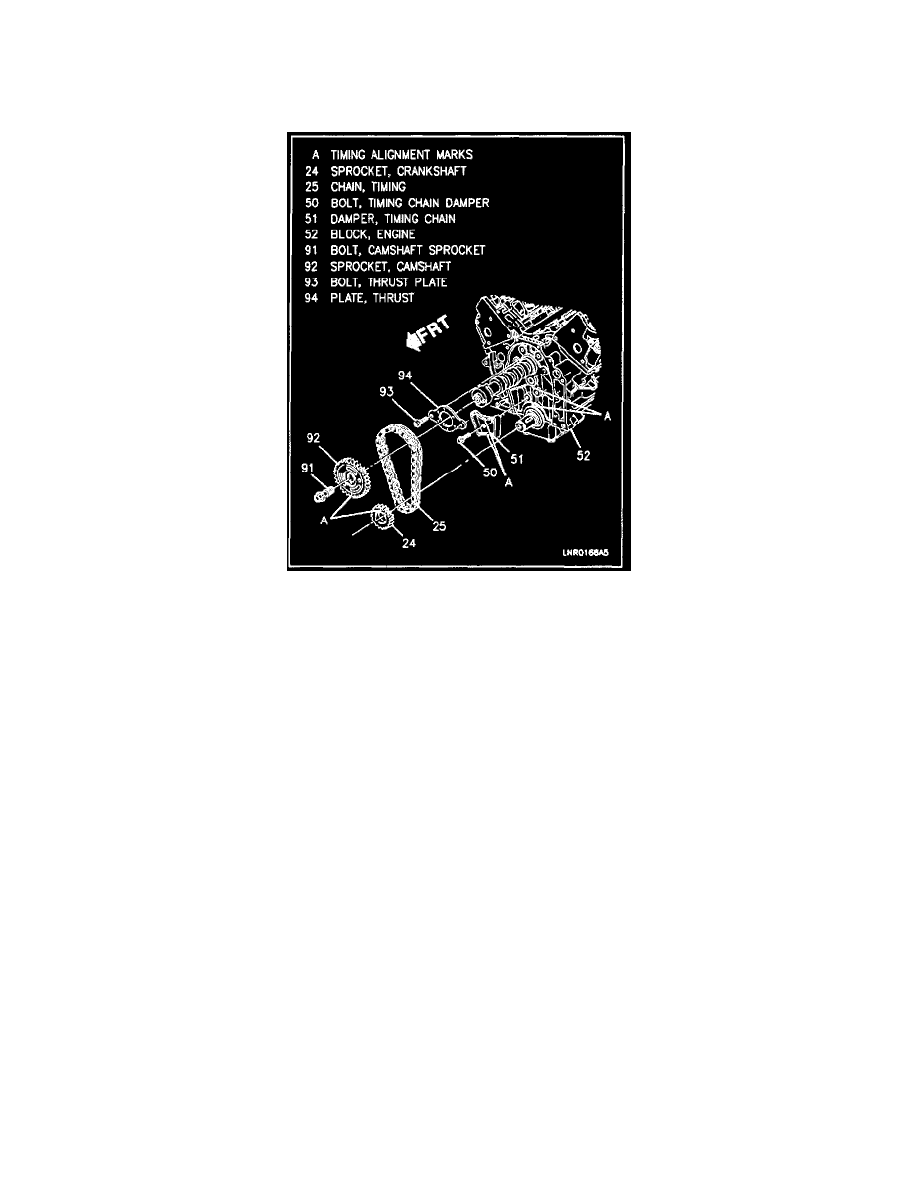
Timing Chain and Sprocket
TIMING CHAIN AND SPROCKETS
Tools Required:
J 5825-A Crankshaft Sprocket Remover
J 38612 Crankshaft Sprocket Installer
Remove
1. Negative battery cable.
2. Drain and recover coolant.
3. Crankcase front cover.
4. Place #1 piston at top dead center (#4 firing position), with the mark on the crankshaft sprocket aligned with the timing mark on the bottom of the
timing chain dampener.
5. Camshaft sprocket and chain.
Note: If the sprocket does not come off easily, a light blow on the lower edge of the sprocket (with a plastic mallet) should dislodge the sprocket.
6. Crankshaft sprocket using J 5825-A.
Install
1. Crankshaft sprocket using J 38612.
2
Apply GM EQS P/N 1052367 or equivalent to the sprocket thrust surface.
3. Install timing chain dampener to cylinder block.
4. Align the timing mark on the crankshaft sprocket to the timing mark on the bottom of the timing chain dampener.
5. Hold the camshaft sprocket with the chain hanging down and install the timing chain to the crankshaft gear.
6. Align the centerline of the locator hole , on the camshaft gear, with the timing mark on the top of the timing chain chain dampener.
7. Align dowel in camshaft with dowel hole in camshaft sprocket.
8. Draw the camshaft sprocket into camshaft using the mounting bolt.
Tighten
-
Camshaft sprocket mounting bolts to 100 Nm (74 lb. ft.).