
Corvette V8-350 5.7L (1982)
Brake Caliper: Service and Repair
Caliper Removal/Installation
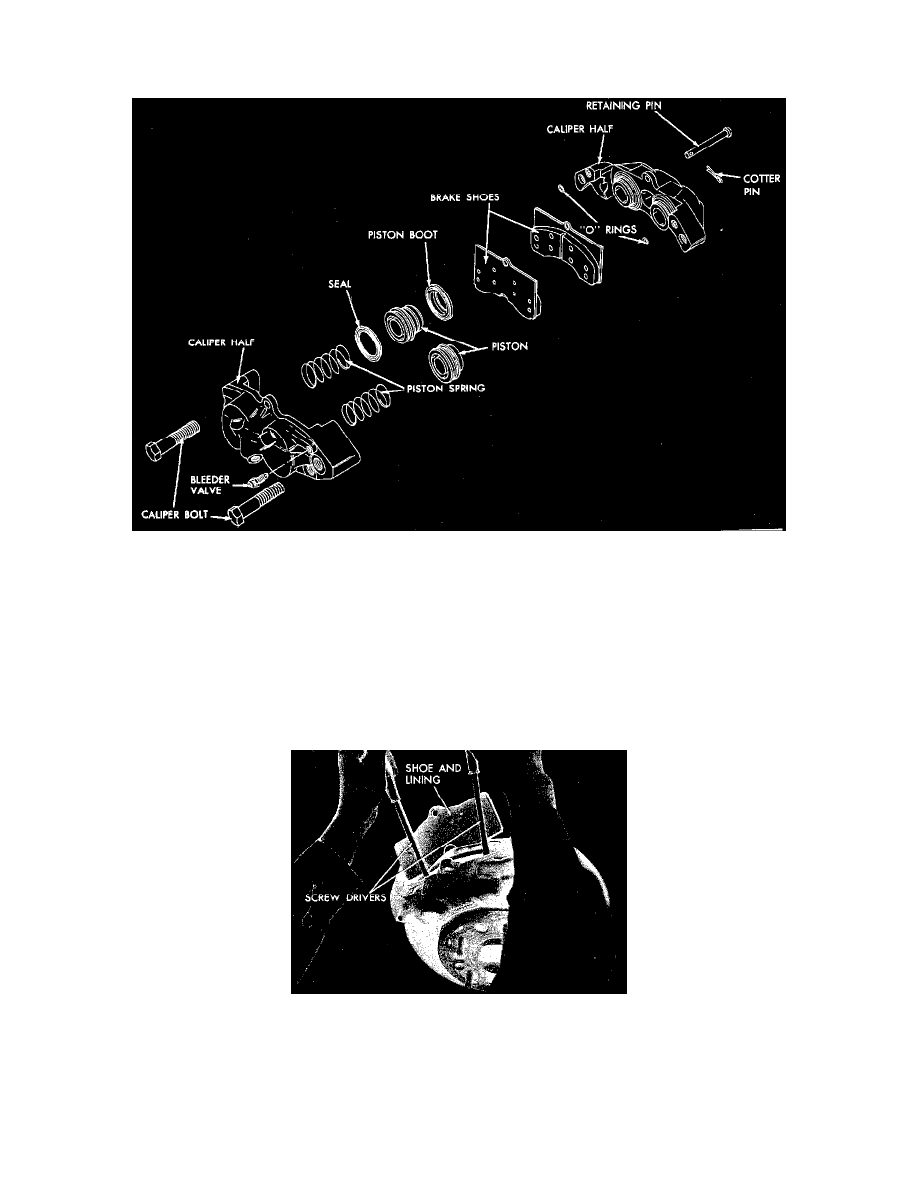
Four-Piston Caliper Assembly
Removal
1. Raise vehicle on a hoist.
2. Remove wheel.
3. Clean dirt from brake hose connections. On front caliper, disconnect the brake hose at brake pipe support bracket. On rear caliper, disconnect the
brake tubing from the inboard caliper. Tape the open tube or pipe end to prevent foreign matter from entering the system.
4. Remove the caliper assembly from the mounting bracket by removing two hex head bolts.
Installation
Replacing Shoe And Lining Assembly
1. Carefully mount the assembled caliper over the edge of the disc. Use two screwdrivers to depress pistons so that the caliper can be lowered into
position on the disc. Use care to prevent damage to boots on the edge of the disc as the caliper is mounted.
2. Secure the caliper to the mounting bracket with two hex head bolts.
If replacing old shoe assemblies, be sure to install the shoes in the same position from which they were removed.
3. Install the shoe and lining assemblies.
4. Place a new copper gasket on the male end of the front wheel brake hose. Install brake hose in the calipers. With the wheels straight ahead, pass