Corvette V8-350 5.7L VIN P SFI (1996)

Fuel Level Sensor: Service and Repair
Fuel Sender Assembly Replacement
Fuel Sender Assembly Installation
Fuel Sender Assembly Replacement
Caution: To reduce the risk of fire and personal injury that may result from a fuel leak, always replace the fuel sender gasket when reinstalling the
fuel sender assembly.
Removal Procedure
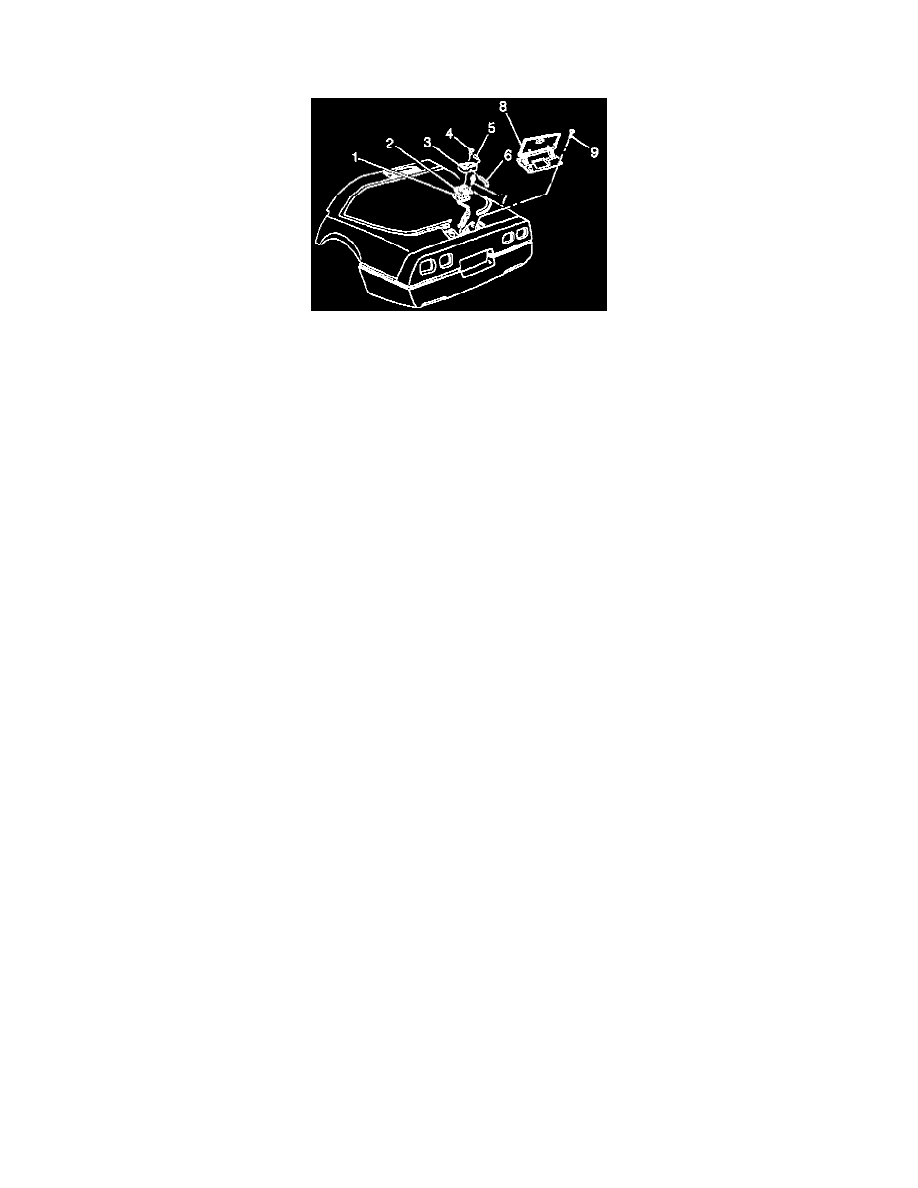
Notice: Numbers in text correspond to numbered components in image.
1. Disconnect the negative battery cable.
2. Relieve the fuel system pressure. Refer to the Fuel Pressure Release.
3. Drain the fuel tank. Refer to Draining Fuel Tank.
4. Remove the filler door bezel attaching screws (9) and the filler door bezel (8).
5. Lift the fuel tank filler pipe housing (3) and disconnect the drain hose (6) from the nipple (5).
6. Remove the fuel tank filler pipe housing (3).
7. Clean all the fuel connections and the surrounding areas before disconnecting the hoses in order to avoid possible contamination of the fuel
system.
8. Disconnect the fuel hoses and the Evaporative Emissions (EVAP) hose from the fuel sender assembly.
9. Plug or pinch the fuel feed and return hoses.
10. Disconnect the fuel sender electrical connector.
11. Remove the fuel sender assembly attaching screws (7), the fuel sender assembly (2), and the gasket (1). Discard the gasket.
12. Clean the gasket sealing surfaces.
13. Inspect the fuel feed hose, the fuel return hose, and the EVAP hose for cuts, nicks, swelling, or distortion. Replace the hoses if necessary.
Installation Procedure
1. Position the new gasket on the fuel tank with the notch facing forward in the right corner of the fuel tank.
2. Carefully fold the strainer to allow it to fit through the opening in the fuel tank. Make sure the strainer unfolds once it is placed in the tank.
3. Install the fuel sender assembly (2) into the fuel tank.
4. Install the fuel sender assembly attaching screws (7). Tighten the fuel sender assembly attaching screws alternately and evenly to 4.5 Nm (40 lb
in).
