
Corvette V8-5.7L VIN G (1997)
1.
Install a new fuel pump strainer in the same position as noted during disassembly. Push on the outer edge of the strainer ferrule until the strainer is
fully seated.
Caution:
In order to reduce the risk of fire and personal In Jury that may result from a fuel leak, always replace the fuel sender gasket and the fuel sender
attaching bolts when reinstalling the fuel sender assembly.
2.
Install a new fuel sender gasket on the fuel sender.
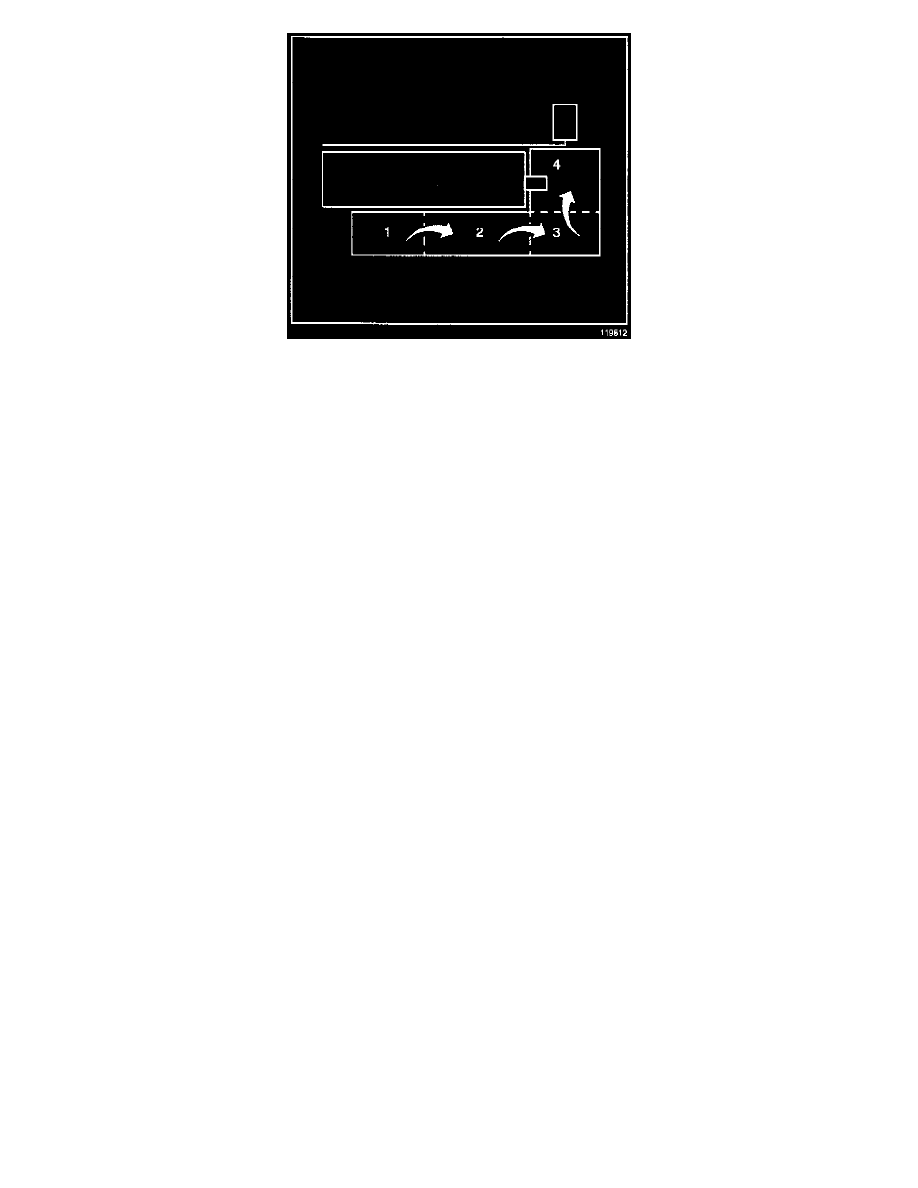
3.
Fold the strainer three times so that the amount of space occupied by the strainer is about equivalent to the diameter of the fuel sender reservoir.
3.1.
Fold the long side of the strainer over (1 over 2).
3.2.
Fold 3 over 4 and hold the strainer in the folded position.
4.
Insert the fuel sender through the fuel tank opening.
5.
Release the strainer once the strainer is in the fuel tank. The strainer will spring back to its full position.
6.
Continue inserting the fuel sender through the fuel tank opening. It may be necessary to rotate the fuel sender in order to facilitate the installation.
6.1.
Look through the fuel tank opening to ensure that the long side of the strainer is visible.
6.2.
If the strainer is not visible, rotate the fuel sender clockwise and counterclockwise about 90 degrees. Rotating the fuel sender will free up the
strainer. The strainer should become visible at the tank opening.
Important:
Do not bend or twist the float arm.
7.
Insert the float and the float arm into the fuel tank opening.
8.
Install the float arm on the fuel sender.
9.
Install the float arm retaining clip.