
Corvette V8-6.2L (2008)
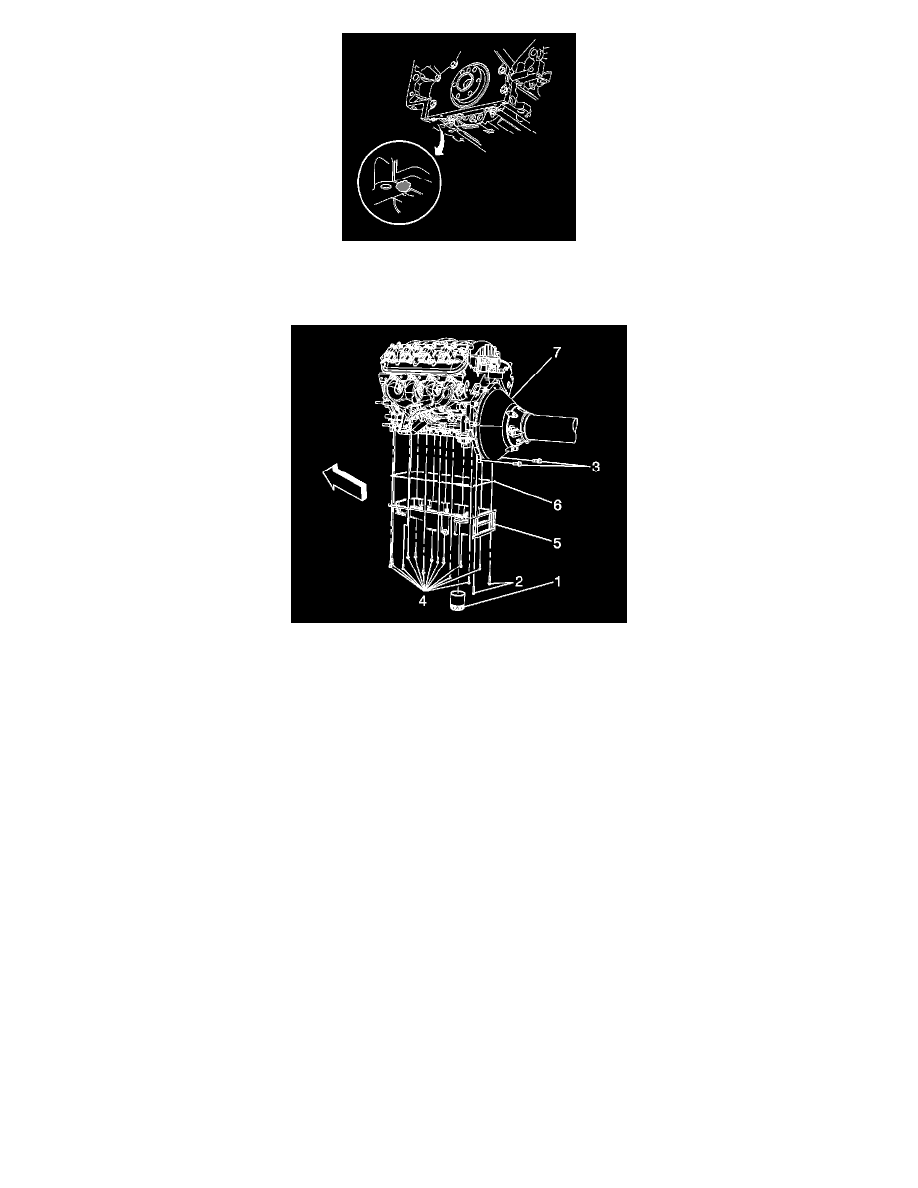
2. Apply a 5 mm (0.2 in) bead of sealant 20 mm (0.8 in) long to the engine block. Refer to Sealers, Adhesives, and Lubricants (6.2L) (See:
Specifications/Sealers, Adhesives, and Lubricants)Sealers, Adhesives, and Lubricants (7.0L) (See: Specifications/Sealers, Adhesives, and
Lubricants) for the correct part number. Apply the sealant directly onto the tabs of the rear cover gasket that protrude into the oil pan surface.
3. Position the oil pan gasket (6) on the oil pan (5).
4. Using 2 bolts (4) to hold the oil pan gasket in place, install the oil pan assembly (5, 6) to the engine block (7).
5. Finger tighten the 2 bolts (4) to hold the oil pan assembly (5) in place.
Notice: Refer to Fastener Notice (See: Service Precautions/Vehicle Damage Warnings/Fastener Notice) .
6. Install the mounting bolts (2 and 3) for the oil pan assembly.
1. Tighten the oil pan mounting bolts (2) M6 to 12 N.m (106 lb in).
2. Tighten the oil pan mounting bolts (4) M8 to 25 N.m (18 lb ft).