
Corvette V8-6.2L (2008)
Knock Sensor: Service and Repair
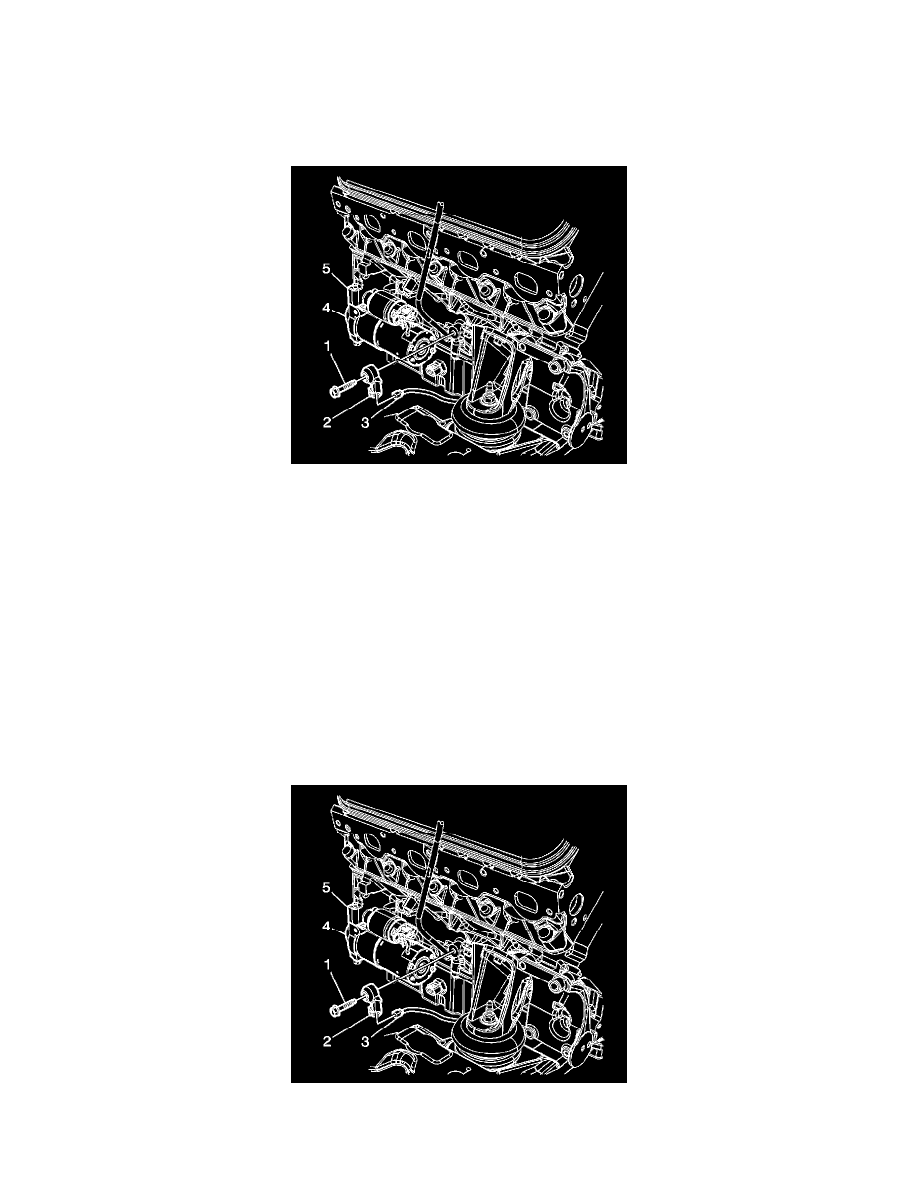
Knock Sensor Replacement (Right)
Knock Sensor Replacement (Right)
Removal Procedure
1. Remove the right exhaust manifold. Refer to Exhaust Manifold Replacement - Right Side (6.0L) (See: Engine, Cooling and Exhaust/Exhaust
System/Exhaust Manifold/Service and Repair/Exhaust Manifold Replacement - Right Side (6.0L))Exhaust Manifold Replacement - Right Side
(7.0L) () .
2. Remove the right catalytic convertor. Refer to Catalytic Converter Replacement - Right Side (6.0L) (See: Emission Control Systems/Catalytic
Converter/Service and Repair/Catalytic Converter Replacement - Right Side (6.2L))Catalytic Converter Replacement - Right Side (7.0L) () .
Important: In the following service procedure, it maybe necessary to remove the starter assembly to gain enough clearance to remove the
knock sensor.
3. Remove the starter assembly (4), ONLY IF NEEDED. Refer to Starter Motor Replacement (See: Starting and Charging/Starting System/Starter
Motor/Service and Repair) .
4. Remove the knock sensor mounting (1).
5. Remove the knock sensor (2) from the engine block (5).
6. Disconnect the engine electrical connector (3) from the knock sensor (2).
7. Remove the knock sensor (2).
Installation Procedure
1. Reconnect electrical connector (3) for the engine harness to the knock sensor (2).
2. Position the knock sensor (2) on the engine block (5).
3. Install the mounting bolt (1) for the knock sensor (2).