
Corvette V8-7.0L (2007)
6. Remove the caps from the fuel sender pipes.
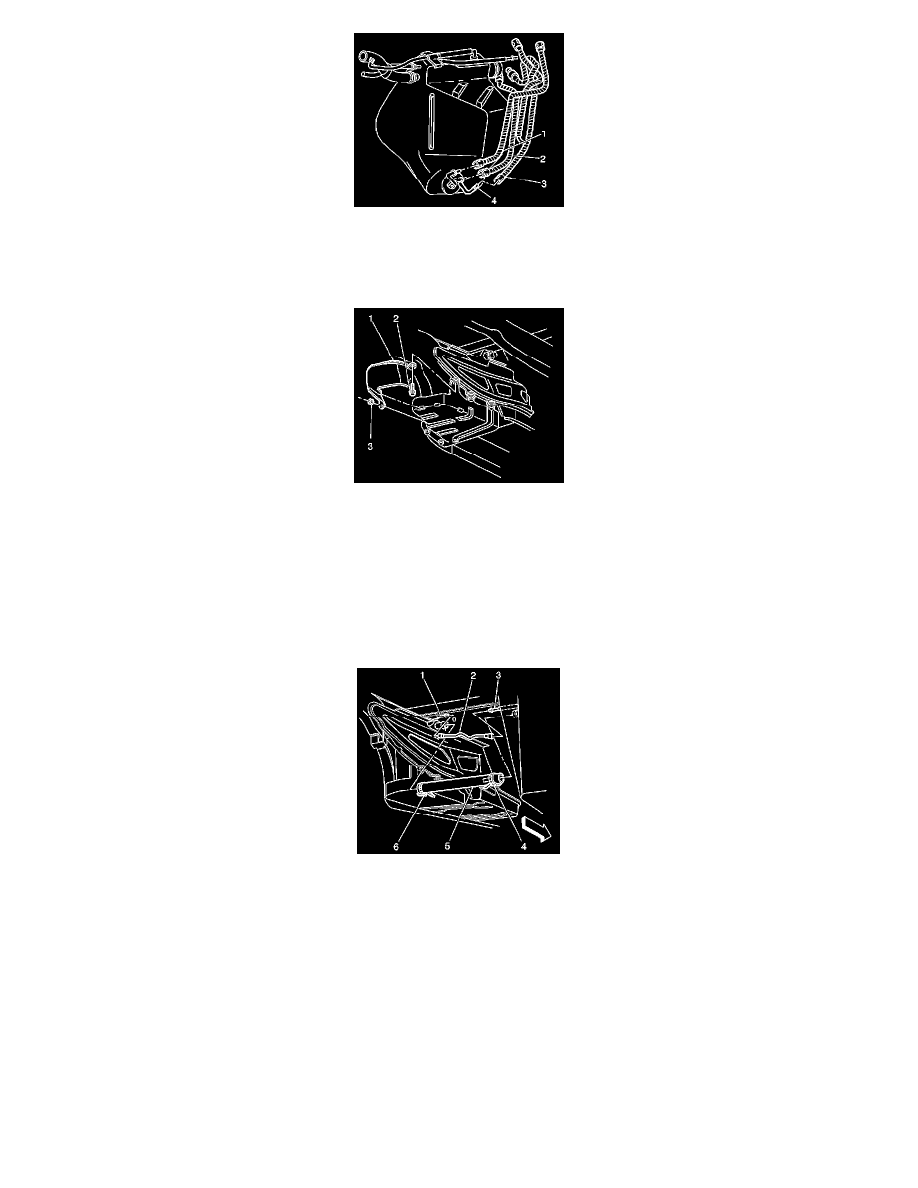
7. Connect the fuel feed rear pipe (3) at the fuel sender.
8. Connect the fuel return rear pipe (2) at the fuel sender.
9. Connect the auxiliary fuel return rear pipe (1) at the fuel sender.
10. Install the left fuel tank shield (1).
11. Install the mount bolt (2) for the left fuel tank shield (2).
Notice: Refer to Fastener Notice.
12. Install the mount nut (3) for the left fuel tank shield.
*
Tighten the fuel tank shield mount bolt to 25 N.m (18 lb ft).
*
Tighten the fuel tank shield mount nut to 12 N.m (106 lb in).
13. Remove the cap from the EVAP pipe.
14. Connect the EVAP pipe (2) at the left tank EVAP pipe (1).
15. Connect the tank crossover hose (5) at the left fuel tank.
16. Push the clamp (6) outboard against the fuel tank. Keep the clamp parallel with the white stripe on the tank crossover hose.
Tighten the tank crossover hose clamp to 4 N.m (35 lb in).
17. Install the left muffler.
18. Refill the fuel system.
19. Tighten the fuel filler cap.
20. Connect the negative battery cable.
21. Inspect for leaks.
1. Turn the ignition switch ON for 2 seconds.
2. Turn the ignition switch OFF for 10 seconds.
3. Turn the ignition switch ON.