
Corvette V8-7.0L (2007)
Tie Rod End: Service and Repair
Rack and Pinion Outer Tie Rod End Replacement
Tools Required
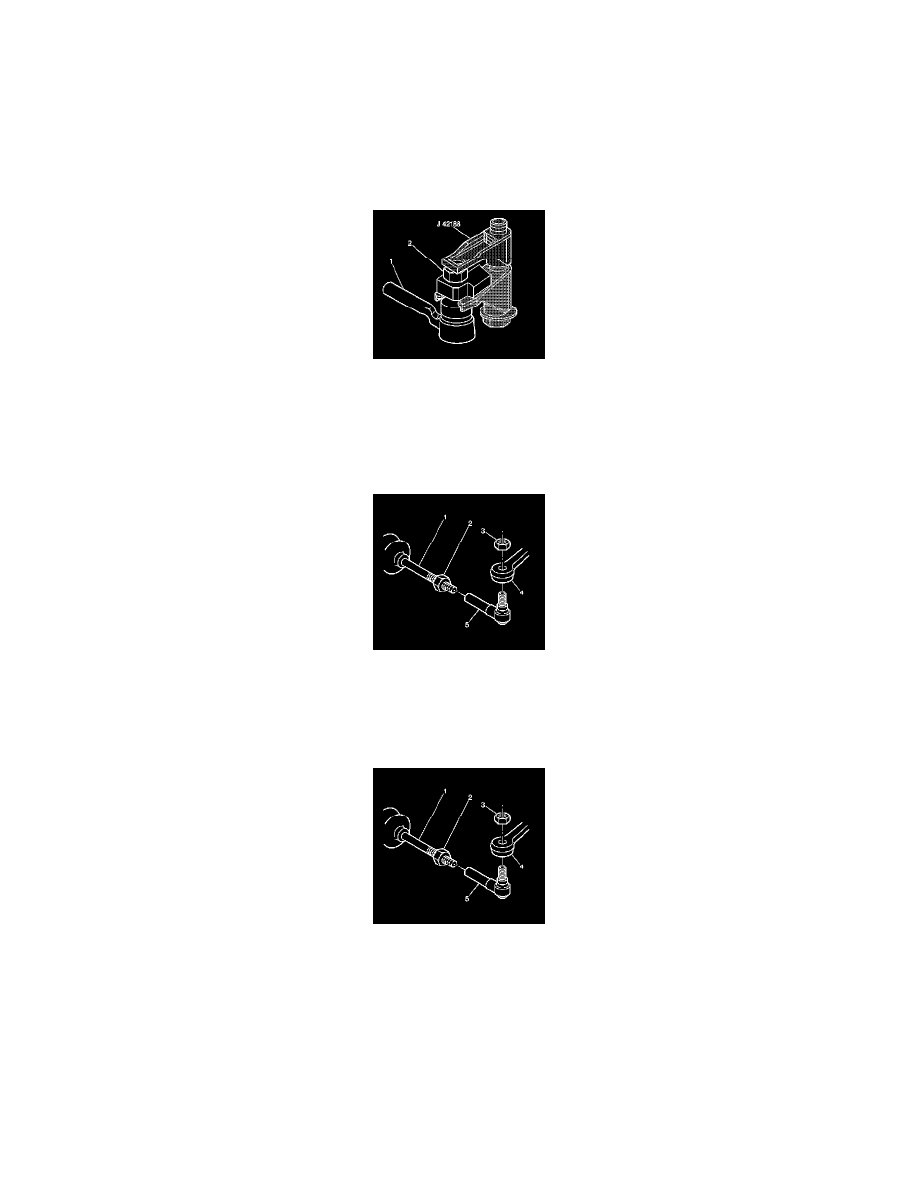
J 42188 Ball Joint Separator
Removal Procedure
1. Raise and suitably support the vehicle. Refer to Vehicle Lifting.
2. Remove the tire and wheel assemblies.
3. Loosen, do not remove, the outer tie rod end stud nut (2) from the outer tie rod end ball stud.
4. Install J 42188 between the steering knuckle and the outer tie rod end stud.
5. Tighten the nut on J 42188 until the steering knuckle and the outer tie rod end stud separate.
6. Remove J 42188 and the outer tie rod end stud nut.
7. Remove the outer tie rod end stud (5) from the steering knuckle (4).
8. Loosen the jam nut (2) on the inner tie rod assembly.
9. Remove the outer tie rod end (5) from the inner tie rod assembly (1).
Installation Procedure
1. Install the outer tie rod end (5) to the inner tie rod assembly (1). Do not tighten the jam nut.
2. Install the outer tie rod end stud (5) to the steering knuckle (4).
Notice: Refer to Fastener Notice in Service Precautions.
3. Install the outer tie rod end stud nut (3) to the outer tie rod end stud (5).
1. Tighten the outer tie rod end stud nut to 20 N.m (15 lb ft) to seat the stud.
2. Turn the nut an additional 160 degrees.
3. Check for the outer tie rod end stud nut for a minimum final torque of 45 N.m (33 lb ft).