
Corvette V8-7.0L (2007)
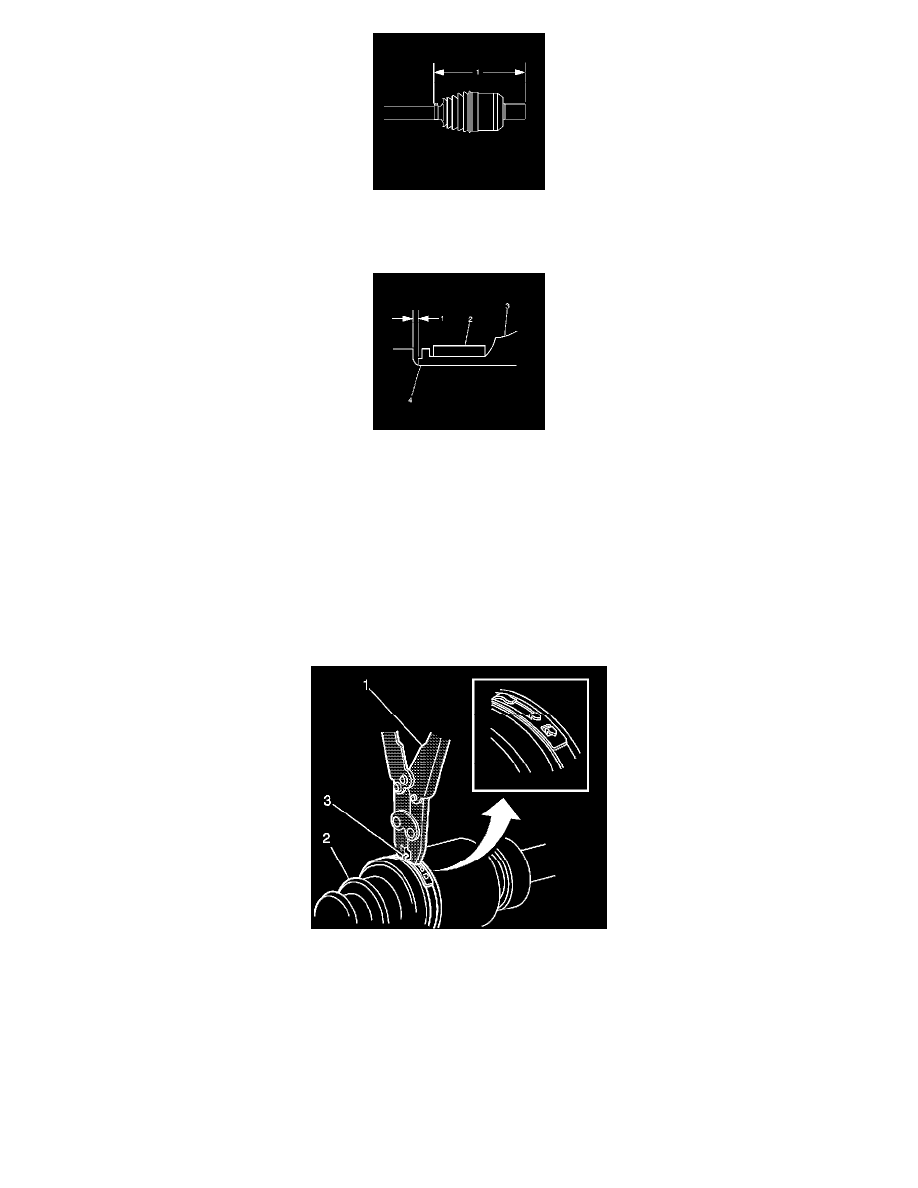
25. Measure the distance (1) between the end of the seal and the end of the joint outer race; adjust the plunging motion of the joint accordingly.
224-228 mm (8.82-8.98 in)
26. Position the large seal retaining clamp (2) onto the seal (3).
27. Position the seal and large retaining clamp to the joint outer race (4) as shown.
28. Measure the distance (1) between the edge of the seal and the edge of the joint outer race last groove closing edge; adjust fit accordingly.
0.8 mm (0.03 in)
Important: The seal must not be dimpled, stretched or out of shape in any way.
29. Inspect the seal for proper shape.
If the seal is NOT shaped correctly, equalize the pressure in the seal and shape the seal properly by hand.
30. Inspect the seal for damage.
If the seal has been cut or punctured during assembly, you must discard and replace the seal.
31. Align the following items while latching:
*
The wheel drive shaft inboard seal (2)
*
The tripot housing
*
The large seal retaining clamp (3)
32. Using the J 46588, latch the large seal retaining clamp. Ensure that the latching tangs are fully engaged in the large seal clamp band.
33. Remove the wheel drive shaft from the bench vise.
34. Distribute the grease within the inner CV joint.
Plunge the joint back and forth four or five times.
35. Inspect the inner CV joint and wheel drive shaft for smooth operation.