
EL Camino V6-229 3.8L (1982)
1981 "F" (Z28)
8999589
25056675
1982 "F" 5.0L (LG4)
8999830
25056676
1981 "Y"
8999338
25056672
B.
Converter Removal, Preparation and Installation:
1.
Disconnect air supply pipe from catalytic converter.
2.
Disconnect intermediate pipe from rear of converter.
3.
Disconnect hanger bracket from converter, except on Corvettes.
4.
On Corvette, remove nuts and bolts and remove converter. All other models, remove front exhaust clamp then remove converter.
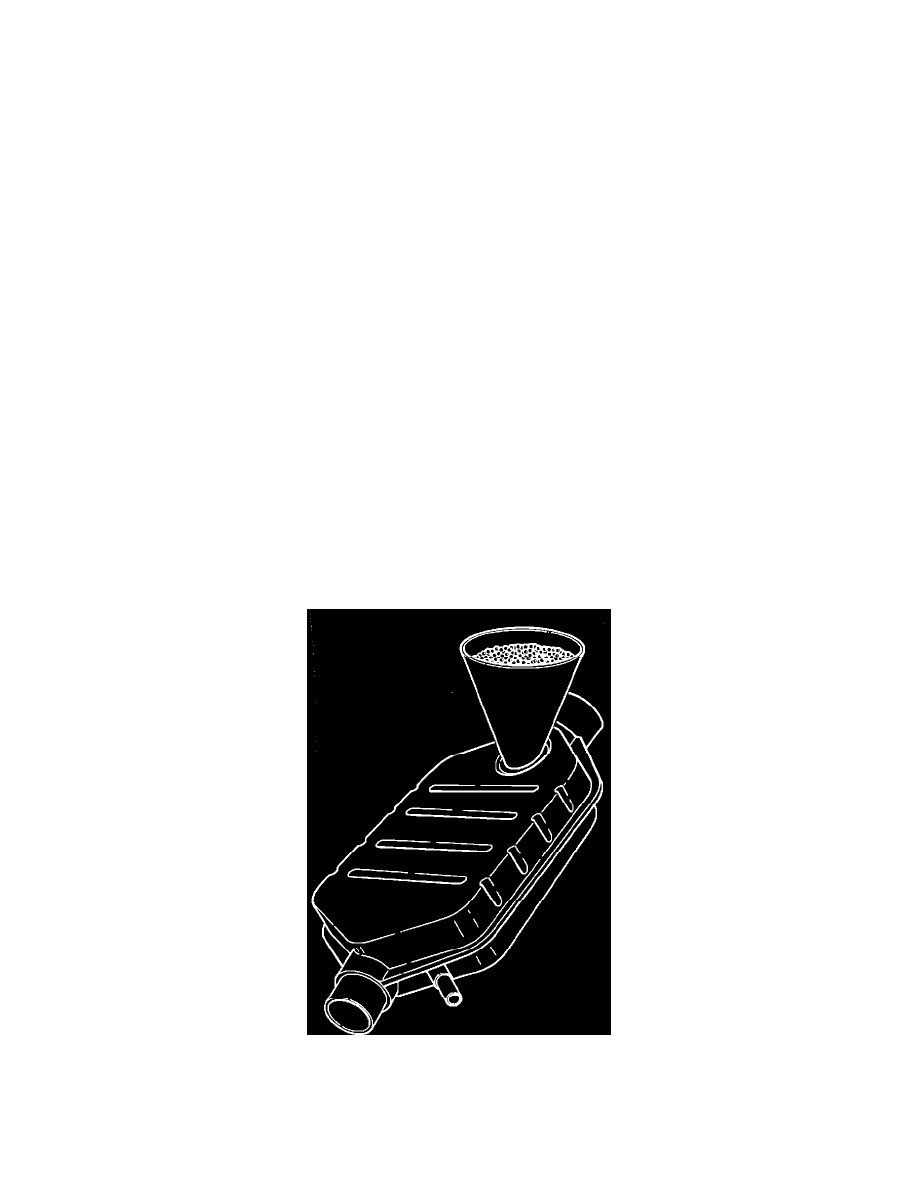
5.
Stand old converter upright on inlet end and pour two(2) 8 ounce cups of water into outlet end to control catalyst dust.
6.
Using hammer and chisel, remove upper bed fill hole plug from old converter by driving chisel between the converter shell and rim of fill
plug (see Figure 1 for description of upper and lower beds). Deform fill plug until it can be removed with pliers.
7.
Hold converter over a clean pan (J-34155-2) and empty catalyst beads by shaking and tapping converter belt flange (Figure 1) with rubber
mallet.
NOTICE:
If upper bed is void or near void (a cup or less) of catalyst beads, the converter is considered damaged (internally) or expanded.
Catalyst beads found in internally damaged or expanded converters are not to be used in new converters. These beads can be
returned via exchange program described in WDDGM Bulletin ID No. 80-93.
8.
Pour upper bed beads into sifting pan (J-34155-1). Sift out broken beads (smaller than half size) into a clean box. Pour sifted beads (half size
and larger) into the other pan (J-34155-2). Set sifted beads aside for now.
Unusable beads and dust can be returned via exchange program described in WDDGM Bulletin ID No. 80-93.
FIGURE 2