
Equinox AWD V6-3.4L (2008)
Coolant Line/Hose: Service and Repair
Heater Outlet Pipe Replacement
Heater Outlet Pipe Replacement (RPO LNJ) (3.4L)
Removal Procedure
1. Remove the injector sight shield. Refer to Fuel Injector Sight Shield Replacement (See: Powertrain Management/Fuel Delivery and Air
Induction/Fuel Injector/Service and Repair/Removal and Replacement/Fuel Injector Sight Shield Replacement) .
2. Drain the cooling system. Refer to Cooling System Draining and Filling (LNJ Static Fill) (See: Engine, Cooling and Exhaust/Cooling
System/Service and Repair)Cooling System Draining and Filling (LNJ GE 47716 Fill) (See: Engine, Cooling and Exhaust/Cooling
System/Service and Repair)Cooling System Draining and Filling (LY7 Static Fill) (See: Engine, Cooling and Exhaust/Cooling System/Service
and Repair)Cooling System Draining and Filling (LY7 GE 47716 Fill) (See: Engine, Cooling and Exhaust/Cooling System/Service and Repair) .
3. Remove the air cleaner air intake duct. Refer to Air Cleaner Inlet Duct Replacement .
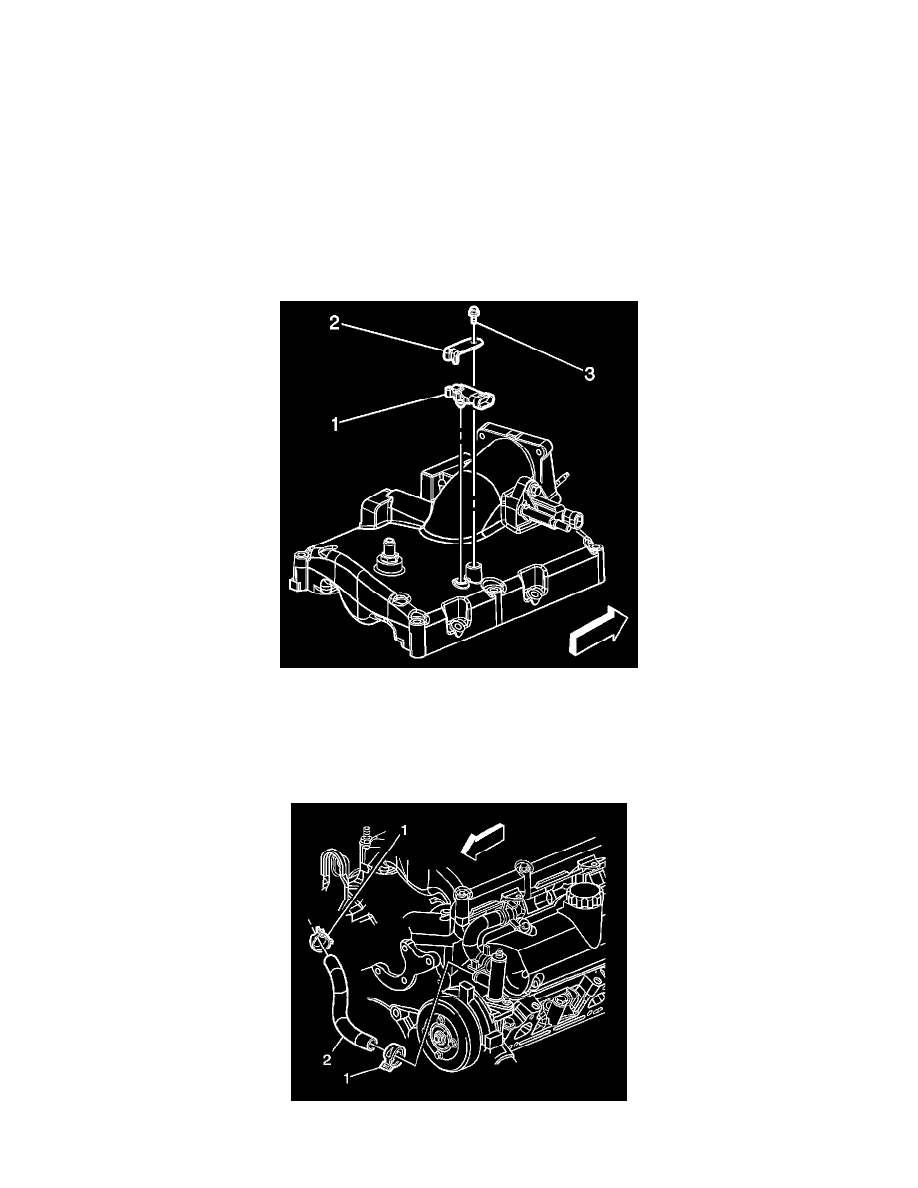
4. Remove the manifold absolute pressure (MAP) sensor bolt (3) and bracket (2).
5. Rotate the MAP sensor out of the way of the heater outlet pipe.
6. Disconnect the evaporative emissions (EVAP) pipe from the EVAP canister purge solenoid. Refer to Plastic Collar Quick Connect Fitting Service
.
7. Disconnect the electrical connector from the EVAP canister purge solenoid.
8. Disconnect the exhaust gas recirculation (EGR) valve electrical connector.
9. Release and slide the heater outlet hose clamp (1) away from the heater outlet pipe connection.