
Express 1/2 Ton Van V6-4.3L VIN W (1999)
NOTICE: If a clamp-type pitman arm is used, spread the pitman arm just enough with a wedge to slip the arm onto the pitman shaft. Do not spread
the pitman arm more than required to slip over the pitman shaft with hand pressure. Do not hammer. Damage to the steering gear may result.
1. Install the pitman arm on the pitman shaft.
Line up the marks made at removal.
Use a new torque prevailing nut.
NOTICE: Refer to Fastener Notice in Service Precautions.
2. Install the pitman arm washer and nut.
-
Tighten the pitman arm retaining nut to 250 Nm (184 ft. lbs.)
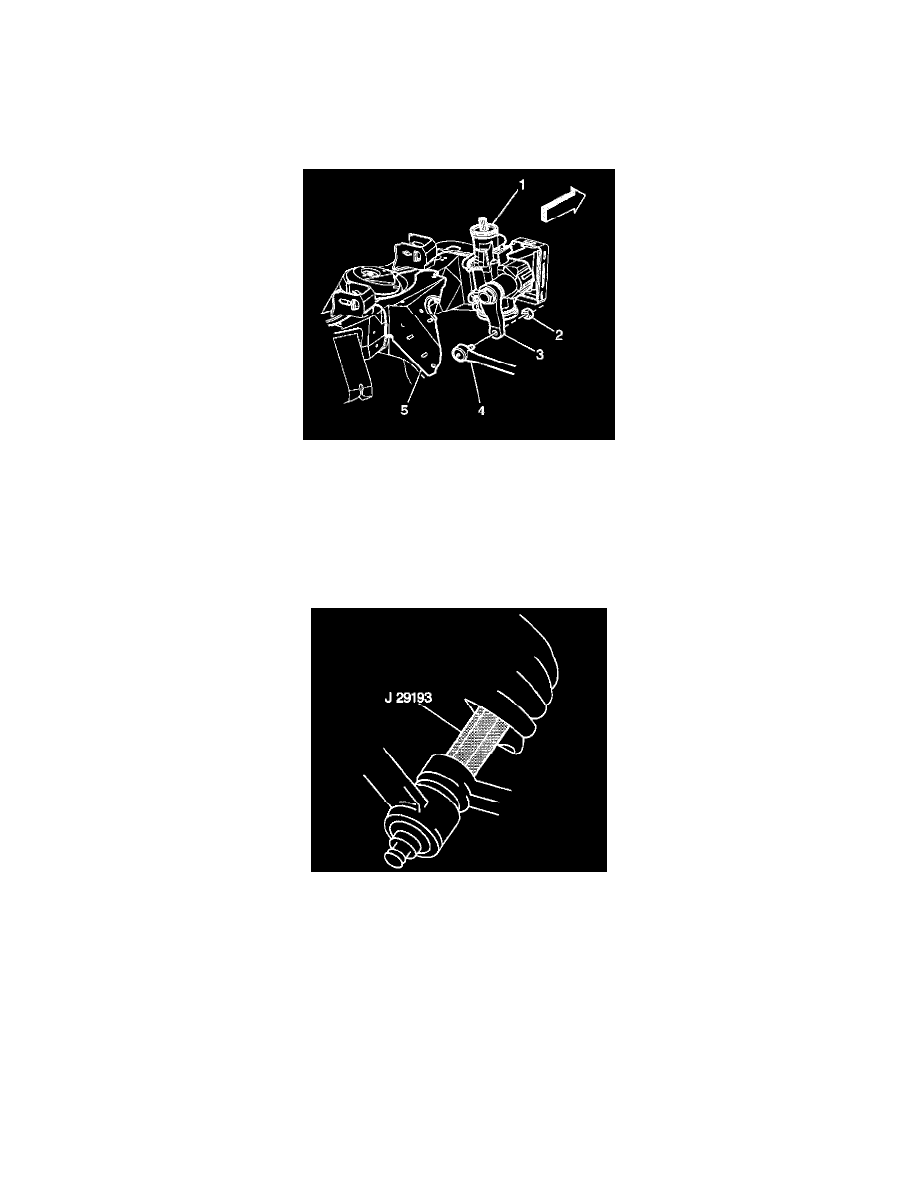
3. Connect the connecting rod (4) to the pitman arm (3) ball stud.
Make sure the seal is on the stud.
-
Tighten the J 29193 or J 29194 to 54 Nm (40 ft. lbs.) in order to seat the tapers.
4. Remove the J 29193. Install a new torque prevailing nut.
-
Tighten the connecting rod nut to 47 Nm (35 ft. lbs.).
5. Remove the safety stands.
6. Lower the vehicle.