
Express 1/2 Ton Van V8-5.7L VIN R (1999)
Compressor Clutch Bearing: Service and Repair
Clutch Rotor And/Or Bearing Install (HT6/HD6)
TOOLS REQUIRED
^
J 6083 Snap Ring Pliers
^
J 33023-A Puller Pilot
^
J 41552 Pulley Puller
^
J 29886 Driver Handle
^
J 21352-A Support Block
^
J 9481-A Bearing Installer
^
J 33019 Bearing Staking Tool
^
J 33017 Pulley and Bearing Assembly Installer
^
J 8433-1 Puller Bar
^
J 6083 Snap Ring Pliers
^
J 9398-A Bearing Remover
^
J 34992 Holding Fixture
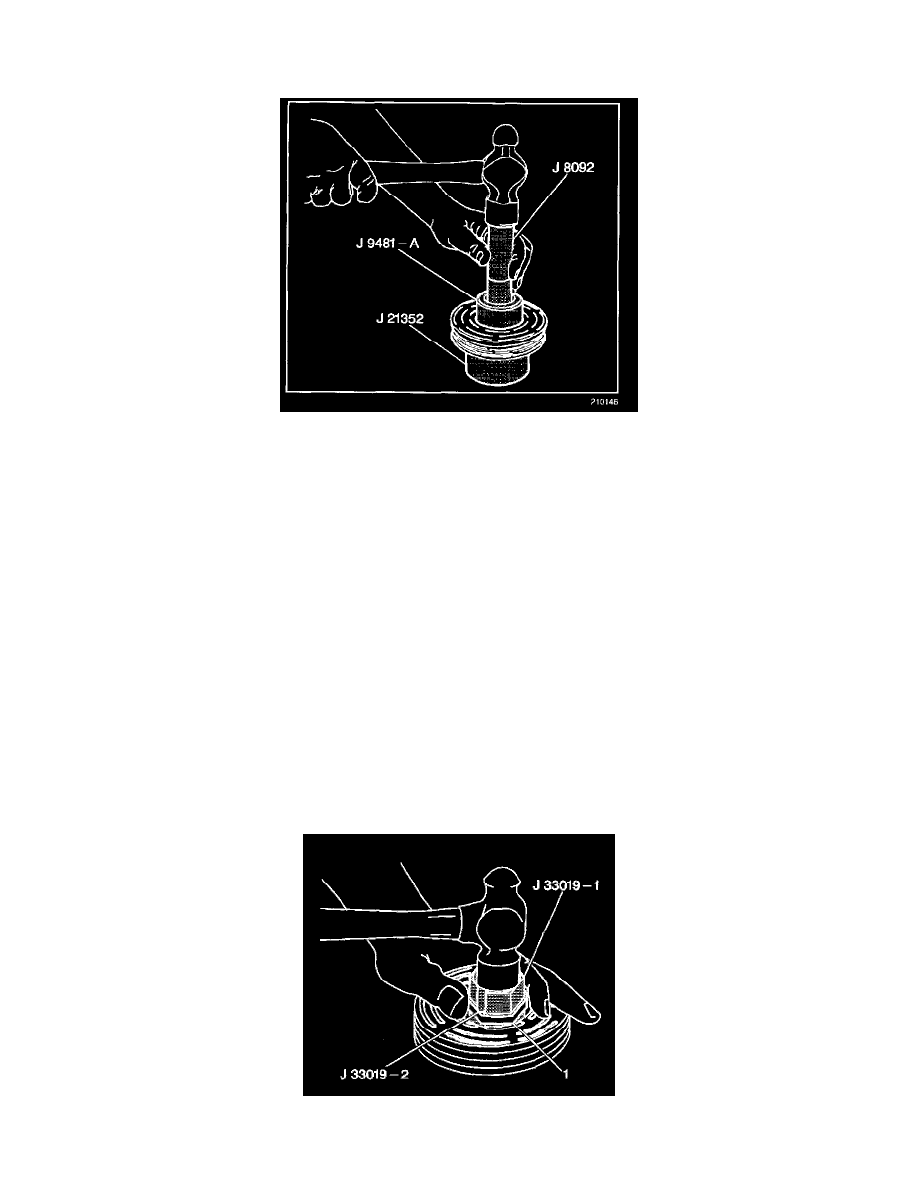
NOTE: Do not support the rotor by resting the pulley rim on a flat surface during the bearing installation or the rotor face will be bent.
1. Place the pulley rotor on the J21352-A in order to fully support the rotor hub during bearing installation.
2. Use the following tools in order to align the new bearing squarely with the hub bore.
^
The J41552
^
The J9481-A
^
J29886
3. Drive the bearing fully into the hub.
The installer will apply force to the outer race of the bearing, if used as shown.
4. Place the J33019 in the hub bore.
5. Shift the rotor and bearing assembly on the J21352-A in order to fully support the hub under the staking pin location.