
Express 1/2 Ton Van V8-5.7L VIN R (1999)
Alignment: Service and Repair
Trim Height Inspection
TRIM HEIGHT MEASUREMENTS
Incorrect trim heights can cause bottoming out over bumps. Incorrect trim heights can cause possible damage to the suspension components and
symptoms similar to those produced when there is a problem with the wheel alignment. Check the trim heights when diagnosing suspension complaints
and before checking the wheel alignment.
Perform the following before measuring the trim heights:
1. Set the tire pressures to the pressure shown on the tire placard. The tire placard is located on the driver's door.
2. Check the fuel level.
3. Add additional weight if necessary to simulate a full tank.
4. Place the front seats in the full back position.
5. Make sure the rear compartment is empty except for the spare tire and jack and simulated fuel load.
6. Make sure the vehicle is on a level surface, such as an alignment rack.
7. Close the doors.
8. Close the hood.
9. Close the rear compartment lid.
All dimensions are measured vertical to the ground. Trim heights should be within 13 mm (0.5 inches) to be considered correct.
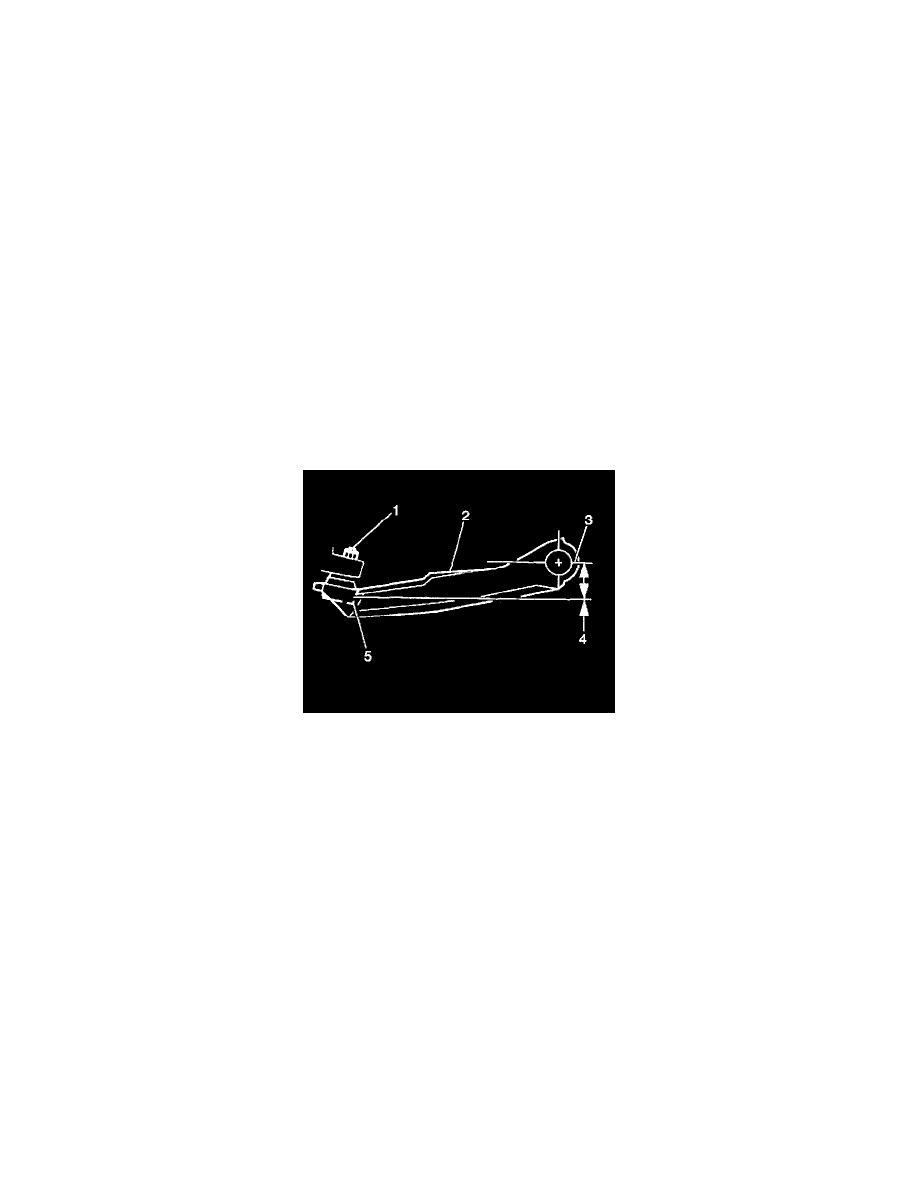
Z HEIGHT MEASUREMENT
1. Lift the front bumper of the vehicle up about 38 mm (1.5 inches).
2. Gently remove your hands. Let the vehicle settle.
3. Repeat this operation for a total of 3 times.
4. For all vehicles, measure from the pivot bolt center line (2) down to the lower corner (5) of the steering knuckle (1) in order to obtain the Z height
measurement (4).
5. Push the front bumper of the vehicle down about 38 mm (1.5 inches).
6. Gently remove your hands.
7. Allow the vehicle to rise.
8. Repeat the operation for a total of 3 times.
9. Measure the Z dimension.
10. The true Z dimension number is the average of the high and the low measurements. Refer to Trim Height Specifications (front).
D HEIGHT MEASUREMENT
1. With the vehicle on a flat surface, lift upward on the front bumper 38 mm (1.5 inches).
2. Release the front bumper. Let the vehicle settle into position.
3. Repeat Steps 1 and 2 two more times. Allow the vehicle to settle.