
Express 2500 V8-6.6L DSL Turbo (2010)
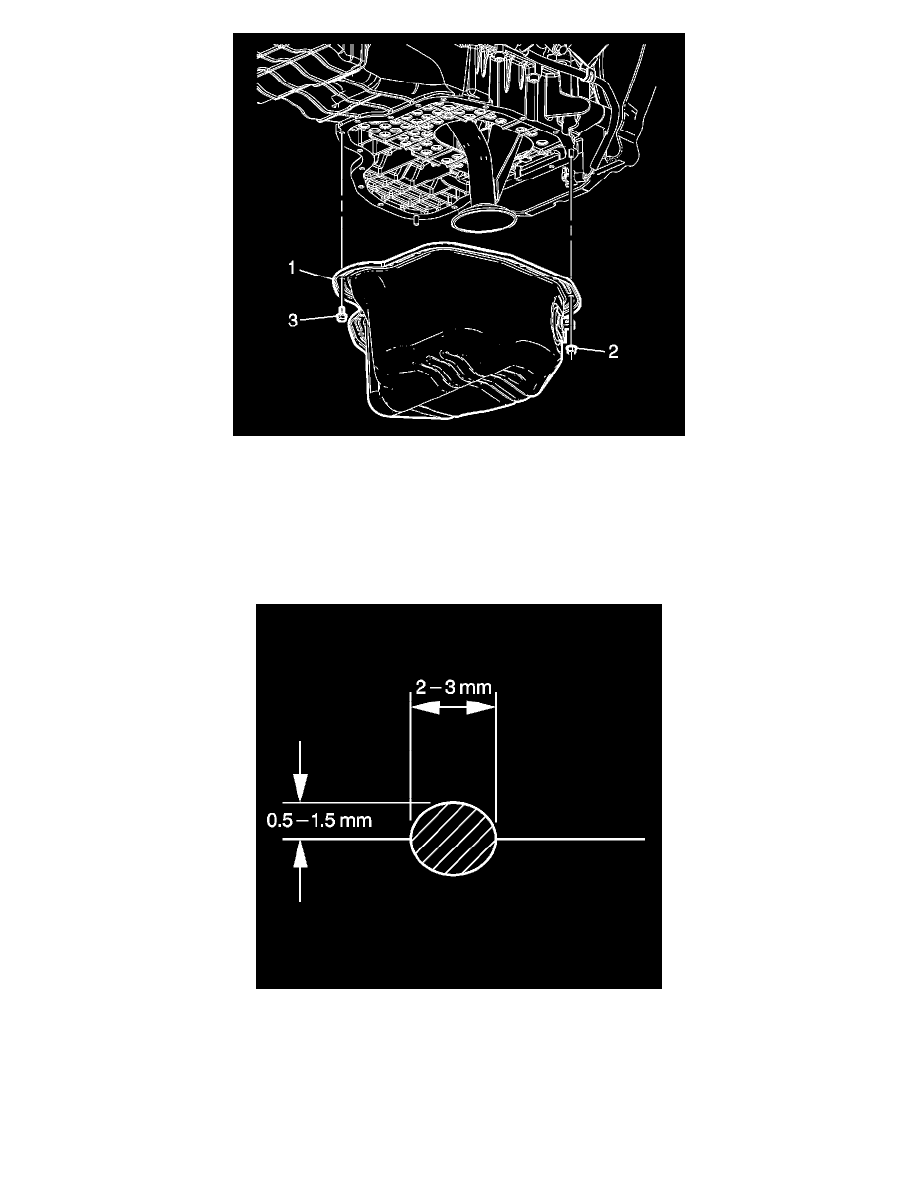
3. Remove the lower oil pan bolts (3) and nuts (2).
Note: Do not damage the sealing surfaces when separating the lower oil pan from the upper oil pan.
4. Separate the lower oil pan from the upper oil pan using J-37228 - cutter.
5. Remove the lower oil pan (1).
Installation Procedure
1. Apply a 2-3 mm (0.79-0.118 in) wide by 0.5-1.5 mm (0.02-0.06 in) high bead of sealant to the lower oil pan mating surface. Refer to Adhesives,
Fluids, Lubricants, and Sealers (See: Specifications/Adhesives, Fluids, Lubricants, and Sealers).