
Express 2500 V8-6.6L DSL Turbo (2010)
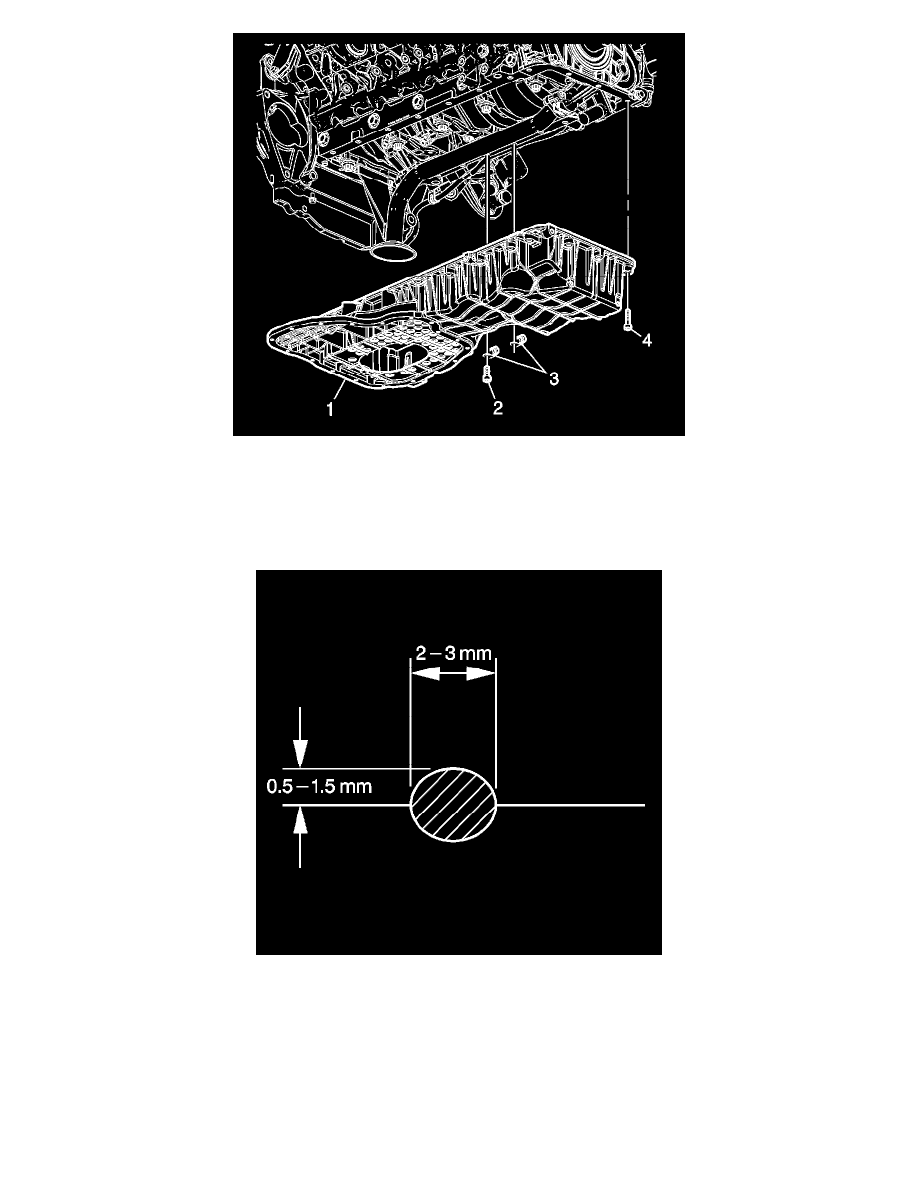
6. Remove the upper oil pan bolts (2) and (4).
7. Remove the wiring harness clips (3).
8. Separate the upper oil pan from the engine block using the J-37228 - cutter.
9. Remove the upper oil pan (1).
Installation Procedure
1. Apply a 2-3 mm (0.79-0.118 in) wide by 0.5-1.5 mm (0.02-0.06 in) bead of sealant to the upper oil pan mating surfaces. Refer to Adhesives,
Fluids, Lubricants, and Sealers (See: Specifications/Adhesives, Fluids, Lubricants, and Sealers).
2. Apply a 2-3 mm (0.79-0.118 in) wide by 0.5-1.5 mm (0.02-0.06 in) bead of sealant to the flywheel housing sealing surface. Refer to Adhesives,
Fluids, Lubricants, and Sealers (See: Specifications/Adhesives, Fluids, Lubricants, and Sealers).