
Express 4500 V8-6.6L DSL Turbo (2009)
7. Install the valve bridge pins.
8. Lubricate the valve lifter end of the pushrod with clean engine oil.
9. Install the pushrods.
To ensure the pushrod is properly installed, gently pull up on the pushrod. Resistance should be felt from the pushrod trying to lift the valve lifter.
Caution: The pushrods must be correctly seated in the valve lifter and valve rocker arms before the rocker arm shaft assembly is torqued into
place. Improper seating of the pushrods can cause damage to the pushrods or the valve rocker arm shaft assembly components.
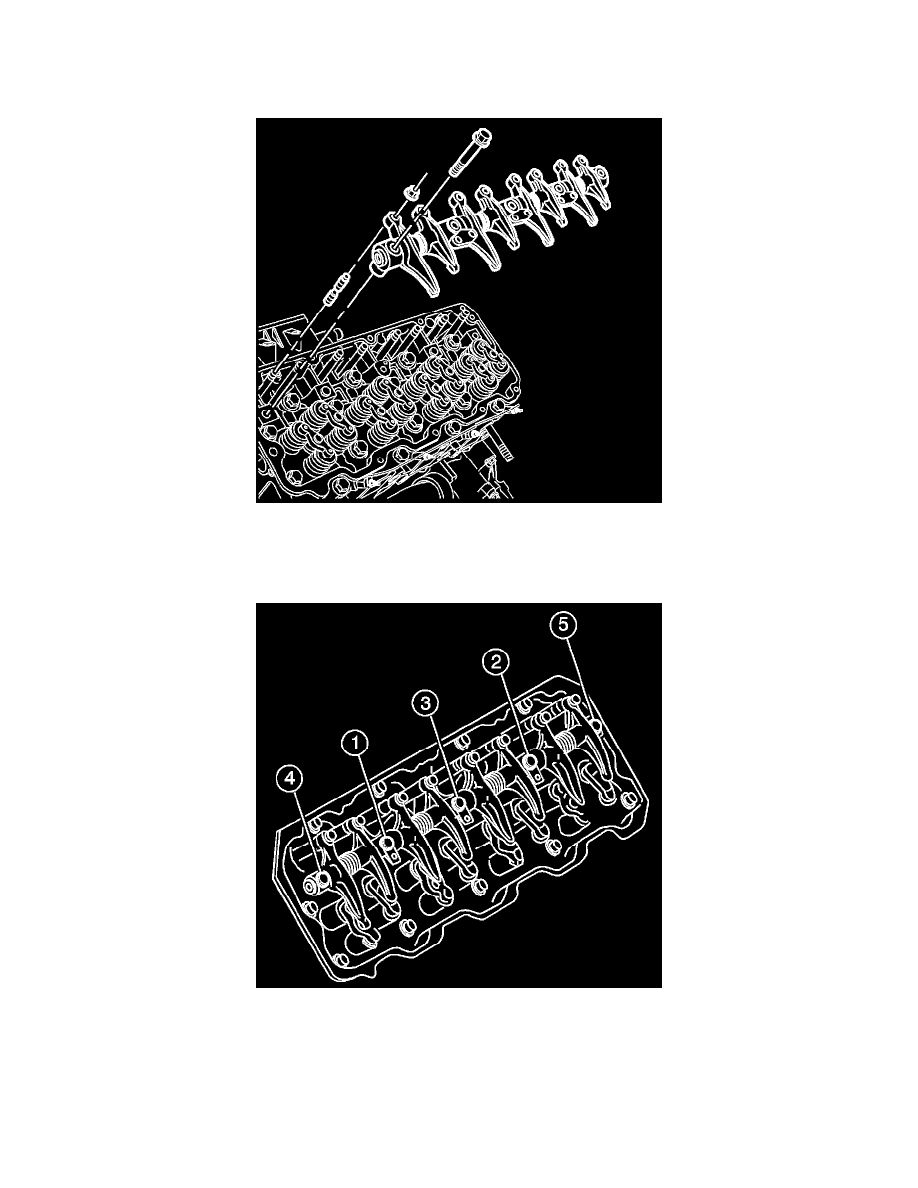
10. Install the rocker arm shaft assembly.
Caution: Refer to Fastener Caution (See: Service Precautions/Vehicle Damage Warnings/Fastener Caution).
11. Tighten the rocker arm shaft bolts in the sequence shown to 41 Nm (30 lb ft).
12. Adjust the valve clearance. Refer to Valve Clearance Adjustment (See: Cylinder Head Assembly/Valve Clearance/Adjustments).
13. Install the lower valve rocker arm covers. Refer to Valve Rocker Arm Cover Replacement - Lower Left Side (LMM) (See: Cylinder Head
Assembly/Valve Cover/Service and Repair/Valve Rocker Arm Cover Replacement - Lower Left Side) and Valve Rocker Arm Cover Replacement
- Lower Right Side (See: Cylinder Head Assembly/Valve Cover/Service and Repair/Valve Rocker Arm Cover Replacement - Lower Right Side).