
G 2500 3/4 Ton Van V8-6.5L DSL Turbo VIN F (1997)
ASSEMBLE
1. Guide pins into the valve body.
2. Gasket.
3. Spacer plate.
4. Gasket.
5. Accumulator housing onto the valve body.
6. Bolts through the accumulator housing and into the valve body.
7. Guide pins.
INSTALL OR CONNECT
1. Eight check balls in proper location into the case oil passages.
2. Gasket.
3. Complete valve body onto the case. Ensure to attach the manual shaft to the detent lever and pin assembly.
4. Pressure switch manifold (PSM) onto the valve body.
5. Spring and roller assembly into place.
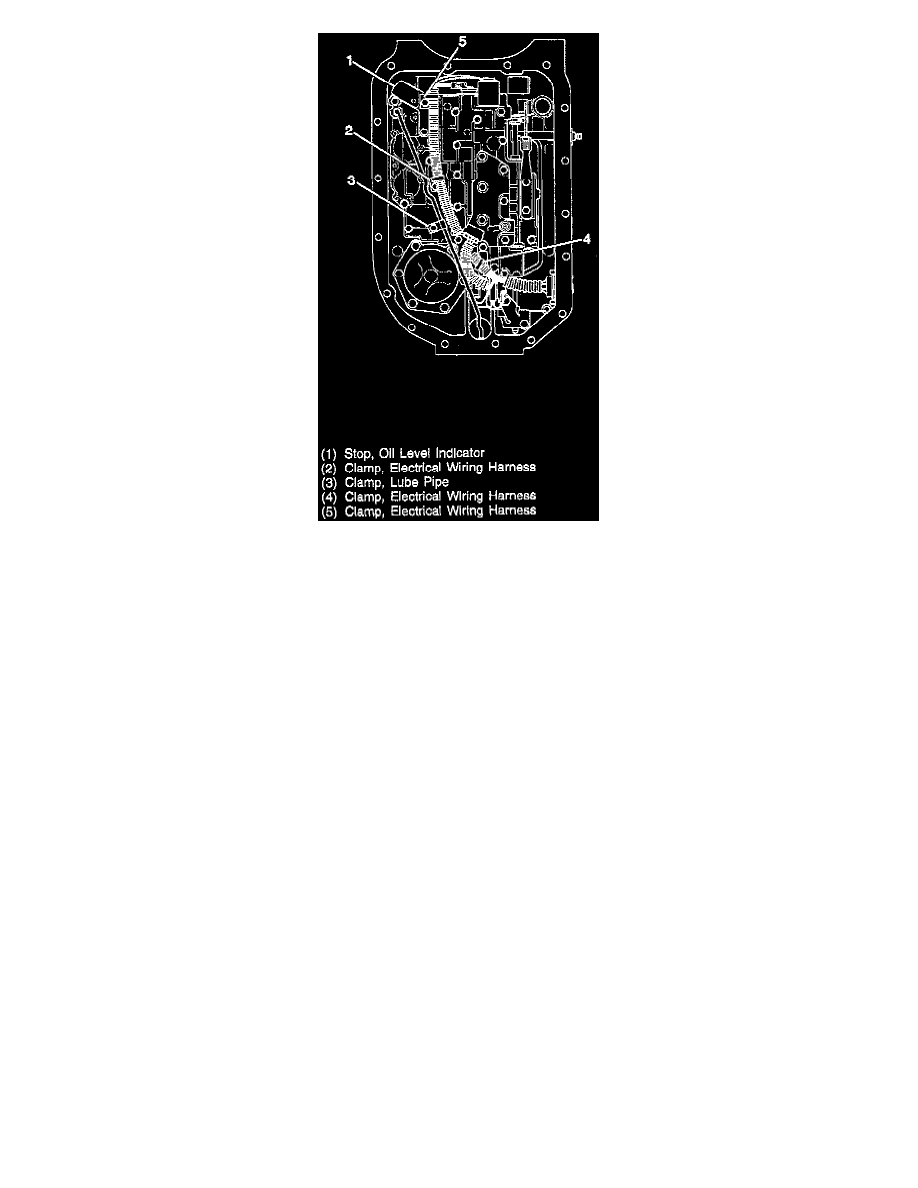
6. Three wiring clips and the oil level indicator stop.
7. Twenty-one bolts.
8. Six bolts into the PSM (Pressure Switch Manifold).
-
Tighten bolts to 11 Nm (97 inch lbs.).
9. Attach the electrical wiring harness to the six connectors. Put the large end into the case first, pressure switch hook up, solenoid, temperature
sensor, PWM solenoid, and force motor.
10. Lube pipe with the long end into case.
11. Lube pipe clip with the short bolt.
-
Tighten bolts to 11 Nm (97 inch lbs.).
12. Twenty-one bolts securing the valve body to the case.
-
Tighten bolts to 17 Nm (13 ft. lbs.).
13. The oil pan and filter.
14. Lower the vehicle.