
G 30 Van V8-454 7.4L VIN N TBI (1995)
Radiator: Service and Repair
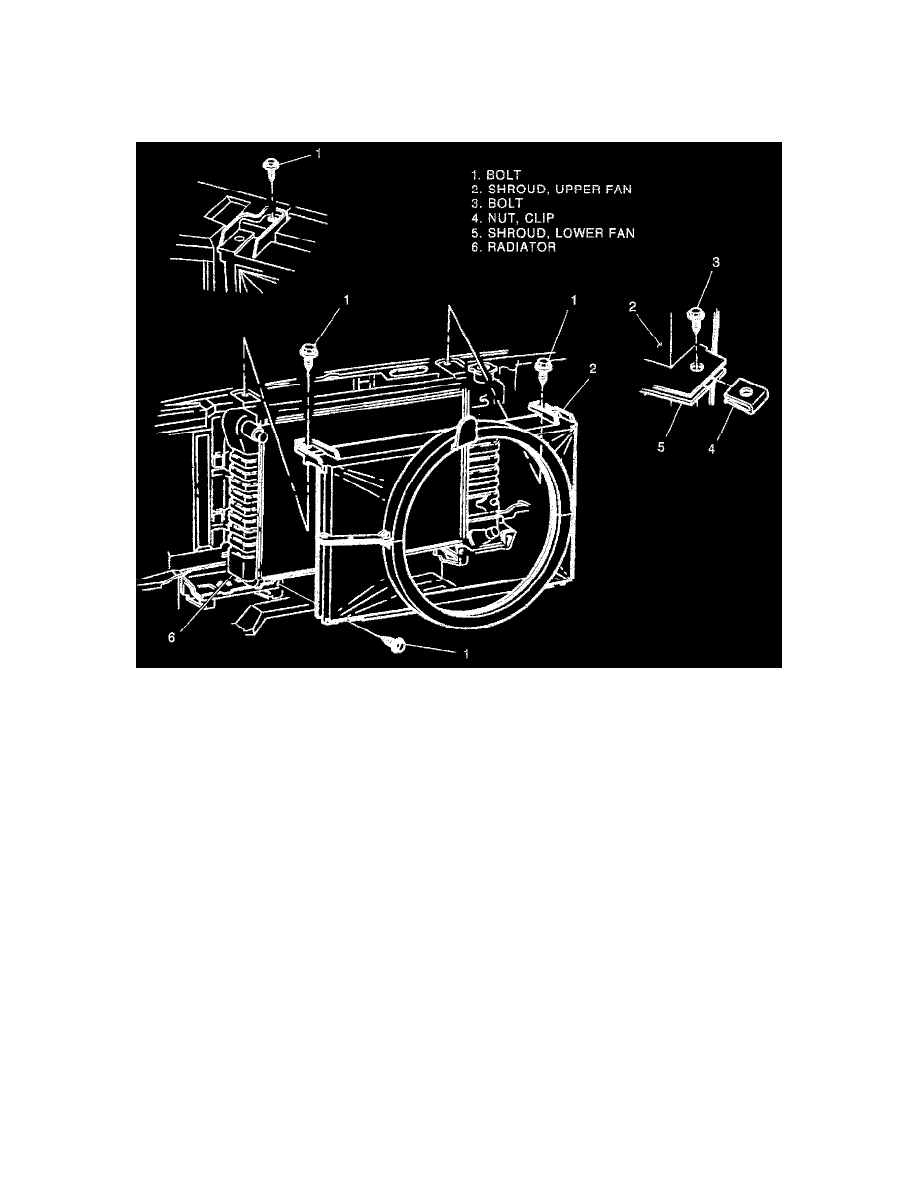
RADIATOR REPLACEMENT
The type of radiator core mounting varies according to model and engine type. The radiator assembly includes a shroud, and may include an oil cooler
in the core. Some models have a separate power steering oil cooler attached in front of the radiator core. On models so equipped it may be necessary
to remove the oil cooler to facilitate removal of the radiator core.
REMOVE OR DISCONNECT
1. Drain coolant from radiator.
2. Radiator inlet and outlet hoses.
3. Radiator overflow hose from radiator.
4. Fan shroud attaching bolts and shroud.
5. Transmission cooler lines.
6. Radiator attaching bolts and radiator.
7. Retainers from radiator support.
INSTALL OR CONNECT
1. Radiator to the vehicle.
^
Radiator support on the upper mounting panel.
2. Transmission cooler lines.
3. Fan shroud.
4. Overflow hose to radiator.
5. Radiator inlet hose and radiator outlet hose.
6. Coolant to the radiator.
7. Remove the radiator cap, start the engine and allow to run until upper radiator hose becomes hot (thermostat is open).
8. Add coolant with the engine idling until the coolant level reaches bottom of filler
9. Install radiator cap, making sure arrow is inline with overflow tube.
^
Inspect for leaks.