
HHR L4-2.4L (2010)
1. Lubricate the new piston seal (4) with GM approved, or equivalent DOT-3 brake fluid from a clean, sealed brake fluid container.
2. Install the lubricated, new piston seal (4) into the caliper bore.
3. Apply a thin coat of GM approved, or equivalent DOT-3 brake fluid from a clean, sealed brake fluid container onto the outer surface area of the
caliper piston (3).
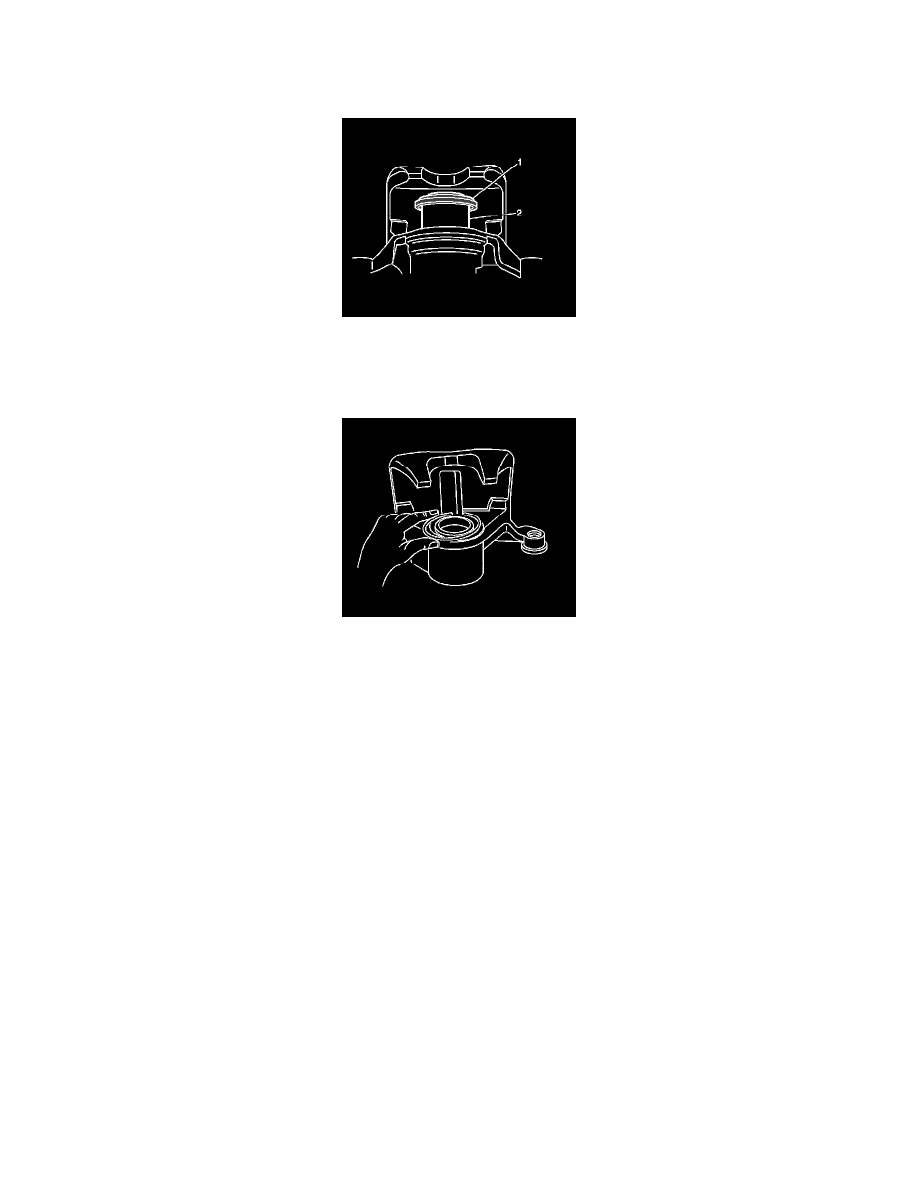
4. Install the bottom half of the caliper piston (2) into the caliper bore.
5. Install the new piston dust boot seal (1) over the caliper piston (2).
6. Compress the caliper piston (2) to the bottom of the caliper bore.
7. Fully seat the piston dust boot seal (1) into caliper counterbore.
8. Install the retaining ring that secures the dust boot to the caliper housing.
Caution: Refer to Fastener Caution (See: Service Precautions/Vehicle Damage Warnings/Fastener Caution).
9. Install the bleeder valve to the caliper and tighten to 11 Nm (97 lb in).
10. Install the bleeder valve cap.
11. Install the brake caliper to the vehicle. Refer to Front Brake Caliper Replacement (See: Removal and Replacement/Front Brake Caliper
Replacement).
Rear Brake Caliper Overhaul
Rear Brake Caliper Overhaul
Removal Procedure
Warning: Refer to Brake Dust Warning (See: Service Precautions/Technician Safety Information/Brake Dust Warning).
Warning: Refer to Brake Fluid Irritant Warning (See: Service Precautions/Technician Safety Information/Brake Fluid Irritant Warning).
Caution: Refer to Brake Fluid Effects on Paint and Electrical Components Caution (See: Service Precautions/Vehicle Damage Warnings).
1. Remove the rear brake caliper from vehicle. Refer to Rear Brake Caliper Replacement (See: Removal and Replacement/Rear Brake Caliper
Replacement).