
HHR L4-2.4L (2010)
Note: Always replace the fuel sender seal when installing the fuel sender assembly. Replace the lock ring if necessary. Do not apply any type of
lubrication in the seal groove.
Ensure the lock ring is installed with the correct side facing upward. A correctly installed lock ring will only turn in a clockwise direction.
6. Using the J 45722 , rotate the fuel sender assembly lock ring clockwise until the ring is locked into place on the fuel tank.
7. Remove the J 45722 from the lock ring.
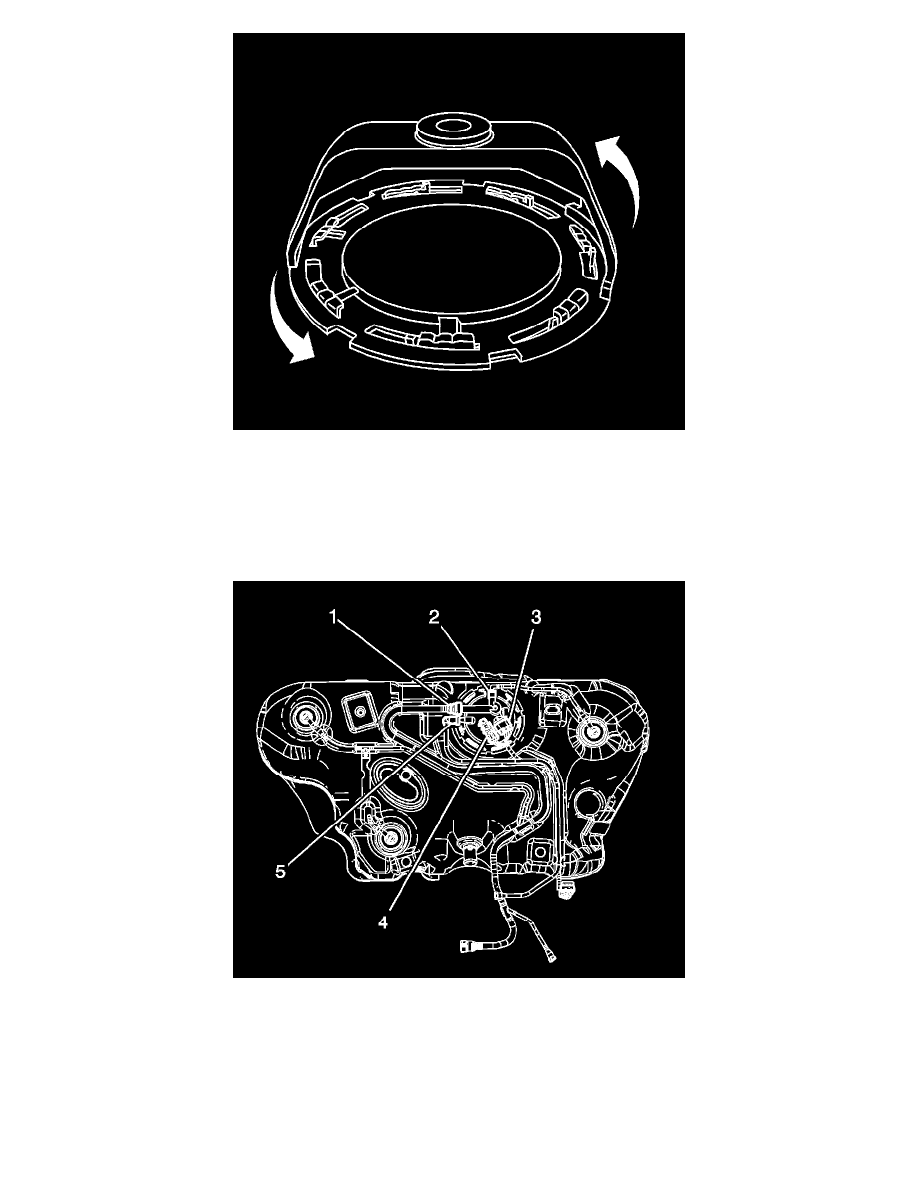
8. Connect the fuel tank feed pipe quick connect fitting (5). Refer to Plastic Collar Quick Connect Fitting Service (See: Powertrain
Management/Fuel Delivery and Air Induction/Fuel Line Coupler/Service and Repair/Plastic Collar Quick Connect Fitting Service).
9. Connect the fuel tank vent pipe quick connect fittings (2, 3). Refer to Plastic Collar Quick Connect Fitting Service (See: Powertrain
Management/Fuel Delivery and Air Induction/Fuel Line Coupler/Service and Repair/Plastic Collar Quick Connect Fitting Service).
10. Connect the fuel pressure sensor and fuel pump module electrical connectors (1, 4).
11. Install the fuel tank. Refer to Fuel Tank Replacement (See: Powertrain Management/Fuel Delivery and Air Induction/Fuel Tank/Service and
Repair/Removal and Replacement).