
HHR L4-2.4L (2010)
Assembly Procedure
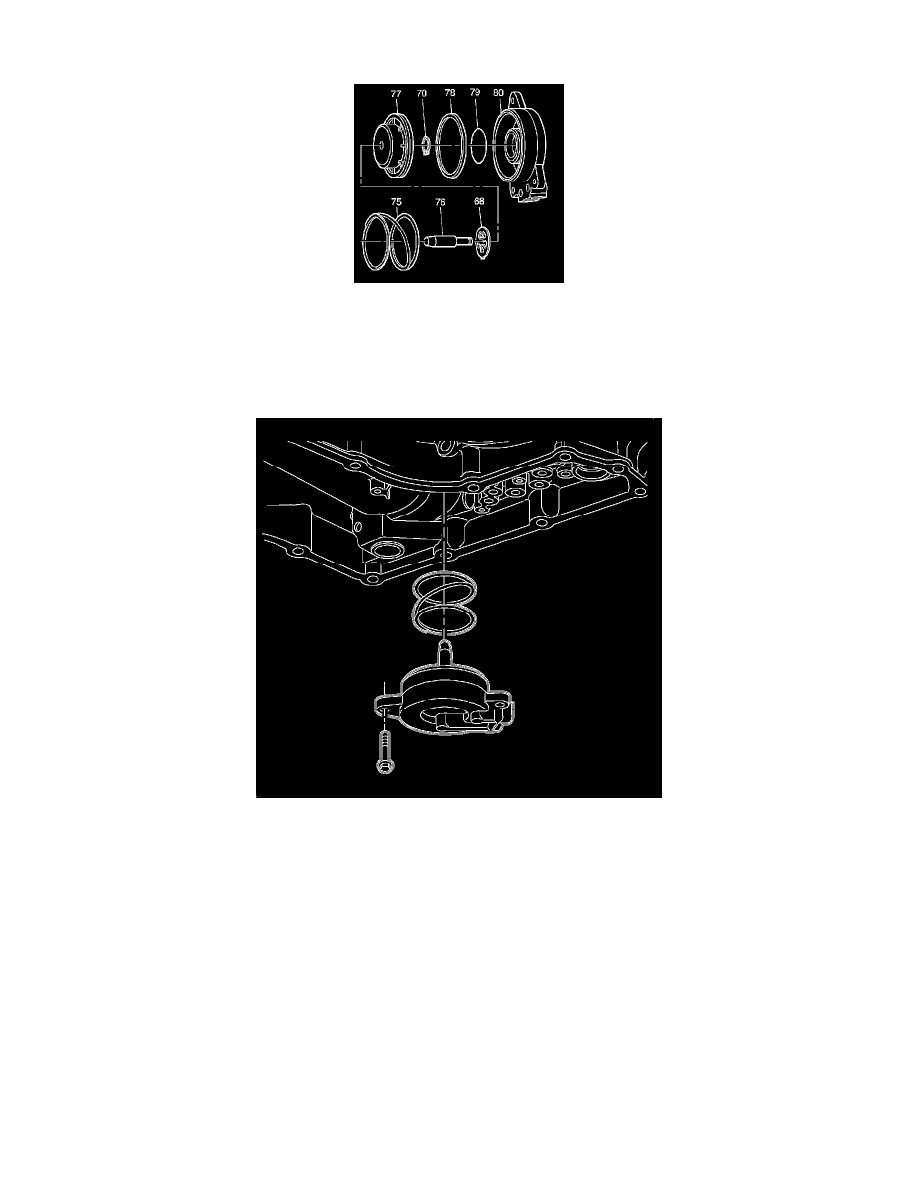
1. Install the servo cushion springs (68) and the servo piston (77) onto the servo pin (76).
2. Install the snap ring (70) onto the servo pin (76) in order to retain the springs (68) and piston (77).
3. Install the new seals (78 and 79) onto the servo piston (77) and the servo cover (80).
4. Install the servo piston assembly into the servo cover (80). Lubricate the piston seals with transmission fluid in order to aid in assembly.
Installation Procedure
1. Install the servo return spring into the transaxle case.
2. Install the servo return spring into the transaxle case.
Caution: Refer to Fastener Caution (See: Service Precautions/Vehicle Damage Warnings/Fastener Caution).
Note: Hand start and tighten servo cover bolts evenly to prevent damage to servo cover bore.
3. Hand start and install the servo cover bolts.
Tighten the servo cover bolts to 12 Nm (9 lb ft).