
Impala V6-3.9L (2007)
Installation Procedure
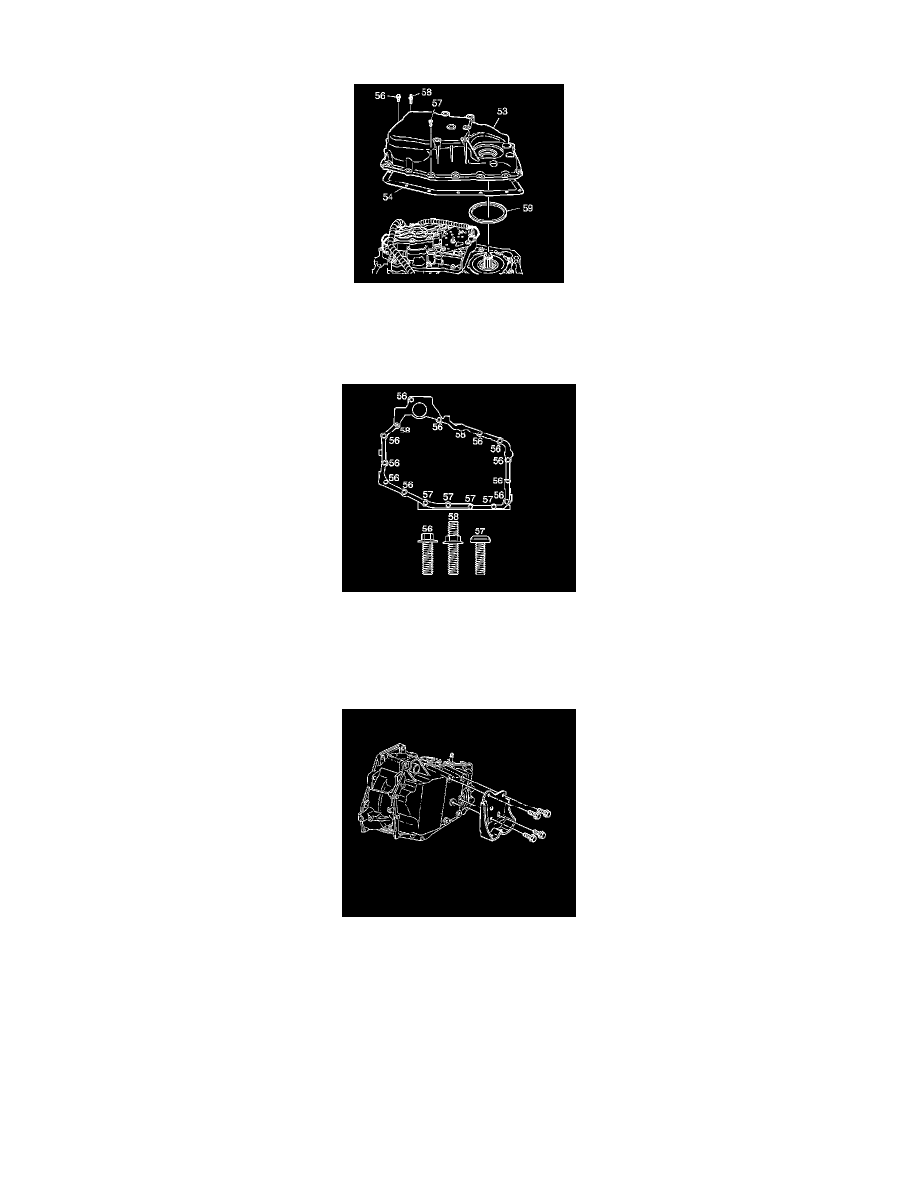
1. Install the J 36850 to the case side cover O-ring (59).
2. Install the O-ring (59) to the case side cover.
3. Install the case side cover gasket (54).
4. Install the case side cover (53), by first installing any 2 of the upper case side cover bolts (56, 58).
Notice: Refer to Fastener Notice.
5. Install the case side cover bolts (56, 57, 58).
Tighten bolts to 25 N.m (18 lb ft).
6. Install the transaxle mount bracket
7. Install the transaxle mount bracket bolts.
Tighten the bolts to 95 N.m (70 lb ft)
8. Install a jackstand under the left frame rail and raise frame while aligning transaxle mount bolts with frame and ball joint with steering knuckle.
9. Install and tighten left side frame-to-body bolts.
10. Install the drive axle to the transaxle.
11. Remove the drain pan from under the transaxle.
12. Install transaxle mount nuts.
13. Install the ball joint nut and cotter pin.
14. Install steering gear-to-frame bolts.