
Impala V8-5.3L (2008)
Important: Use a 1/2 x 20 in standard thread nut with the puller bolt.
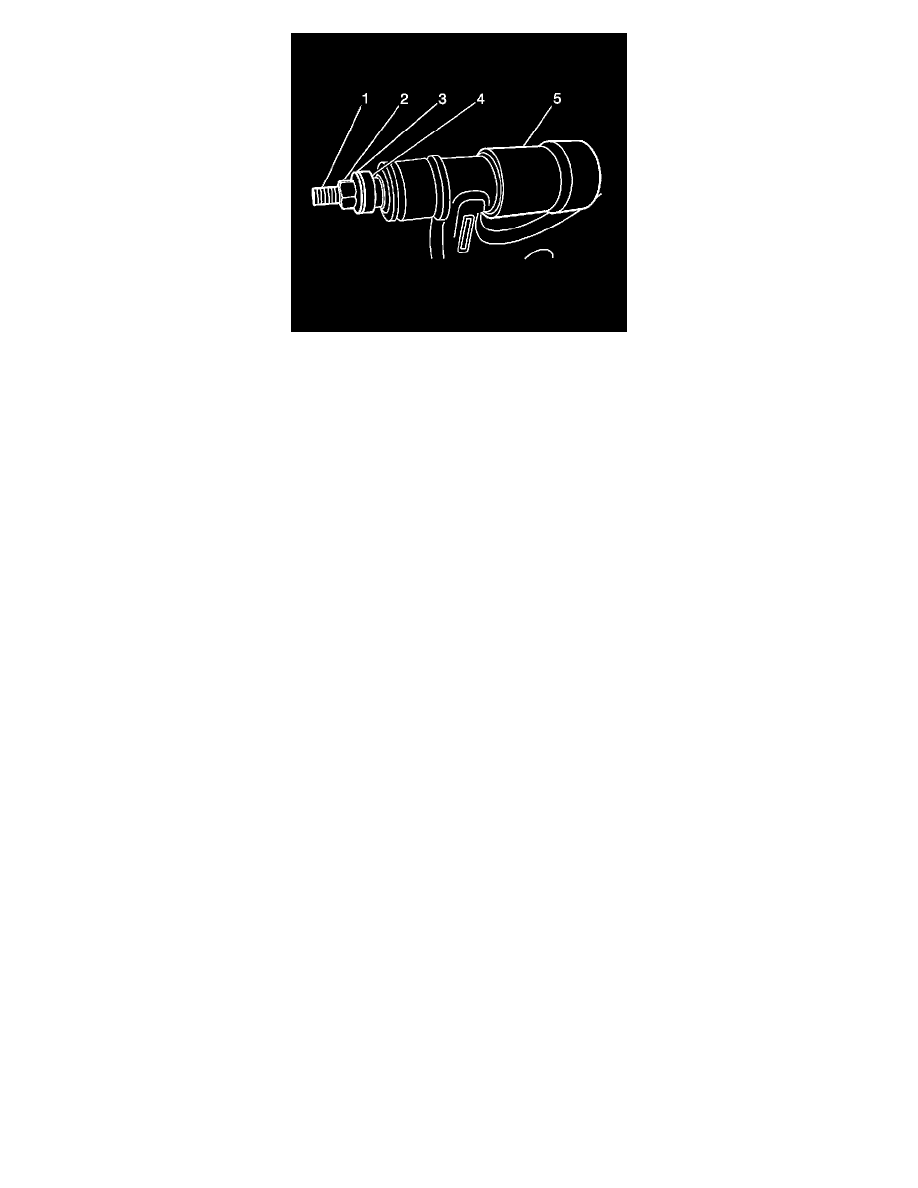
2. Assemble the following bushing installation tools as indicated :
1. The nut (1)
2. The J 21474-01 washer (2)
3. The J 21474-01 bearing (3)
4. The J 21474-5 (4)
5. The J 21474-01 puller bolt (5)
3. Tighten the puller bolt (5) until the bushing is installed into the control arm.
4. Disassemble the J 21474-01 and J 21474-5 .
5. Remove the control arm from the vice.
6. Install the lower control arm. Refer to Lower Control Arm Replacement (See: Service and Repair) .