
K 1500 Suburban 4WD V8-454 7.4L VIN N TBI (1995)
Idle Air Control Valve: Service and Repair
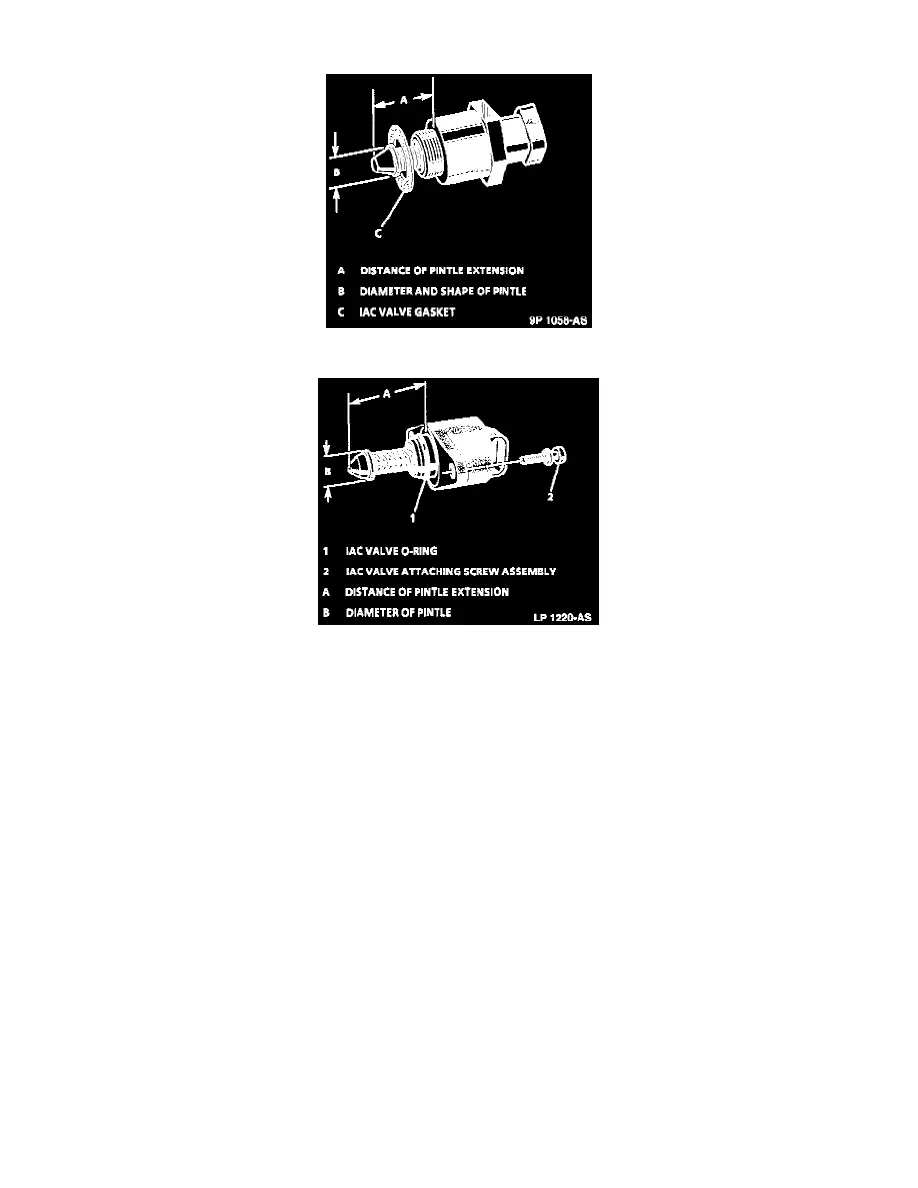
IAC Valve
IAC Valve
NOTE: The IAC valve is an electrical component and must not be soaked in any liquid cleaner or solvent. Otherwise damage could result.
IMPORTANT: Thread-mounted IAC Valves have a dual taper, 10 mm diameter, pintle. The flange-mounted IAC valve and has a 12 mm diameter,
dual taper pintle.
Any replacement of an IAC valve must have the correct part number, with the appropriate pintle taper and diameter for proper seating of the valve
in the throttle body.
REMOVE OR DISCONNECT
1. Electrical connector.
2. IAC valve.
^
On thread-mounted units, use a 32 mm (1-1/4") wrench.
^
On flange-mounted units, remove screw assemblies.
3.
IAC valve gasket or 0-ring and discard.
CLEAN
^
Thread-mounted valve - Old gasket material from surface of throttle body assembly to insure proper seal of new gasket.
^
Flange-mounted valve - IAC valve surface on throttle body to assure proper seal of new 0-ring and contact of IAC valve flange.
NOTE: If the IAC valve was removed during service, its operation may be tested electrically with the IAC system analyzer (J 37027 or BT-
8256K). However, if the valve pintle is extended electrically, it must also be retracted electrically. Before installing an IAC valve, measure the
distance between the tip of the valve pintle and the mounting surface. If the dimension is greater than 28 mm (1.10"), it must be reduced to prevent
damage to the valve. This may be done electrically using on IAC system analyzer motor tester (J 37027 or BT-8256K).
MEASURE
^
Distance between tip of IAC valve pintle and mounting flange.
-
If greater than 28 mm, use finger pressure to slowly retract the pintle. The force required to retract the pintle of a new valve will not cause
damage to the valve.