
K 1500 Truck 4WD V8-305 5.0L (1988)
Front Steering Knuckle: Service and Repair
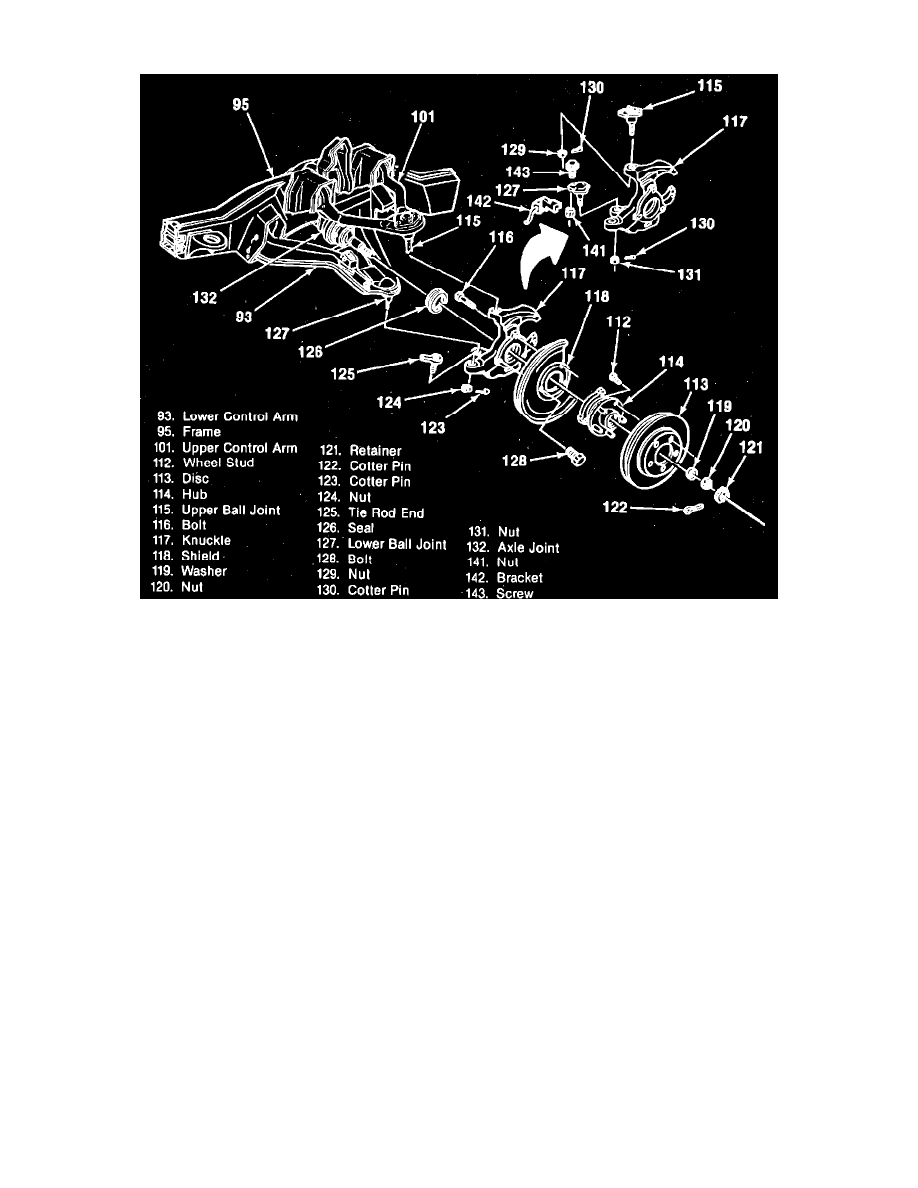
Fig. 3 Hub, knuckle & ball joints assembly
REMOVE
1. Raise and support vehicle.
2. Remove wheel and tire assembly.
3. Remove caliper.
4. Remove disc.
5. Remove pin, retainer, drive axle nut and washer.
6. Remove pin, nut and tie rod end from knuckle.
7. Remove hub and bearing assembly, using a puller.
8. Remove bolts and splash shield.
9. Remove pins and ball joints from knuckle.
10. Remove nuts and knuckle.
11. Remove spacer from knuckle.
12. Remove seal from knuckle.
INSTALL
1. Reverse procedure to install. Torque nuts (129 and 131) to 94 ft lbs, tighten nuts to align cotter pin holes. Do not tighten more than 1/16 of a turn.
Torque bolts (128) to 12 ft lbs Torque bolts (116) to 66 ft lbs Torque nut (124) to 35 ft lbs Torque nut (120) to 173 ft lbs