
Lumina V6-3.1L VIN J (2000)
Tighten the retractor cover screw (4) to 10 N.m (89 lb in).
10. Install the window regulator handle, if equipped. Refer to Door Window Regulator Handle Replacement (See: Windows and
Glass/Windows/Window Handle/Service and Repair) .
Trim Panel Replacement - Side Front Door
REMOVAL PROCEDURE
1. Remove the window regulator handle, if equipped.
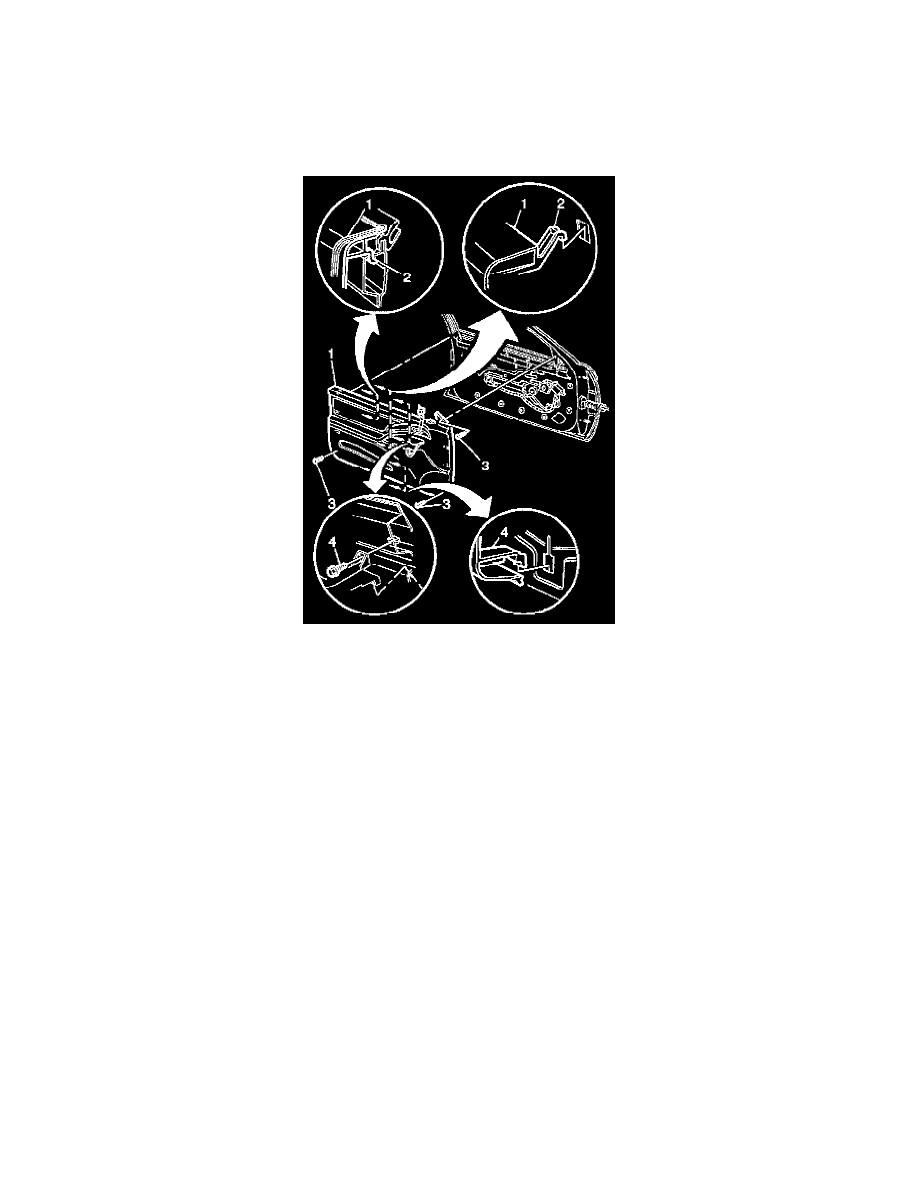
2. Remove the inner trim panel screw at the retractor cover opening (coupe only).
3. Remove the power window switch (coupe only).
4. Remove the inside handle bezel.
5. Remove the front door inner trim panel screws (3).
6. Carefully lift the trim panel upwards in order to release the top portion of the inner trim panel (1).
7. Pull the trim panel away from the door to remove the trim panel.
8. Disconnect all necessary electrical connectors.
8. Remove the outside mirror remote control cable, if equipped.
INSTALLATION PROCEDURE
1. Install the outside mirror remote control cable, if equipped.
2. Connect all necessary electrical connectors.
3. Align the top edge of the inner trim panel (1) to the door.
4. Hook the inner trim panel in place.
IMPORTANT: Apply enough pressure in order to fully engage the three top hooks to the door inner panel.
5. Firmly press downward on the inner trim panel in order to secure the clips.
NOTE: Refer to Fastener Notice in Service Precautions.
6. Install the inner trim panel screws (3).
Tighten
Tighten the inner trim panel screws to 2 N.m (18 lb in).
7. Install the inside handle bezel.
8. Install the power window switch (coupe only).