
Lumina V6-3.1L VIN J (2000)
Wiper Switch: Service and Repair
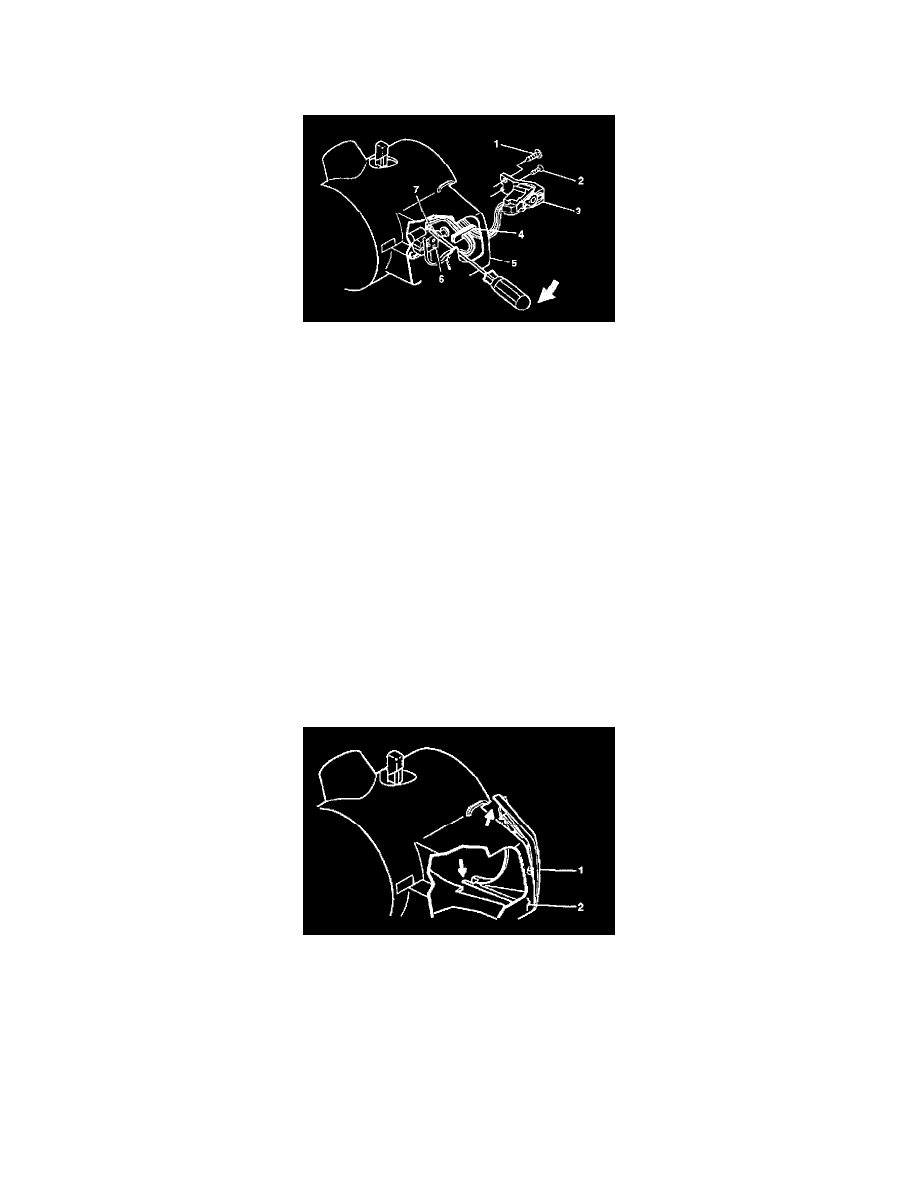
Assemble
Assembly Procedure
1. Push the pivot and pulse dimmer switch connector through the lock housing cover and sleeve assembly (5).
Important: Use care to not damage the wires as they are pushed through the lock housing cover and sleeve assembly (5).
2. If the pivot and pulse dimmer switch assembly (3) was left hanging skip the next step.
3. Install the pivot and pulse dimmer switch assembly (3) to the lock housing cover and sleeve assembly (5) following these steps:
3.1.
Install the wire harness clamp (4) to the tab inside the lock housing cover and sleeve assembly (5).
3.2.
Snap the switch body into the upper wing (7) and the lower wing (6).
3.3.
Install the dimmer switch component to the lock housing cover and sleeve assembly (5).
3.4.
Install the pivot and pulse dimmer switch connector to the bulkhead connector.
Notice: Refer to Fastener Notice in Service Precautions.
4. Install the flat head screw (2) into the pivot and pulse dimmer switch assembly (3).
Tighten
Tighten the flat head screw to 2 Nm (18 inch lbs.).
5. Install the round washer head screw (1) into the pivot and pulse dimmer switch assembly (3).
Tighten
Tighten the round washer head screw to 3 Nm (27 inch lbs.).
6. Install the housing cover end cap (1) to the lock housing cover and sleeve assembly (2) following these steps:
6.1.
Align the housing cover end cap (1) to the lock housing cover and sleeve assembly (2).
6.2.
Push the top and the bottom edges of the housing cover end cap (1) into the slots in the lock housing cover and sleeve assembly (2).
7. Install the turn signal cancel cam assembly. Refer to Turn Signal Cancel Cam and Upper Bearing Inner Race - Assemble under Steering Column
Service and Repair.