Luv 2WD L4-110 1800cc (1982)

pin tensioner with clean engine oil. Start new pin in block, place tensioner over appropriate pin. Place "E" clip on pin and then tap pin into
block, using a hammer, until clip just clear tensioner. Check tensioner and adjuster for freedom of rotation on pins.
^
Inspect guide for wear or damage and plugged lower oil jet. If replacement or cleaning is necessary, remove guide bolts, guide and oil jet.
Install new guide and upper attaching bolt. Install lower oil jet and bolt so that oil port is pointed toward crankshaft as shown.
Installation
1. Install timing sprocket and pinion gear (groove side toward front cover). Align key grooves with key on crankshaft, then drive into position using
Installing Tool J-26587.
2. Turn crankshaft so that key is. turned toward cylinder head side (#1 and #4 pistons at top dead center).
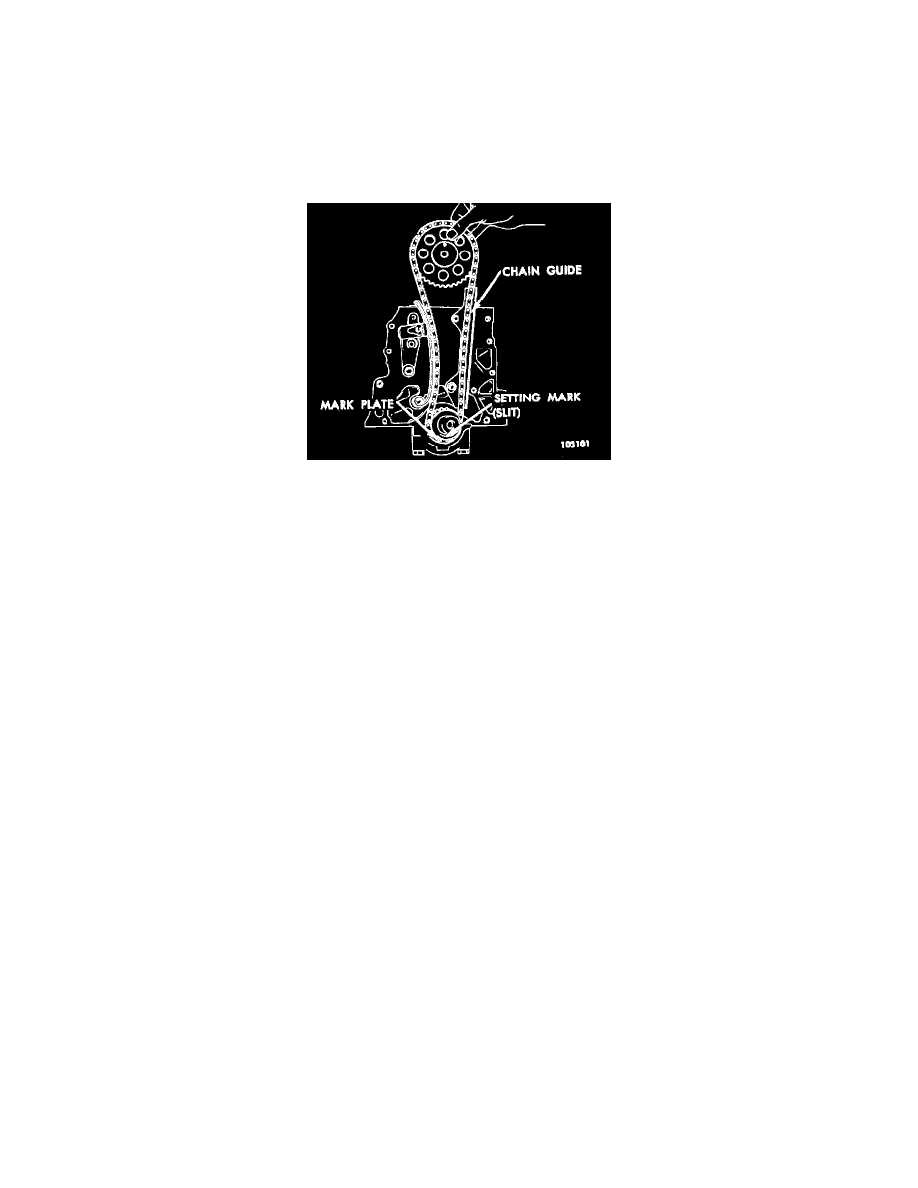
3. Install the timing chain by aligning mark plate on chain with mark on crankshaft timing sprocket. The side of the chain with the mark plate is on
the front side and the side of chain with the most links between mark plates is on the chain guide side.
Keep the timing chain engaged with the camshaft timing sprocket until the camshaft timing sprocket is installed on camshaft.
4. Install the camshaft timing sprocket so that marked side of sprocket faces forward and so that the triangular mark aligns with the chain mark plate.
5. Install the automatic chain adjuster.
6. Release lock by depressing the shoe on adjuster by hand, and check to make certain the chain is properly tensioned when lock is released.
7. Install front cover assembly as outlined previously.
