Malibu L4-2.4L (2010)

Brake Caliper: Removal and Replacement
Front Brake Caliper Replacement
Front Brake Caliper Replacement
Removal Procedure
Warning: Refer to Brake Dust Warning (See: Service Precautions/Technician Safety Information/Brake Dust Warning).
Warning: Refer to Brake Fluid Irritant Warning (See: Service Precautions/Technician Safety Information/Brake Fluid Irritant Warning).
1. Inspect the fluid level in the brake master cylinder reservoir.
2. If the brake fluid level is midway between the maximum-full point and the minimum allowable level, no brake fluid needs to be removed from the
reservoir before proceeding.
3. If the brake fluid level is higher than midway between the maximum-full point and the minimum allowable level, remove brake fluid to the
midway point before proceeding.
4. Raise and support the vehicle. Refer to Lifting and Jacking the Vehicle (See: Maintenance/Vehicle Lifting/Service and Repair).
5. Remove the tire and wheel assembly. Refer to Tire and Wheel Removal and Installation (See: Maintenance/Wheels and Tires/Service and Repair
).
6. Install and firmly hand tighten 2 wheel nuts to opposite wheel studs in order to retain the rotor to the hub.
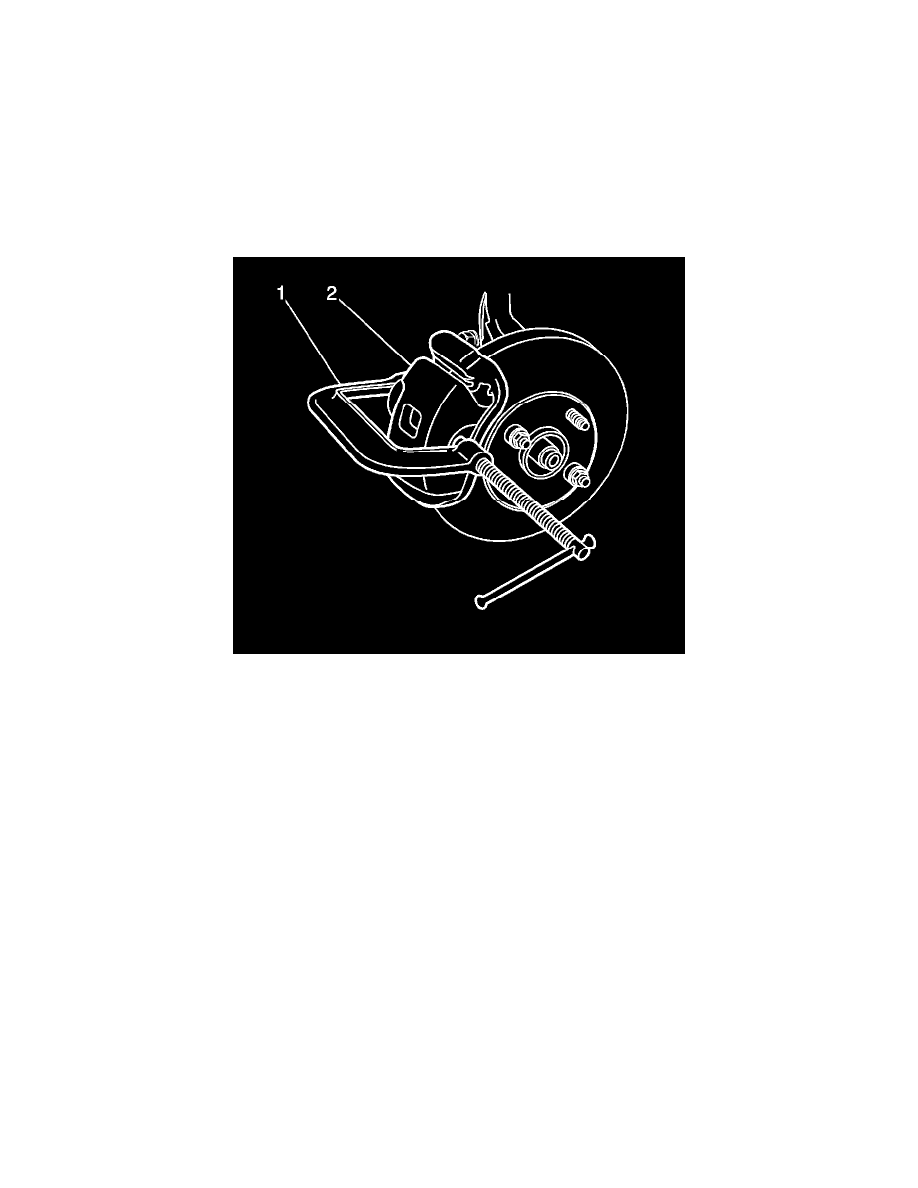
7. Install a large C-clamp (1) over the body of the brake caliper (2) with the C-clamp ends against the rear of the caliper body and against the outer
brake pad.
8. Tighten the C-clamp until the caliper piston is compressed into the caliper bore enough to allow the caliper to slide past the brake rotor.
9. Remove the C-clamp from the caliper.
