
Malibu L4-2.4L (2010)
3. If the timing chain tensioner is not in the compressed state, perform the following steps:
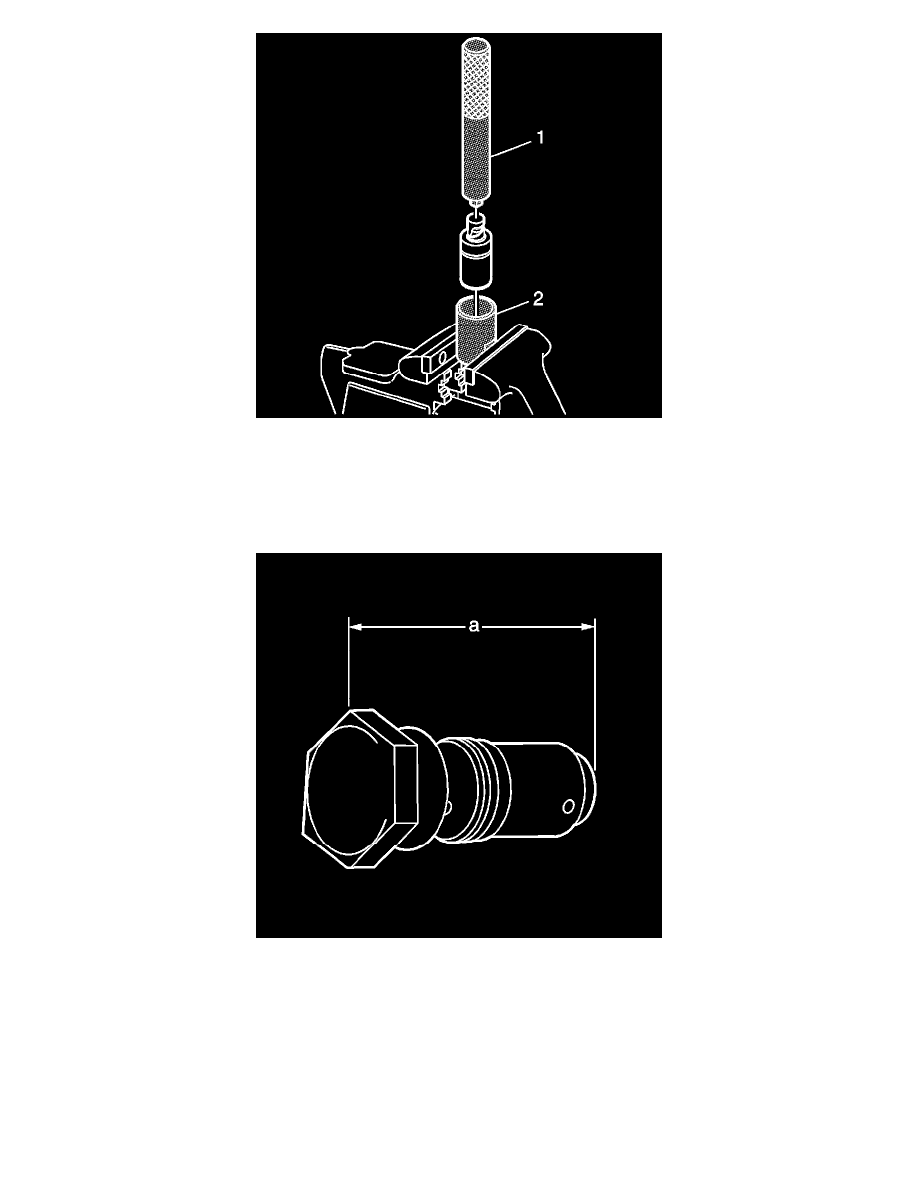
1. Remove the piston assembly from the body of the timing chain tensioner by pulling it out.
2. Install the J 45027-2 (2) into a vise.
3. Install the notch end of the piston assembly into the J 45027-2 (2).
4. Using the J 45027-1 (1), turn the ratchet cylinder into the piston.
4. Inspect the bore of the tensioner body for dirt, debris, and damage. If any damage appears, replace the tensioner. Clean dirt or debris out with a
lint-free cloth.
5. Install the compressed piston assembly back into the timing chain tensioner body until it stops at the bottom of the bore. Do not compress the
piston assembly against the bottom of the bore. If the piston assembly is compressed against the bottom of the bore, it will activate the tensioner,
which will then need to be reset again.
6. At this point the tensioner should measure approximately 72 mm (2.83 in) (a) from end to end. If the tensioner does not read 72 mm (2.83 in) (a)
from end to end, repeat steps 3-5.